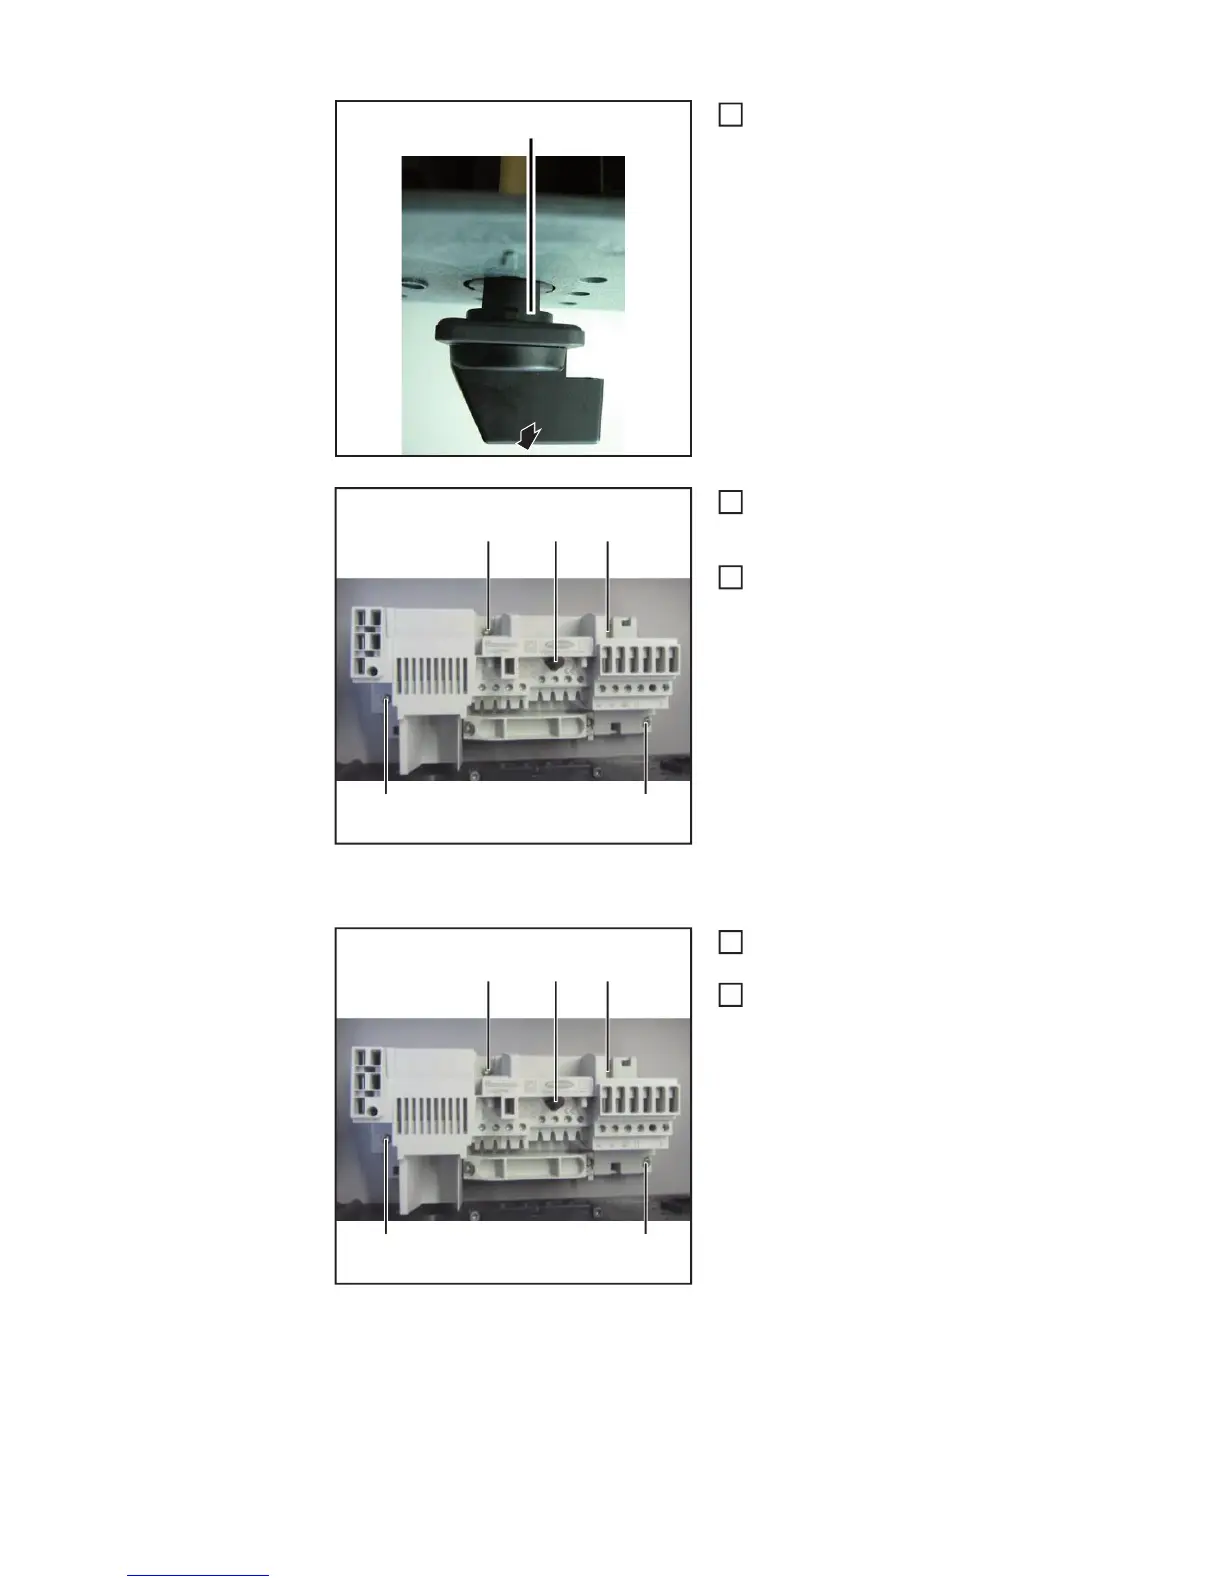
EasyManuals Logo

Fronius Primo 3.0-1 Service Manual

Fronius Primo 3.0-1
Go to English
160 pages
To Next Page IconTo Next Page
To Previous Page IconTo Previous Page
Page #42 background imageLoading...
Page #42 background image
42
Schaltknopf mit Welle (2) nach unten
entfernen
4x Schraube 4x9 mm TX20 (3) entfer-
nen und Trenner aus Wandhalterung
nehmen.
Versteck-Sicherung (4) vom DC-Tren-
ner abnehmen
* Anmerkung:
Auf der Abbildung ist die Zugentlas-
tung noch am DC-Trenner.
Die Zugentlastung kann zum Ab-
schließen der AC- und DC-Kabel
gelockert werden und muss spätes-
tens nach dem Entnehmen des DC-
Trenners vom DC-Trenner entfernt
werden.
DC-Trenner einbauen:
Versteck-Sicherung (4) auf neuen DC-
Trenner aufsetzen
Neuen DC-Trenner mit Versteck-Si-
cherung in Wandhalterung einsetzen
und mit 4x Schraube 4x9 mm TX20 (3)
fixieren
Anzugsmoment = 2 Nm
2
(2)
2
(3)
(3)(3)
(3) (4)
*
3
4
(3)
(3)(3)
(3) (4)
*
1
2

Table of Contents

Other manuals for Fronius Primo 3.0-1

Questions and Answers:

Question and Answer IconNeed help?

Do you have a question about the Fronius Primo 3.0-1 and is the answer not in the manual?

Fronius Primo 3.0-1 Specifications

General IconGeneral
PurposeSolar panel
Efficiency98 %
Output power3000 W
Input current12 A
Input voltage80 - 1000 V
Output voltage- V
Input frequency50 - 60 Hz
Power supply typeAuto
Adjustable output voltage-
International Protection (IP) codeIP65
Product colorBlack, Grey
Built-in displayYes
Operating temperature (T-T)-40 - 55 °C
Weight and Dimensions IconWeight and Dimensions
Depth204 mm
Width431 mm
Height645 mm
Weight21500 g

Related product manuals