Fit the auto-
transformer,
power source
and the cooling
unit
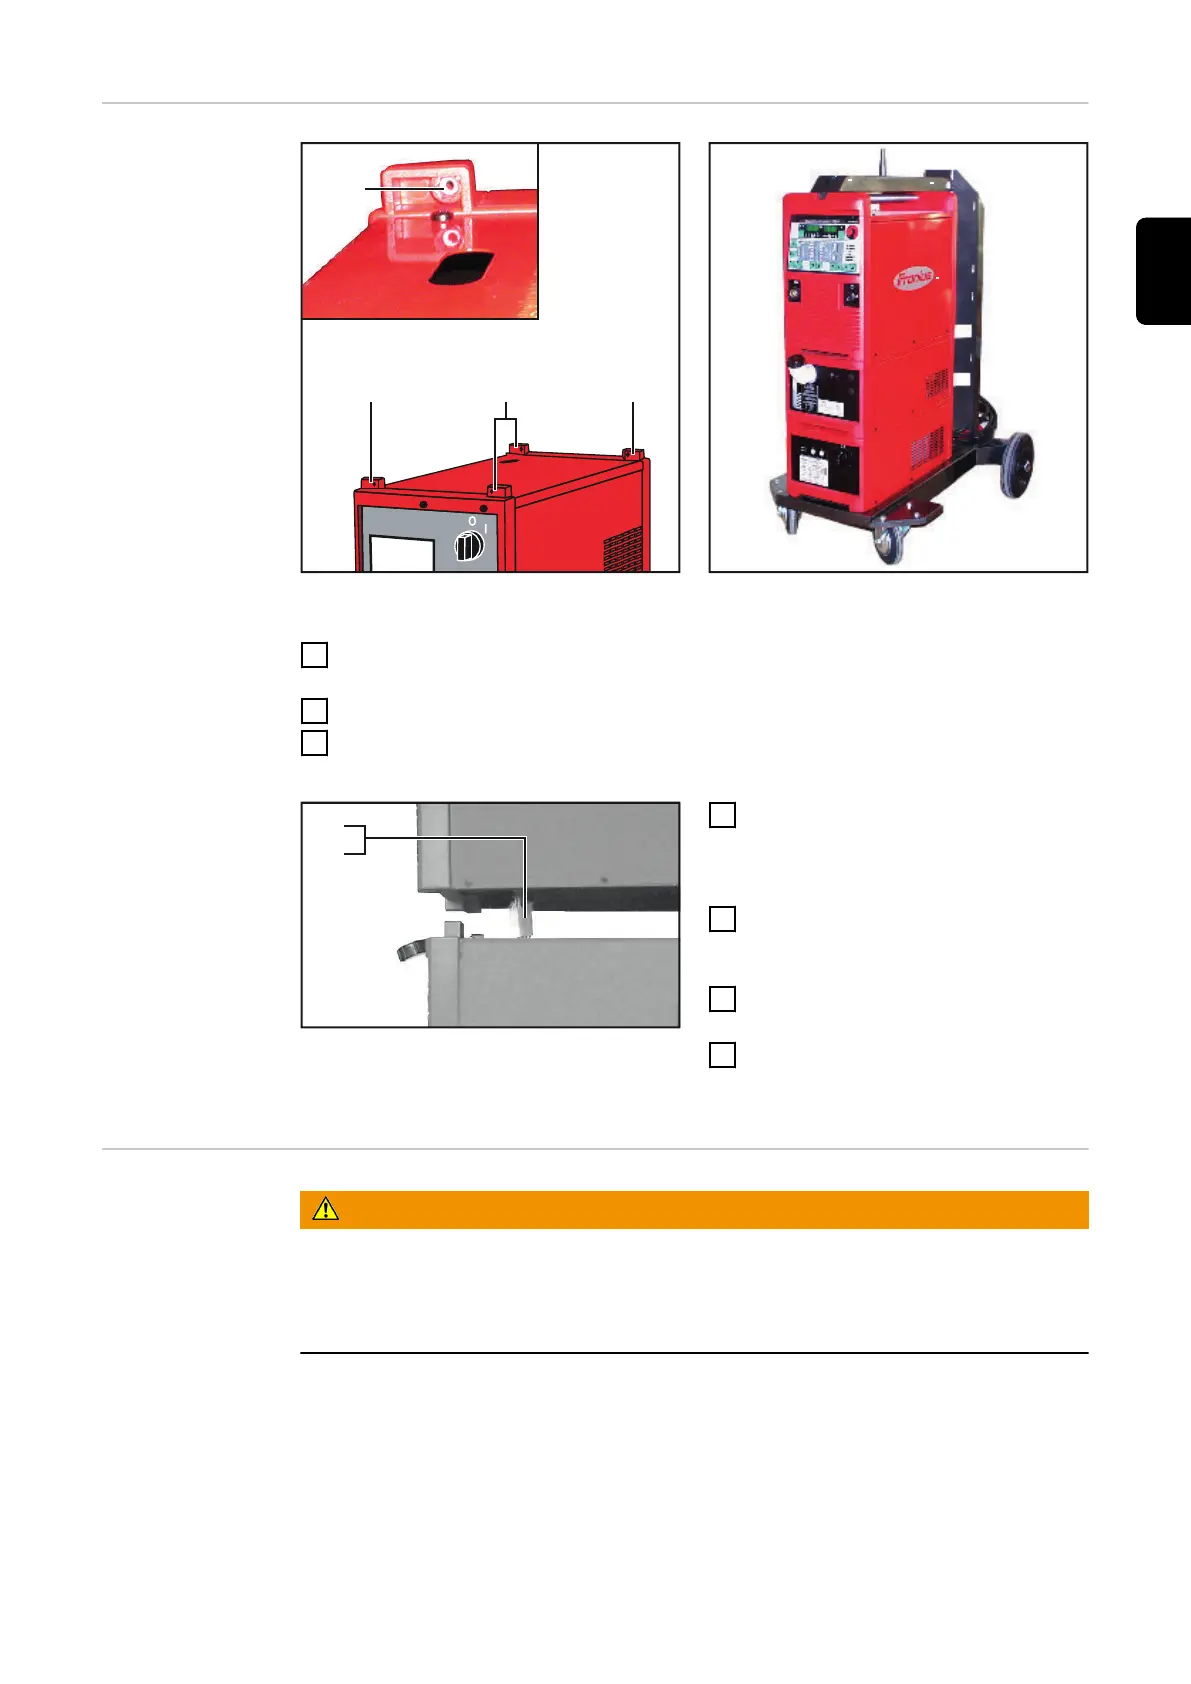
Fixing bar on auto-transformer or cooling unit Trolley with auto-transformer, cooling unit and
power source
1
On the top of the auto-transformer, insert the hexagon nuts provided into the
hexagon- shaped openings (14) on the fixing bars
2
Carefully place cooling unit onto auto-transformer
3
Firmly attach cooling unit to the auto-transformer at the front and back
using the Allen screws (M5x40) provided
Connection between power source and cooling
unit
4
Pull the power source connector
(16) as far as possible through the
opening on the underside of the
power source
5
Reestablish the connection (15)
between the power source and the
cooling unit
6
Carefully place power source onto
cooling unit
7
Fasten power source to the cooling
unit at the front and back using Al-
len screws (M5x40)
Fitting the wire-
feeder mount
and gas cylinder
holder
WARNING!
Danger from machines toppling over or falling.
This can result in serious personal injury and damage to property.
▶
Set up the device securely on an even, solid surface.
▶
Check all screw connections are tightly fastened after installation.
47
EN
 Loading...