Scanning Procedure
141
Scan
4
When you use another Scan service, [Store to Folder] is replaced with [E-mail],
[Network Scanning], [Scan to PC], [Store to USB], [Store & Send Link], or [Store to
WSD].
The following shows the reference section for each service.
"E-mail" (P.147)
"Network Scanning" (P.166)
"Scan to PC" (P.168)
"Store to USB" (P.176)
"Store & Send Link" (P.182)
"Store to WSD" (P.185)
Note • WSD stands for Web Services on Devices.
Step 3 Starting the Scan Job
The following describes how to start a scan job.
For information on how to start a scan job on the [Store to WSD] screen, refer to "Store to WSD"
(P.185).
Note • WSD stands for Web Services on Devices.
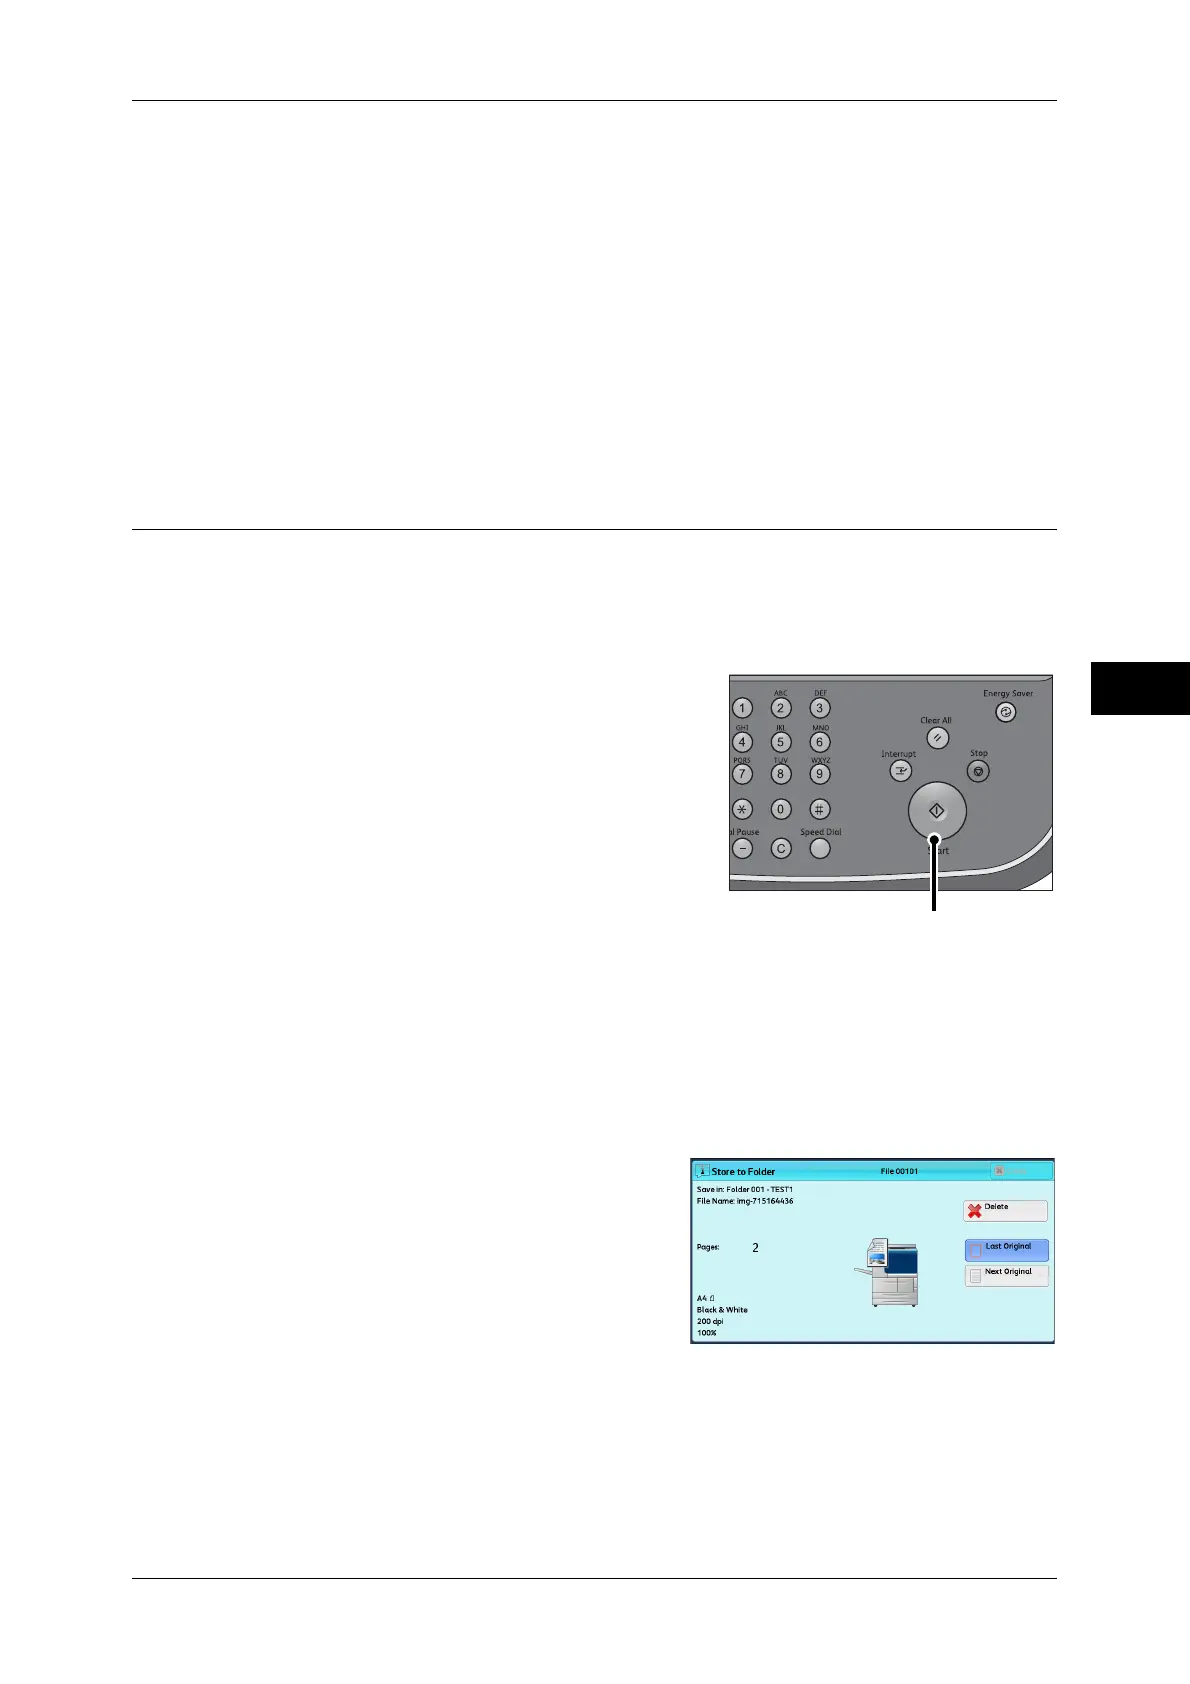
1 Press the <Start> button.
Important • If the document has been loaded in the
document feeder, do not hold down the
document while it is being conveyed.
• If a copy protection code is detected, the
machine will not scan the document.
Note • If a problem occurs, an error message appears
on the touch screen. Solve the problem
according to the message.
• You can set the next job during scanning.
If you have more documents
If you have more documents to scan, select [Next Original] on the touch screen while
the current document is being scanned. This allows you to scan the documents as a
single set of data.
Up to 999 pages can be stored.
Note • If the number of pages scanned by the machine exceeds the maximum, the machine stops
scanning. Follow the message displayed on the screen, and either abort the operation or
save the already-scanned data as a single set of data.
2 While documents are being scanned, select
[Next Original].
Note • When using the document feeder, load
the next document after the machine has
finished scanning the first document.
• When [Next Original] is displayed on the
screen shown on the right and no
operation is performed for a certain period
of time, the machine automatically
assumes that there are no more
documents.
• You can change the scan settings of the next document by selecting [Change Settings] that
is displayed after selecting [Next Original].
<Start> button
 Loading...