Saving Scanned Documents
59
Copy
3
Saving Scanned Documents
You can save scanned documents as data in a folder on the machine.
To use a folder, select [Copy & Store File] or [Store File Only]. You also need to create
a folder in advance.
For information on how to create a folder, refer to "5 Tools" > "Setup" > "Create Folder" in the
Administrator Guide.
For information on how to operate folders, refer to "Send from Folder" (P.209).
Note • The maximum number of pages that can be stored in the machine is about 2000 pages per
file. This value is for reference only, and varies depending on the type, size, and orientation
of the document.
• Once a copy file has been saved, you cannot create a file that exceeds a total of 10000
pages by merging files, inserting files, or inserting separators.
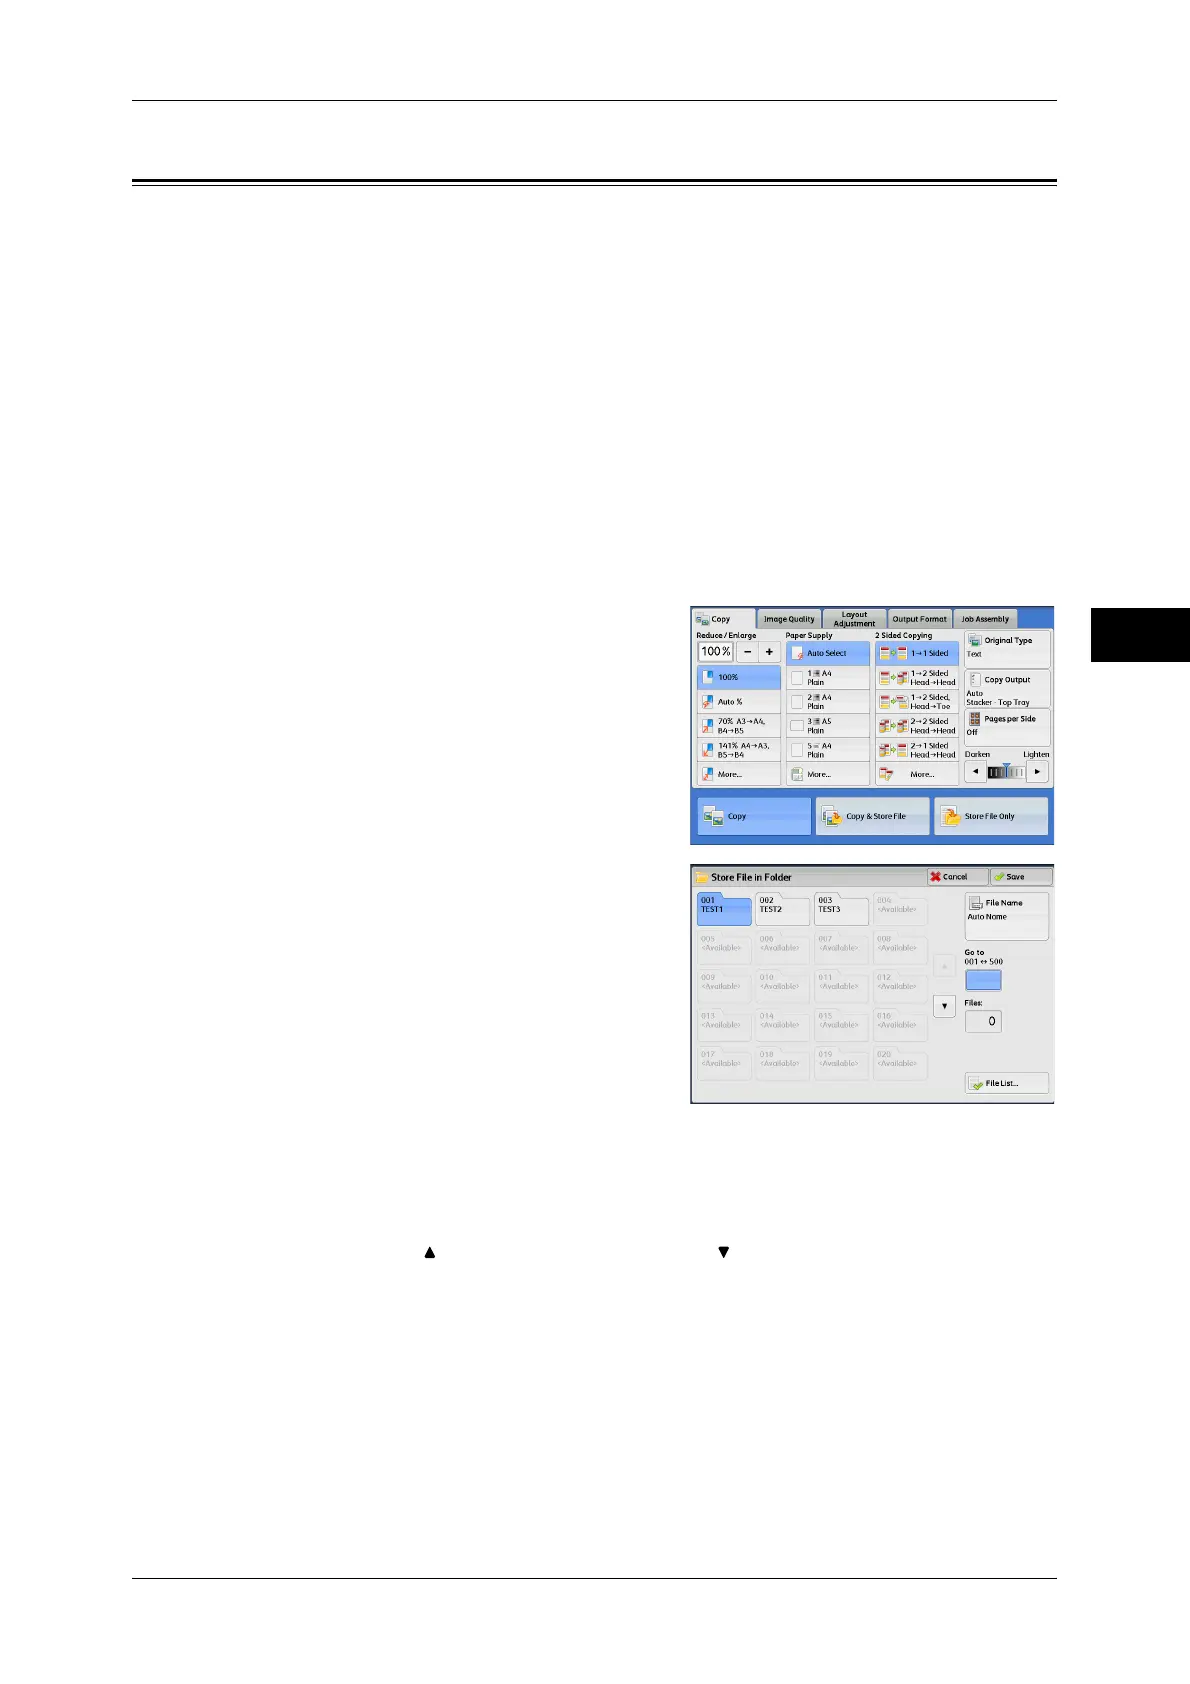
1 Select [Copy] on the [Services Home] screen.
2 Select each tab, and configure features as necessary.
3 Select [Copy & Store File] or [Store File
Only].
4 Specify a folder to save data in.
Note • If a passcode is set for the folder, the
passcode entry screen may appear. Enter
the passcode and select [Confirm]. If you
have forgotten the passcode, set the
folder passcode in the System
Administration mode again.
5 Press the <Start> button.
Folder
A folder to save scanned data in.
Note • Select [ ] to return to the previous screen or [ ] to move to the next screen.
File Name
Specify the file name for saving.
Using the displayed keyboard and the numeric keypad, you can enter up to 28
characters.
For information on how to enter characters, refer to "Entering Text" (P.48).
Go to
Displays a folder at the top when you enter the 3-digit folder number with the numeric
keypad.
 Loading...