Copy
61
Copy
3
Trays (2nd and 3rd Buttons)
Select from preset paper trays.
You can change the paper trays to display. For information on the settings, refer to "Paper Supply -
Buttons 2 to 4" (P.293).
More...
Displays a pop-up window. Select a paper tray from the options. Selecting [Bypass...]
displays the [Tray 5 (Bypass)] screen.
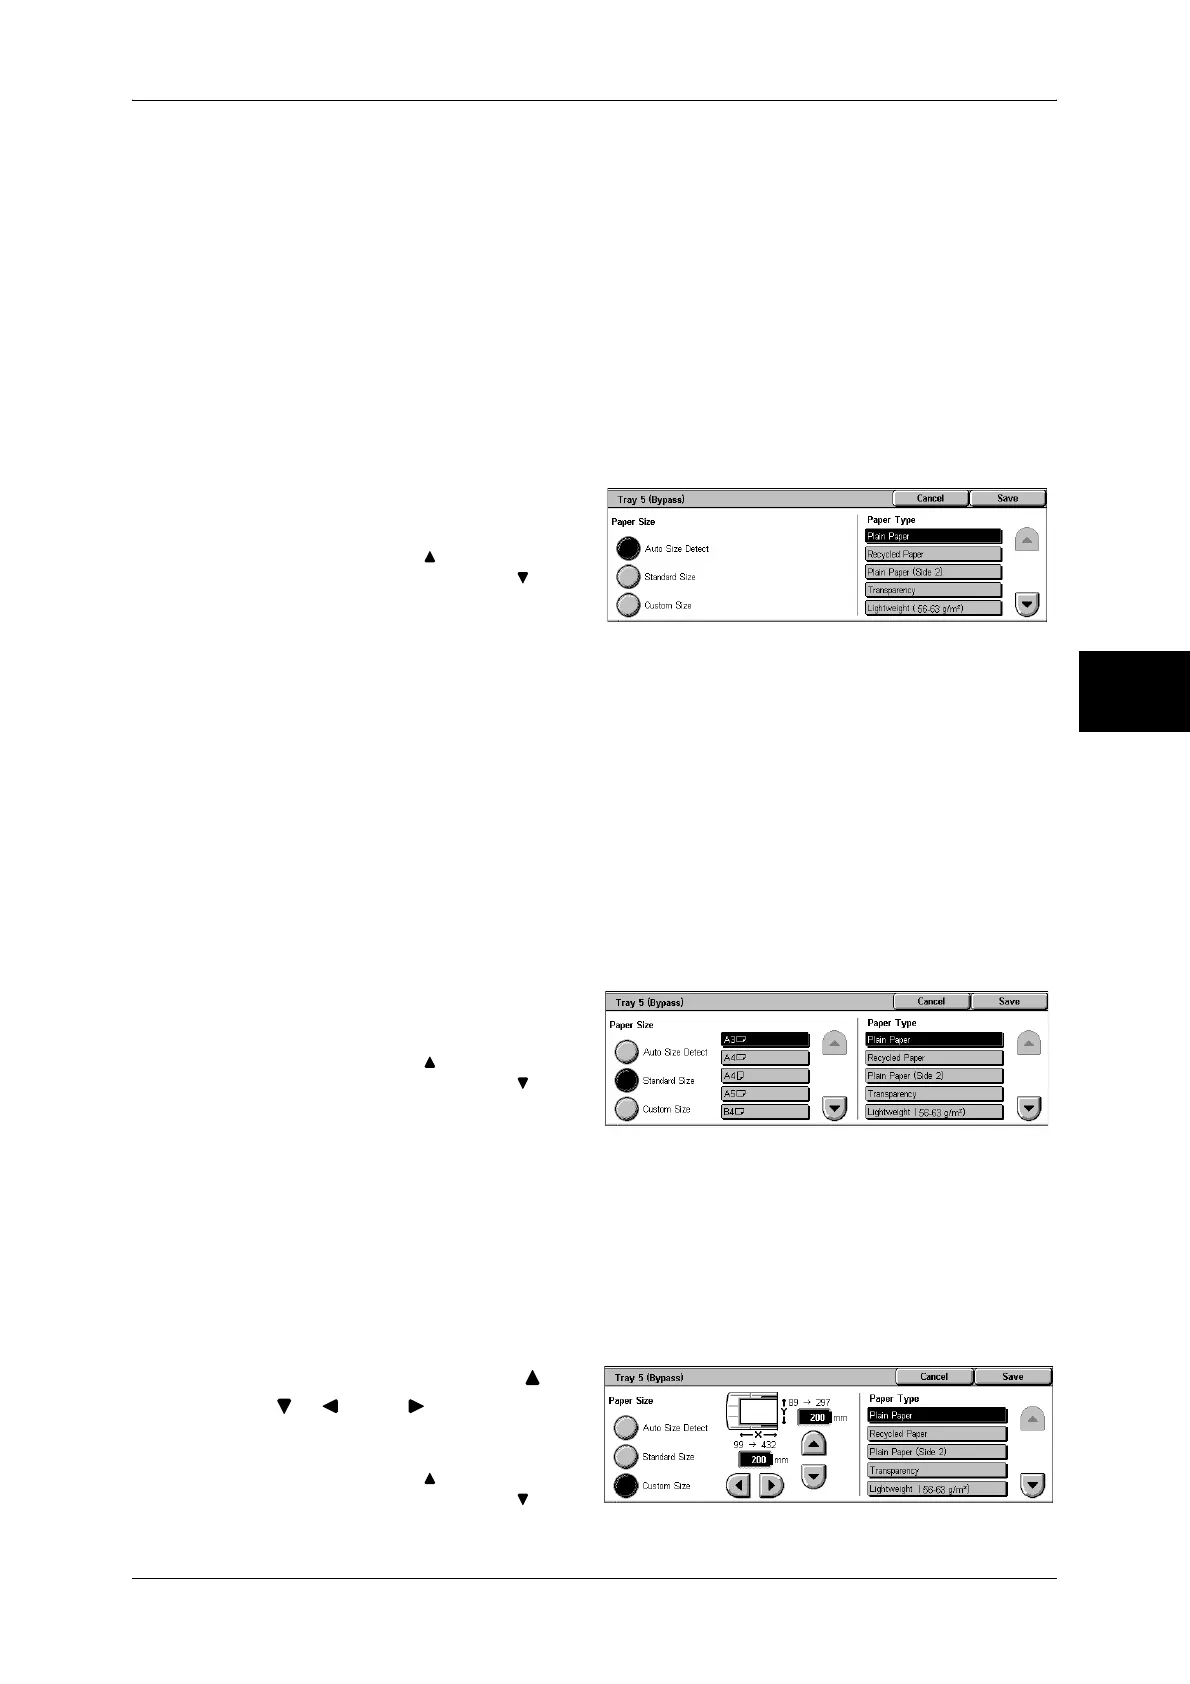
[Tray 5 (Bypass)] Screen
If you want to make copies on paper that cannot be loaded in the Trays 1 to 4, use the
Tray 5 (bypass).
1 Select a paper size and a paper
type.
Note • Select [ ] to return to the
previous screen or [ ] to
move to the next screen.
Paper Size
Select from [Auto Size Detect], [Standard Size], and [Custom Size].
When [Auto Size Detect] is selected, the paper size is identified automatically.
When selecting [Standard Size] or [Custom Size], refer to "When [Standard Size] is Selected" (P.61)
and "When [Custom Size] is Selected" (P.61).
Note • [Auto Size Detect] can only detect standard sizes.
Paper Type
Select the paper type.
When [Standard Size] is Selected
Select the paper size from standard sizes and then select the paper type.
1 Select the paper size and paper
type.
Note • Select [ ] to return to the
previous screen or [ ] to
move to the next screen.
When [Custom Size] is Selected
Set the X (width) within the range from 99 to 432 mm, and the Y (height) within the
range from 89 to 297 mm in 1 mm increments.
Important • If the X (width) of non-standard size paper is less than 140 mm, documents may not be
printed properly.
• When copying both sides of a document on non-standard size paper, specify the size within
the range of 127 to 432 mm for the X (width) length and 89 to 297 mm for the Y (height)
length.
1 Enter the paper size using [ ],
[ ], [ ], and [ ].
2 Select the paper type.
Note • Select [ ] to return to the
previous screen or [ ] to
move to the next screen.
 Loading...