1.2 Connecting a cable 33
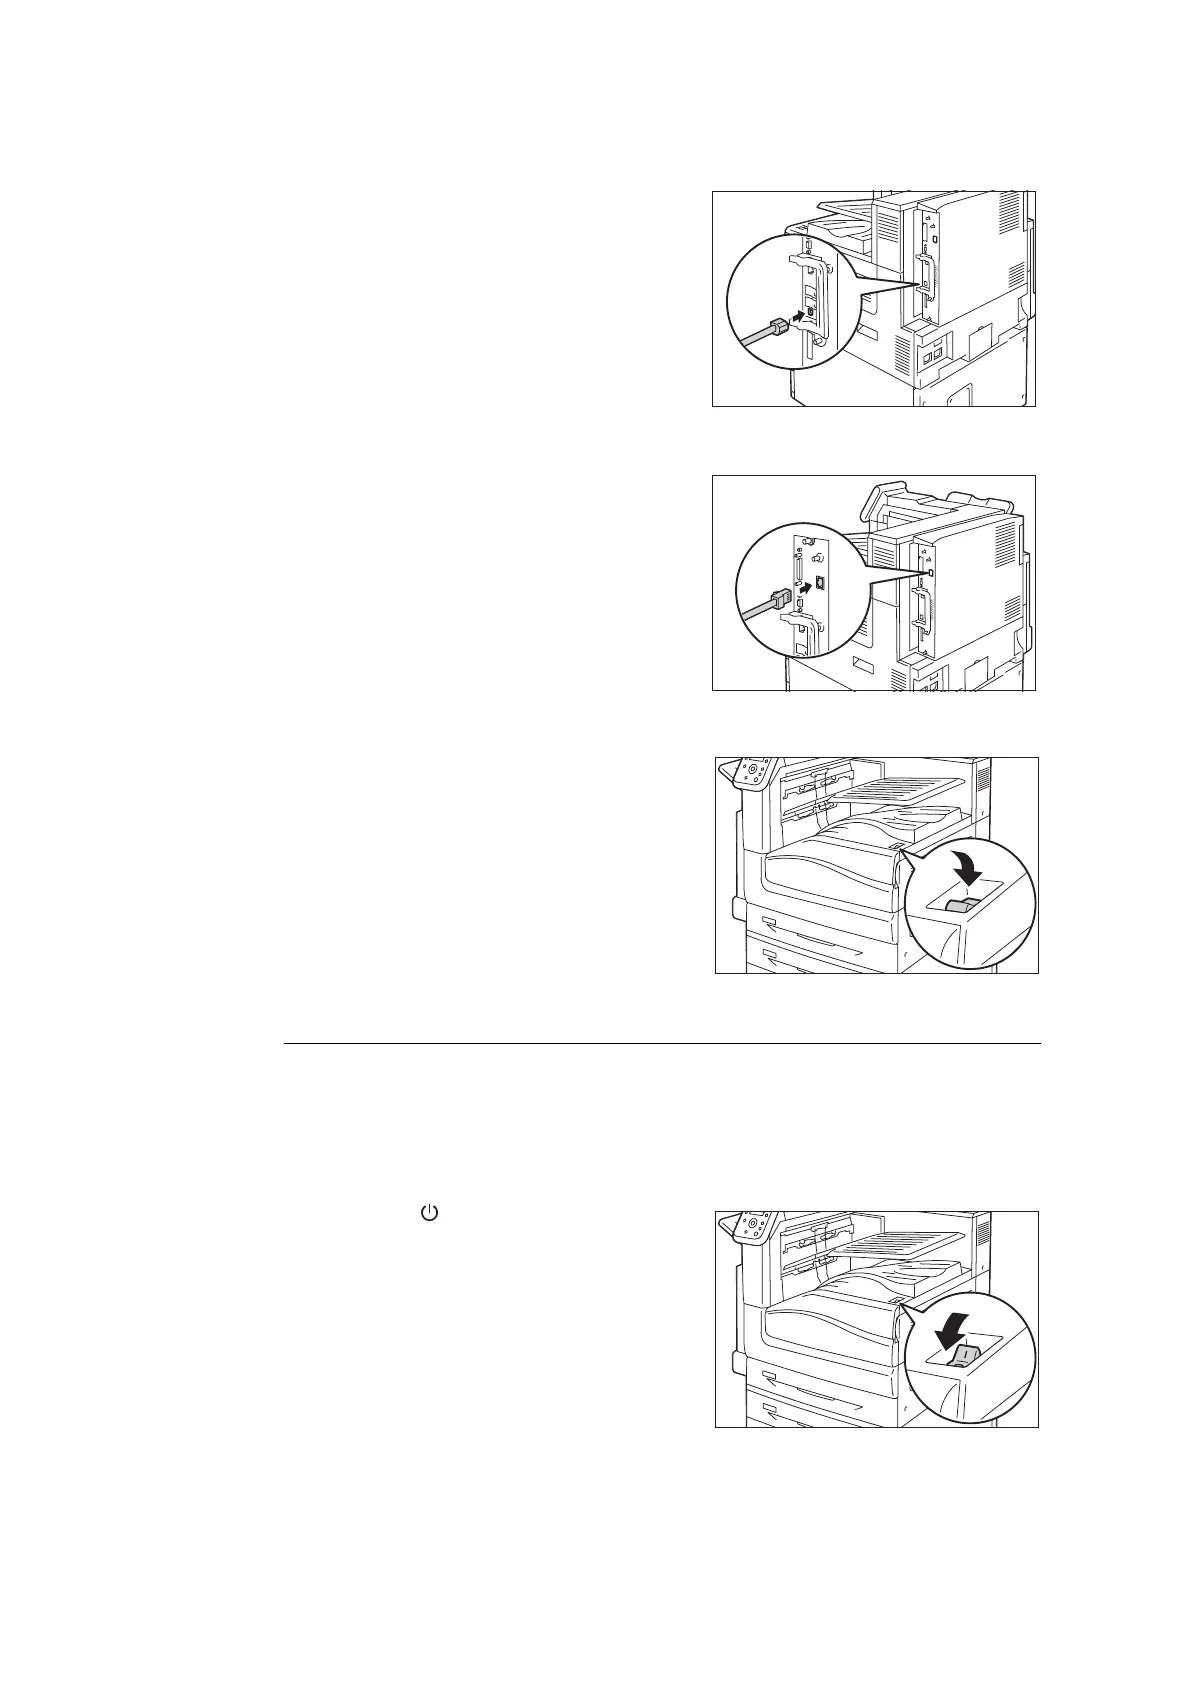
4. Plug the network cable into the interface
connector on the printer.
Important
• Position of the connector varies according to whether
the optional Gigabit Ethernet Board Kit is installed or
not. Make sure to connect with the appropriate
connector for your environment.
• The connector in the standard configuration cannot be
used when the Gigabit Ethernet Board Kit is installed.
• MAC address is the same as in the standard
configuration when installing the Gigabit Ethernet
Board Kit.
• LED1 on the Gigabit Ethernet Board Kit lights up as
follows according to the network environment
connected.
10BASE-T environment: Off
100BASE-T environment: Lights in yellow
1000BASE-T environment: Lights in blue
5. Plug the other end of the network cable into
a network device such as a hub.
6. Press the < | > side of the printer’s main
power switch to turn on the main power and
then close the front cover.
7. Press the < | > side of the printer’s power
switch to turn on the power.
Parallel Connection
When using a parallel connection, you must first install the optional Parallel Port Kit and
connector conversion cable.
Important
• Optional Parallel Port Kit and Gigabit Ethernet Board Kit cannot be installed at the same time.
1. Press the < > side of the printer’s power
switch to turn off the power.
Example:Standard configuration
Example:When the Gigabit Ethernet
Board Kit is installed.

 Loading...


