80 3 Printing
Printing on Custom Size Paper
The following procedure uses Windows XP WordPad as an example.
Important
• Make sure to set paper sizes correctly. Setting wrong paper sizes can cause printer malfunctions.
Note
• The method for displaying the Properties dialog box varies depending on the application being used.
Refer to the documentation of the application.
1. On the [File] menu, select [Print].
2. Select the printer from the [Select Printer] list box, and then click [Preferences].
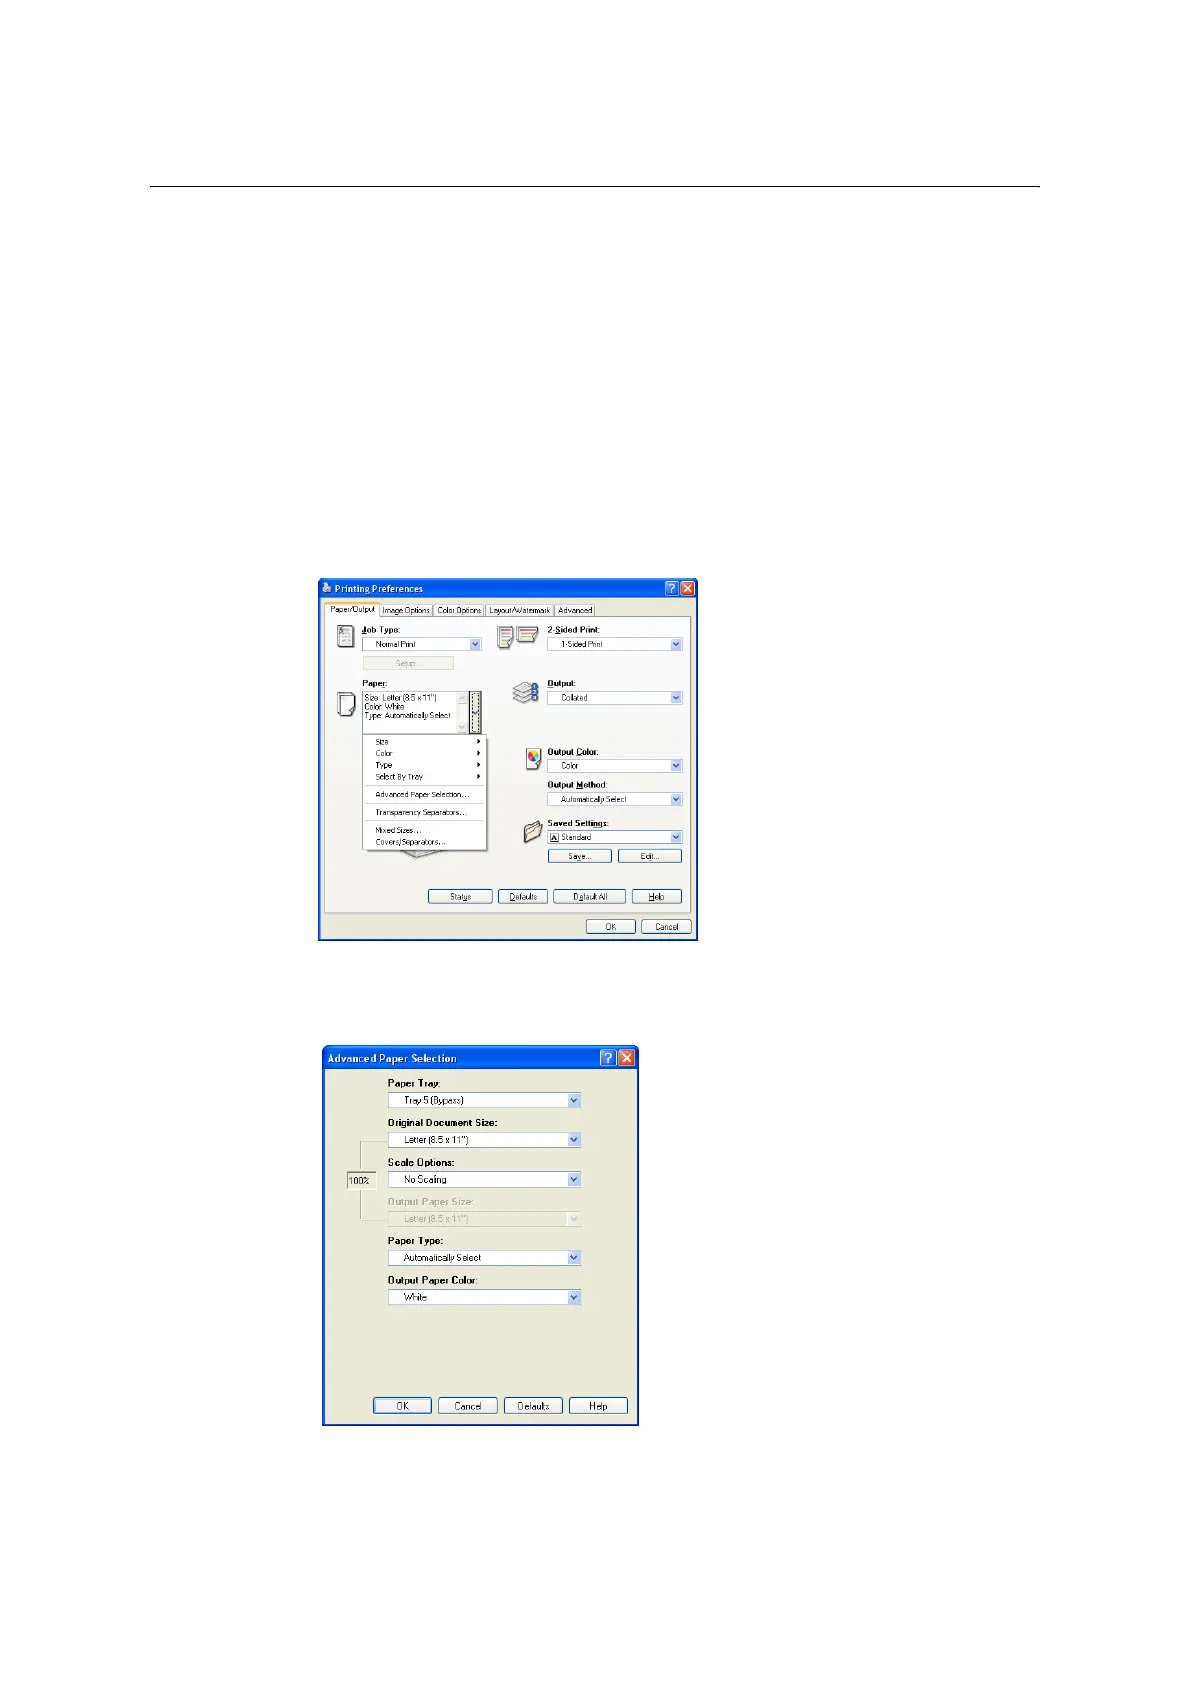
3. The [Paper/Output] tab appears.
Click <v> beside the [Paper] to display the options, and then select the registered
custom paper size from [Size].
4. When the paper is loaded in the Bypass Tray, click <v> beside the [Paper] to display
the options, and then select [Advanced Paper Selection].
5. Click [OK].
6. Click [Print] on the [Print] dialog box to start printing.

 Loading...


