A.6 Installing the HDD Extension Kit 411
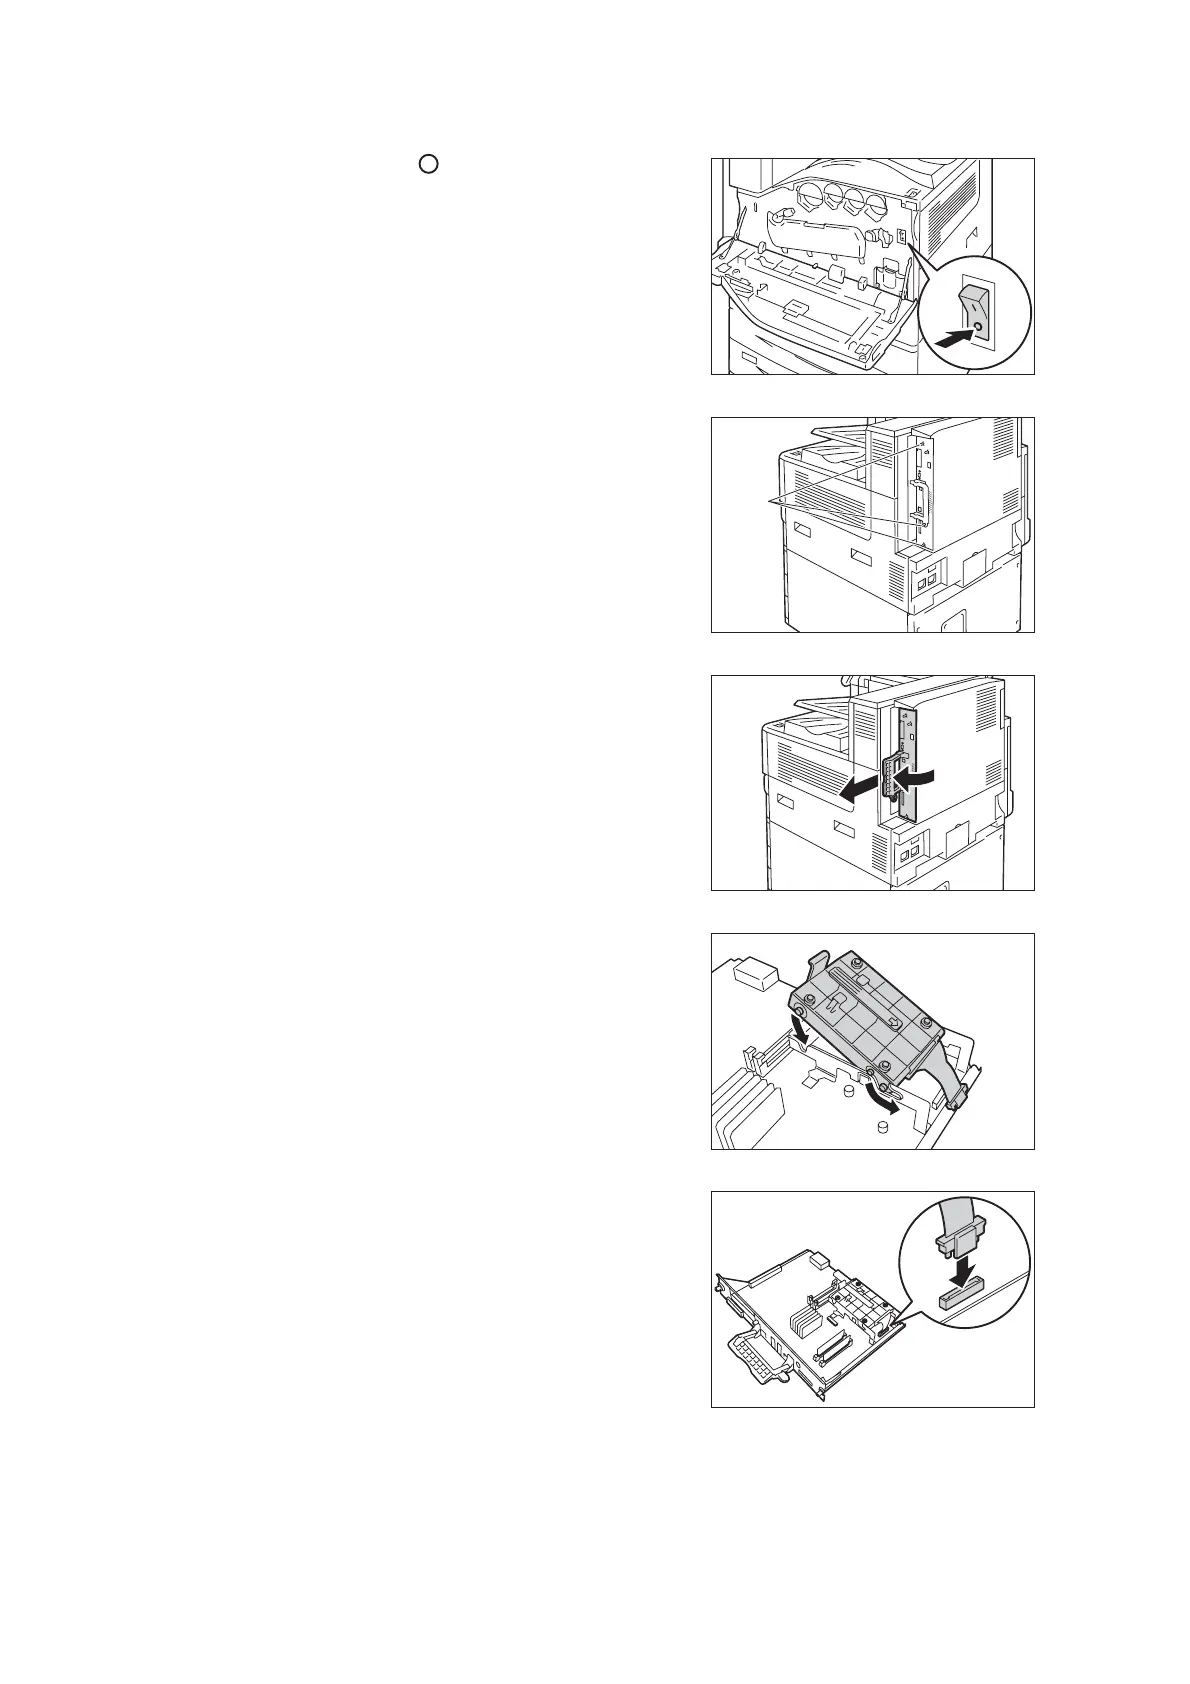
3. Press the < > side of the printer's main
power switch to turn off the main power and
close the front cover.
Note
• The <Main Power> lamp goes out on the control
panel.
4. Unplug the power cord from the power
outlet and the printer.
5. Loosen the three screws on the control
board of the printer.
6. Pull out the handle on the control board and
then carefully pull the control board out of
the printer. Place the control board on a
table top or some other flat surface.
Important
• When pulling out the control board, hold it with both
hands so you do not drop it.
7. With the connector cables of the hard disk
facing outwards, attach the hard disk to the
gold frame on the control board.
Make sure the protrusions of the hard disk
fit correctly into the slots of the frame.
8. Connect each of the hard disk connector
cables to the connectors on the control
board.
screw

 Loading...


