A.8 Installing the Parallel Port Kit 421
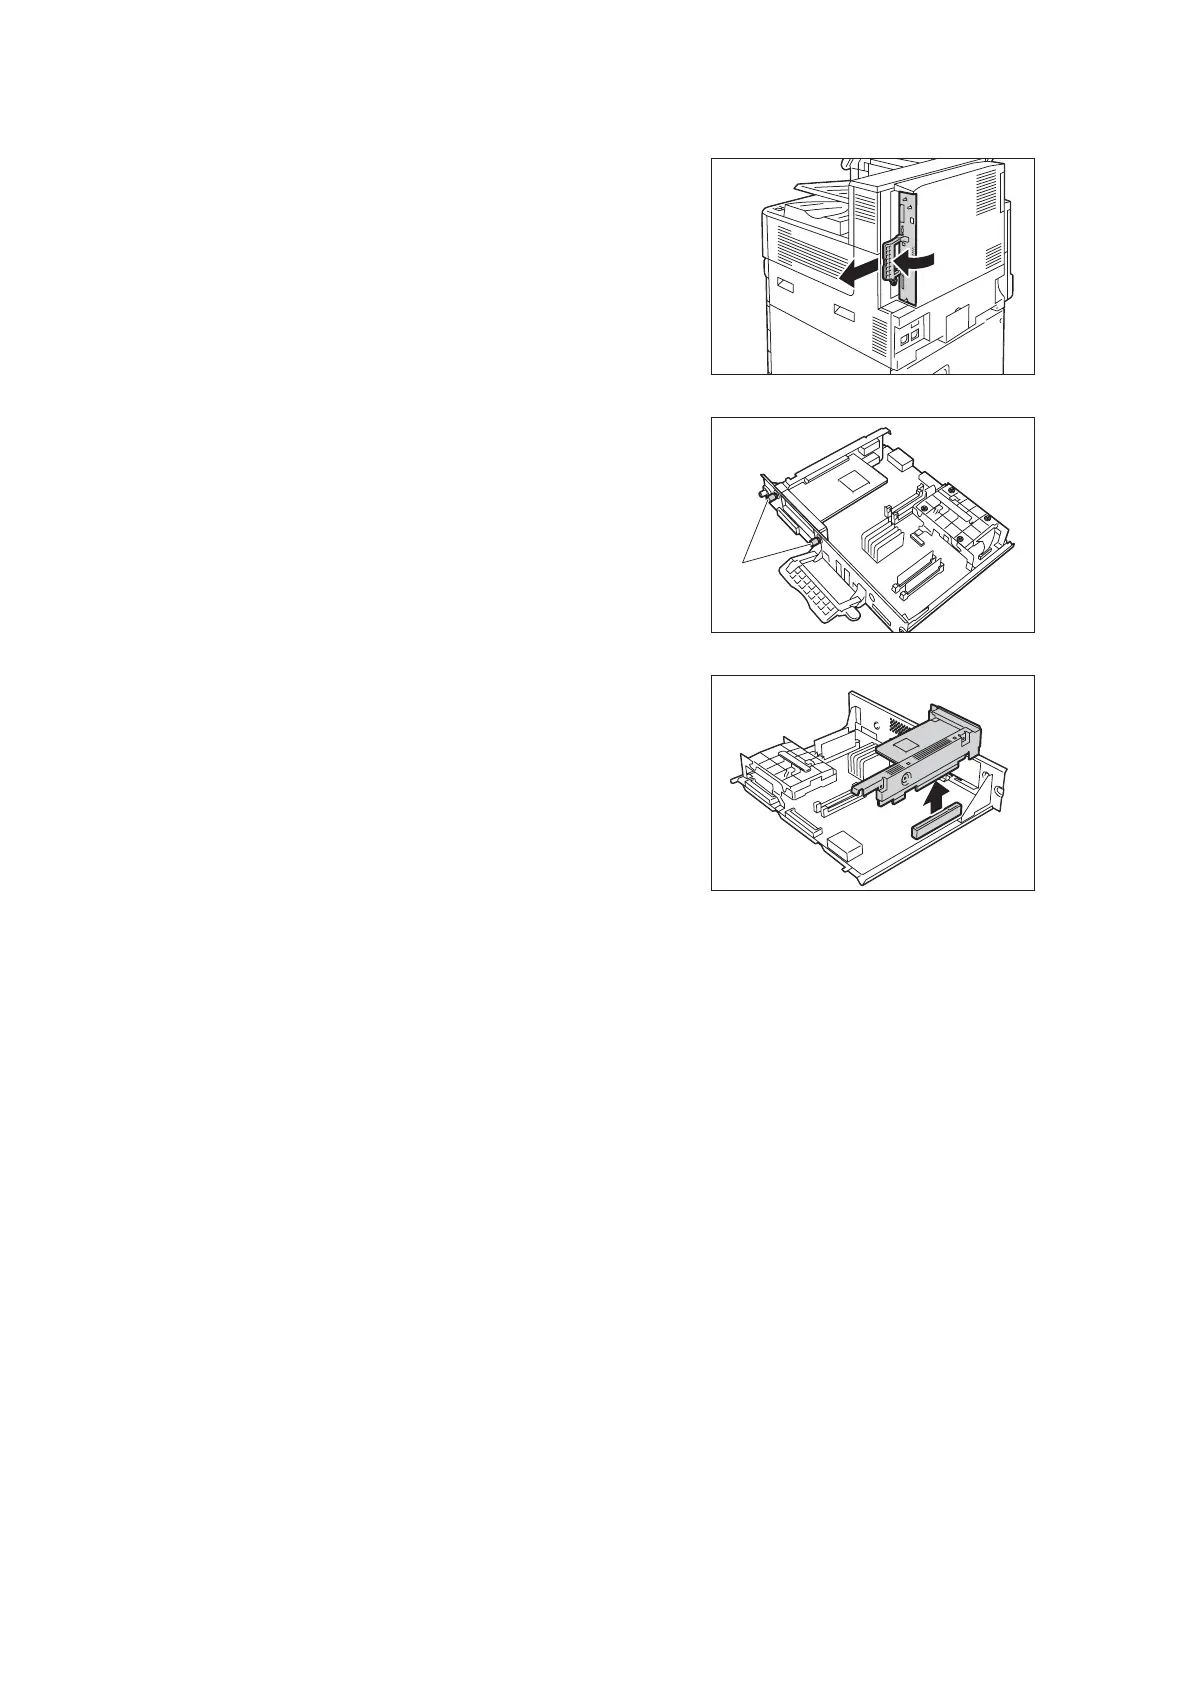
6. Pull the handle on the control board and
then carefully pull the control board out of
the printer. Place the control board on a
table top or some other flat surface.
Important
• When pulling out the control board, hold it with both
hands so you do not drop it.
7. Remove the two screws that secure the
Parallel Port Kit.
Note
• The screws you remove here may be used for
securing other optional kit on the control board
.
8. Remove the Parallel Port Kit from the
control board.
Parallel Port Kit removal is now complete.
If you need to install the Gigabit Ethernet Board Kit consecutively, proceed to step 8 in the
“A.9 Installing the Gigabit Ethernet Board Kit” (P. 422).
It no other installation for the optional kit is needed, install the dummy plate that you
removed in step 7 in the “Installing the Parallel Port Kit,” insert the control board, and then
secure the board with three screws in place.
screw

 Loading...


