▶
Position the HDD backplane on the three hooks (see circles).
▶
Push the HDD backplane downward. Ensure that the HDD backplane fits
into the guides (A). There are five guides, three can be seen in figure.
CAUTION
▶
Ensure that none of the cables are strained or damaged!
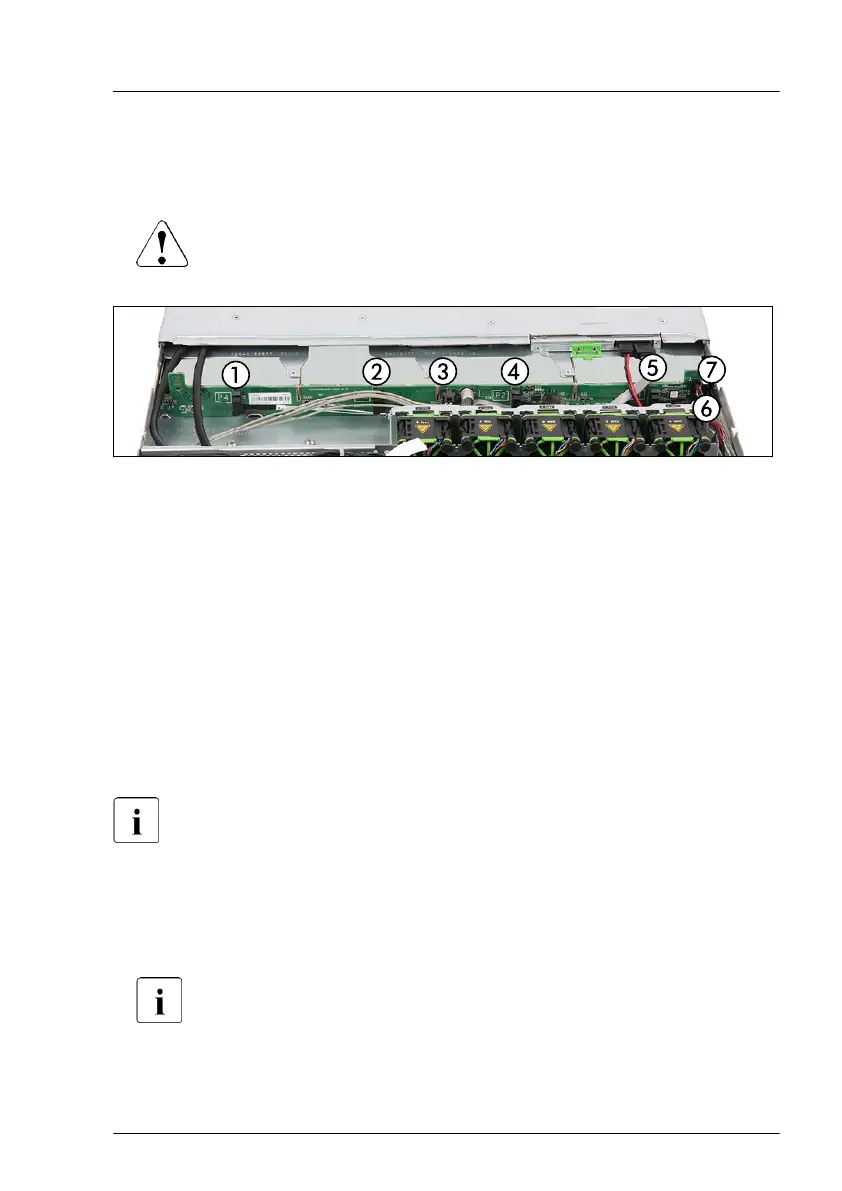
Figure 68: Connecting the cables to the 3.5-inch HDD backplane
▶
Connect the following cables to the HDD backplane:
1 SAS/SATA cable, according to the length
2 SAS/SATA cable, according to the length
3 Power cable to backplane connector "X12"
4 SAS/SATA cable, according to the length
5 SAS/SATA cable, according to the length
6 SAS/SATA cable plug "P6" to backplane connector "SGIO"
7 OOB cable to backplane connector "SMBus"
For the cable plans, see "Appendix B" on page 365
.
Concluding steps
▶
Insert all HDD modules, see "Installing a 3.5-inch HDD module" on
page 142
.
Ensure that you reinstall the HDD module in the bay it was located
before the HDD backplane replacement.
▶
"Reassembling" on page
52
.
Hard disk drive (HDD) / solid state drive (SSD)
RX1330 M4 Upgrade and Maintenance Manual 149

 Loading...