Viewing E-label Regulatory and Compliance Information
The label for this device is provided electronically. The e-label may provide regulatory information, such as
identification numbers provided by the FCC or regional compliance markings, as well as applicable product and
licensing information.
1
From the watch face, hold .
2 From the settings menu, select System.
3 Select About.
Device Information
About the AMOLED Display
By default, the watch settings are optimized for battery life and performance (Tips for Maximizing the Battery
Life, page126).
Image persistence, or pixel "burn-in," is normal behavior for AMOLED devices. To extend the display life, you
should avoid displaying static images at high brightness levels for long time periods. To minimize burn-in, the
fēnix display turns off after the selected timeout (Display and Brightness Settings, page82). You can turn your
wrist toward your body, tap the touchscreen, or press a button to wake the watch.
Charging the Watch
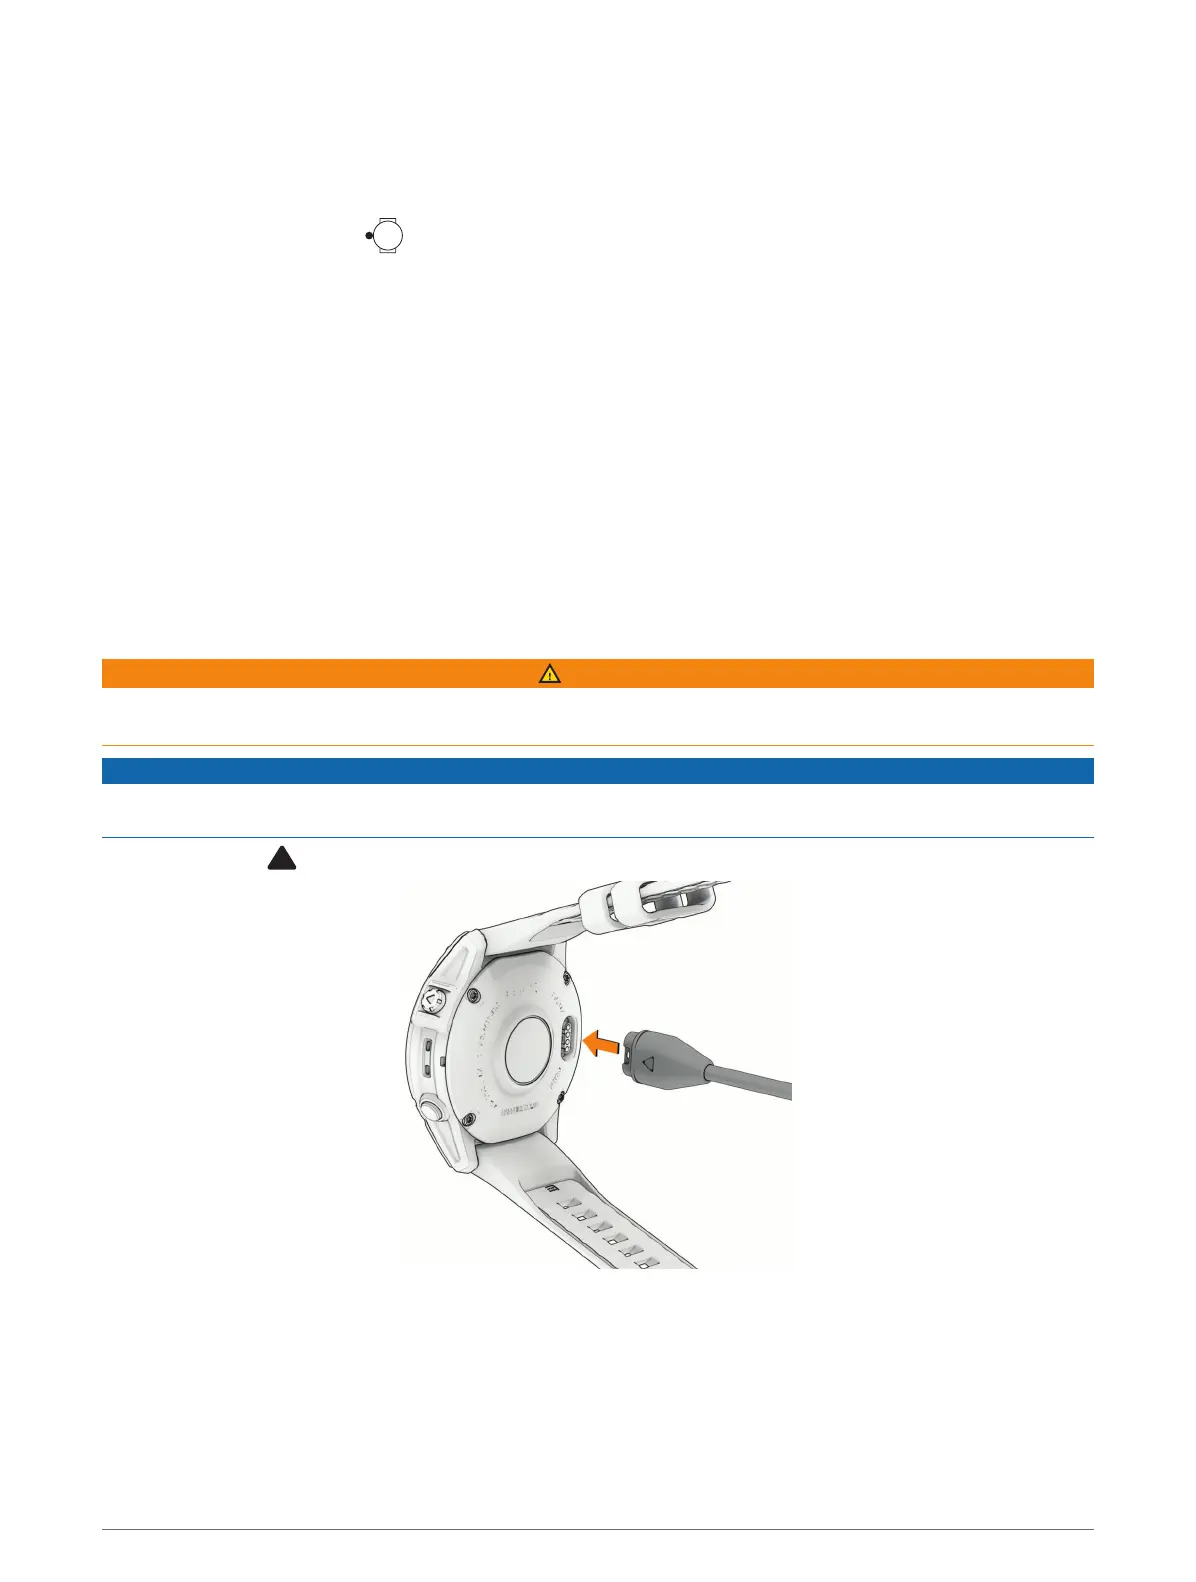
WARNING
This device contains a lithium-ion battery. See the Important Safety and Product Information guide in the product
box for product warnings and other important information.
NOTICE
To prevent corrosion, thoroughly clean and dry the contacts and the surrounding area before charging or
connecting to a computer. Refer to the cleaning instructions (Device Care, page124).
1 Plug the cable ( end) into the charging port on your watch.
2 Plug the other end of the cable into a USB-C
®
computer port or AC adapter (15 W minimum output power).
The watch displays the current battery charge level.
3 If necessary, go to buy.garmin.com, or contact your Garmin dealer for information about optional
accessories and replacement parts.
4 Disconnect the watch after the battery charge level reaches 100%.
Device Information 123