Introduction
Step 1:
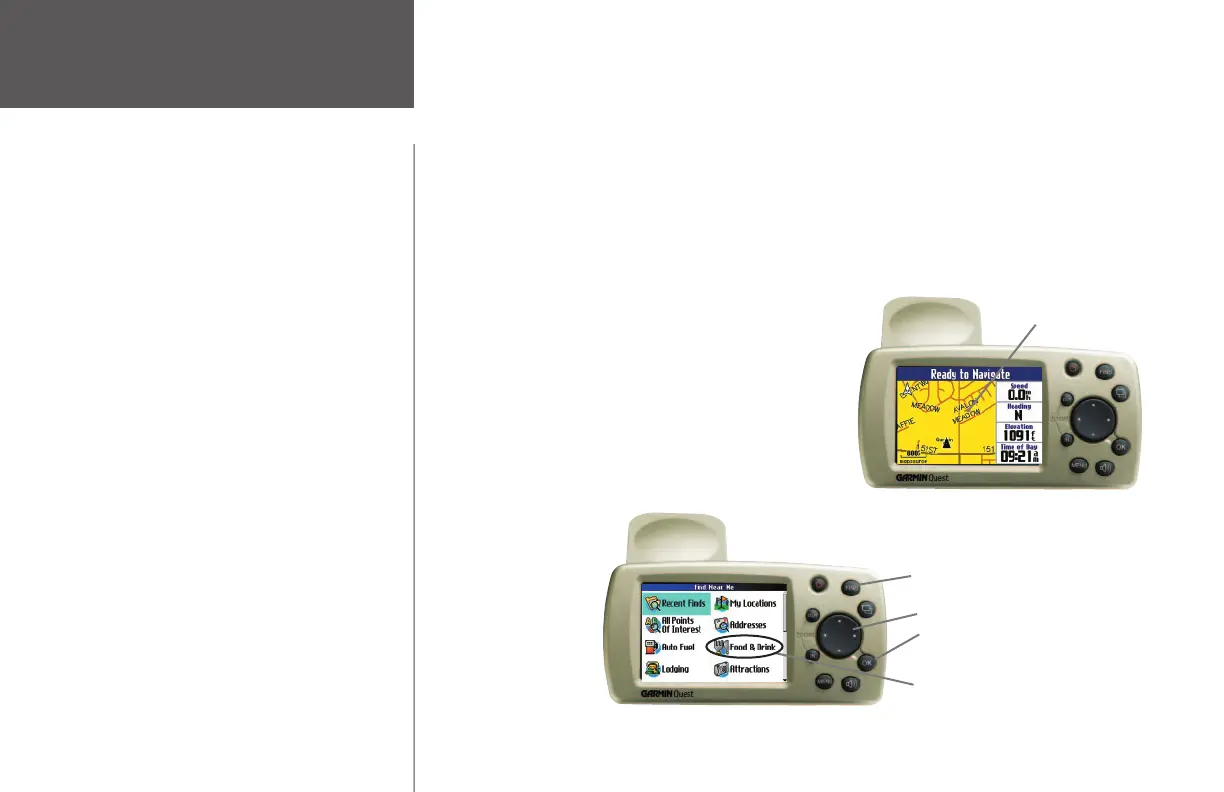
If you have not already done so, snap your Quest into the suction mount vehicle adapter. Plug
the cable end of the vehicle adapter into your vehicle’s cigarette lighter. (See Appendix C if you need addi-
tional instructions.) Turn on the Quest so that it can fi nd satellites. Be sure to fl ip up the antenna. When
your Quest has established a satellite fi x, it displays a “Ready to Navigate” message, as shown below:
Step 2:
Press the FIND key on the
Quest. The Find Near Me menu
appears:
GETTING STARTED: A Tutorial
The tutorial below guides you through the steps for fi nding a restaurant in your area and then creating a
route to it. If you have never used a Quest or a GPS navigation unit before, try this simple task. You’ll see
that using your Quest is fast and easy.
Where to fi nd it
Note:
Make certain your Quest’s antenna is unobstructed as it
looks for satellites. For example, it cannot establish a satellite
fi x if your vehicle is parked in a garage. While in your vehicle,
position the antenna so that it is parallel to the surface
of the road so that it can have the best view of the sky.
FIND key
Use the rocker pad to select
the Food & Drink icon. Then,
press the OK key.
Rocker pad
OK key
Map page
• Learn how to attach the Quest to the bracket
mount on the suction mount vehicle adapter
on page 52.
• Learn how to set the correct time zone for
your Quest on page 40.
• Learn about the Map page and its many
features beginning on page 6.
• Learn more about GPS navigation beginning
on page 44.
• To fi nd a city, address, intersection, park, or
other point of interest, see Finding Places,
beginning on page 14.
• Learn how to use your Quest’s onscreen
keyboard on page 6.
• Learn how to change your Quest’s street detail
level on page 33.
• If you do not want your Quest to automati-
cally switch to “night” colors at sunset, see
page 35 (color mode).
iv
190-00323-00_0B.indd iv 8/20/2004, 11:07:47 AM