Appendix
52
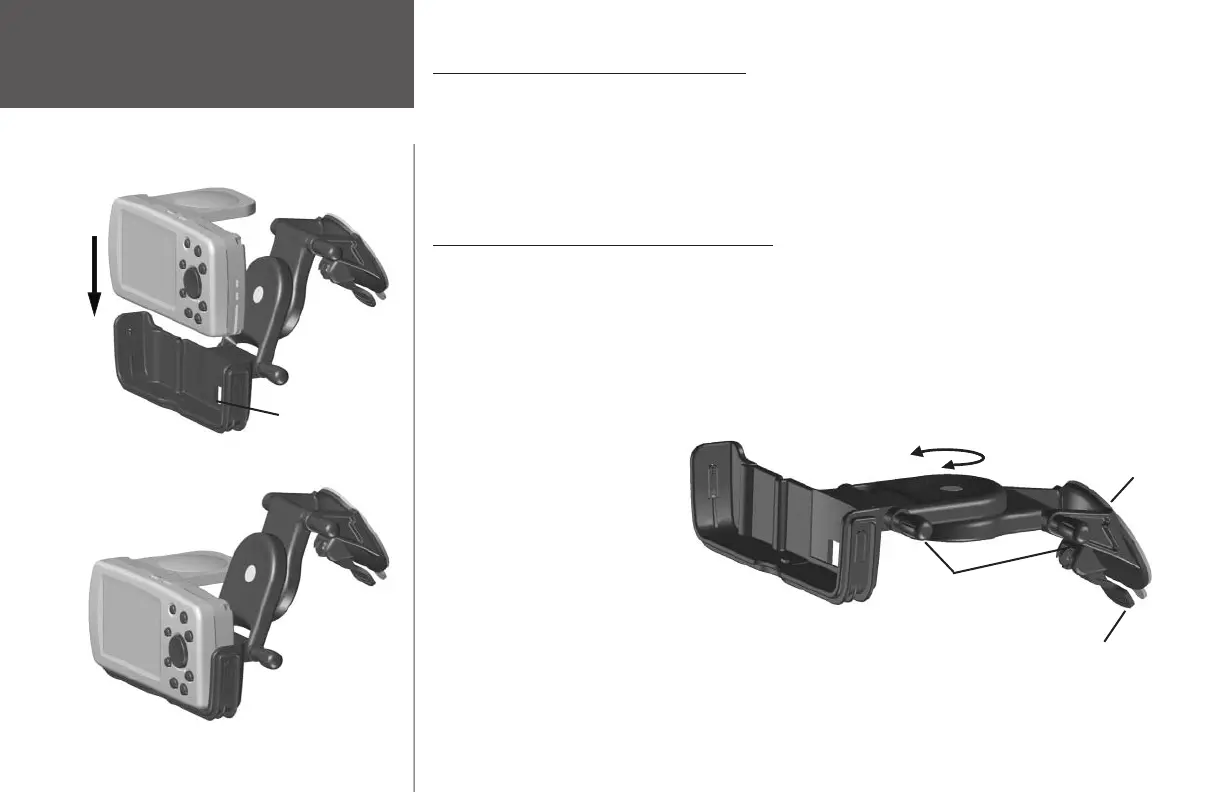
Inserting the Quest to the Bracket Mount
1. Flip up the antenna on the back of the Quest.
2. Position the Quest above the mount, aligning the slots on the sides of the unit with the tabs on the inside
of the mount.
3. Slide the Quest downward into the mount until it snaps into place. To remove, fi rmly press upward on the
Quest from the bottom middle of the unit and lift the Quest from the mount.
Installing the Suction Mount Vehicle Adapter
1. Extend the suction mount by loosening the two adjusting knobs on the right side of the mount. This
allows you to move the bracket components as you prepare to attach the suction mount to your
windshield. When the suction mount is extended, lightly tighten the adjusting knobs to keep the bracket
components in place. You can also adjust the bracket’s horizontal angle by twisting the swivel knob left or
right (a clicking noise will be heard).
2. Thoroughly clean the
inside surfaces of both the
windshield and the mount's
suction cup and allow both
to air dry before installing
the suction mount.
3. Place the Quest in the
bracket mount and place
the suction mount in the
desired location on your
windshield. Make certain the
suction cam lever is in the
UP position. Verify that the
DC adapter can reach the
desired receptacle in your
vehicle.
Vehicle Installation
Position the Quest above the mount, align the slots,
and slide the Quest downward.
Bracket Mount
Bracket
Assembly
Suction Cam Lever shown in
DOWN position to create a grip
against the windshield.
Bracket Mount
Adjusting
Knobs
Use the Swivel Knob to rotate the Quest
toward you or your passenger
Suction Cup
Before you attach the suction mount to your windshield, extend
the components of the mount by loosening the adjusting knobs.
190-00323-00_0B.indd 52 8/20/2004, 11:08:43 AM