○○○○○○○○○○○○○○○○○○○○○○
Disk 4•17
○○○○○○○○○○○○○○○○○○○○○○
Disk 4•17
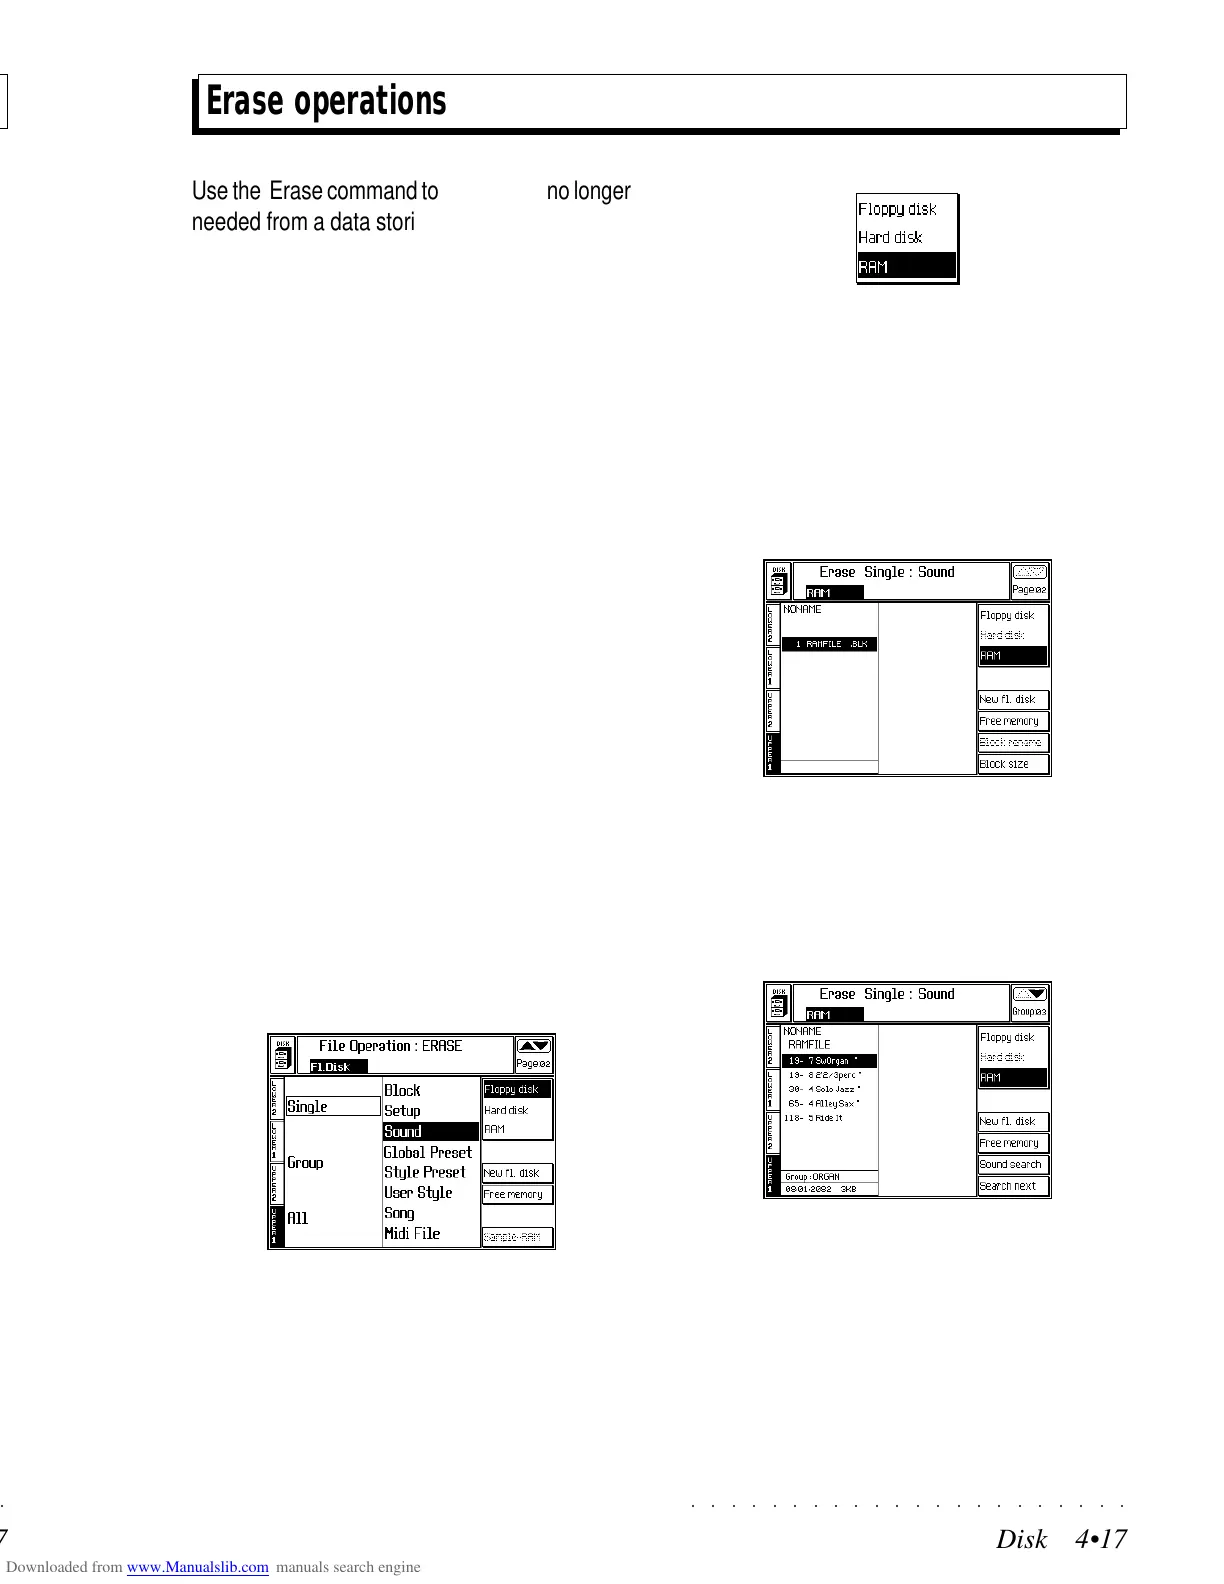
Erase operations
Use the Erase command to cancel files no longer
needed from a data storing device (Disk or Hard
Disk) or from RAM to make room for other files.
The Erase File Selector does not operate be-
tween source and destination directories (as in
the Load and Save File selector), but on a single
directory contained in the device you are cancel-
ling files from.
Erase operations are executed using the same
procedures are those described for the Load and
Save commands. This section provides general
information relating to the Erase operation. The
user is encouraged to apply the same logic to
Erase operations as those used for Load and
Save operations.
The following example shows how to Erase a sin-
gle Song from RAM memory.
ERASE SINGLE SONG
1. Press DISK to enter Disk Mode and use the
+/– Page/Bank buttons to open the main
ERASE page.
2. Select the desired ERASE command.
3. Select the source device to erase from.
In this case, select the RAM option with soft
button F3.
If you are erasing from a floppy disk, insert
the disk into the drive and check that the
“Floppy Disk” option is selected (soft button
F1,
If you are erasing from the Hard Disk, select
the “Hard Disk” option with soft button F2.
4. Press ENTER to enter the file selector.
5. If necessary, select the Block containing the
file to erase then press ENTER to access the
Block.
6. Select the file to erase.
7. Press ENTER twice to erase the file from the
directory.
○○○○○○○○○○○○○○○○○○○○○○
Disk 4•17
○○○○○○○○○○○○○○○○○○○○○○
Disk 4•17
Erase operations
Use the Erase command to cancel files no longer
needed from a data storing device (Disk or Hard
Disk) or from RAM to make room for other files.
The Erase File Selector does not operate be-
tween source and destination directories (as in
the Load and Save File selector), but on a single
directory contained in the device you are cancel-
ling files from.
Erase operations are executed using the same
procedures are those described for the Load and
Save commands. This section provides general
information relating to the Erase operation. The
user is encouraged to apply the same logic to
Erase operations as those used for Load and
Save operations.
The following example shows how to Erase a sin-
gle Song from RAM memory.
ERASE SINGLE SONG
1. Press DISK to enter Disk Mode and use the
+/– Page/Bank buttons to open the main
ERASE page.
2. Select the desired ERASE command.
3. Select the source device to erase from.
In this case, select the RAM option with soft
button F3.
If you are erasing from a floppy disk, insert
the disk into the drive and check that the
“Floppy Disk” option is selected (soft button
F1,
If you are erasing from the Hard Disk, select
the “Hard Disk” option with soft button F2.
4. Press ENTER to enter the file selector.
5. If necessary, select the Block containing the
file to erase then press ENTER to access the
Block.
6. Select the file to erase.
7. Press ENTER twice to erase the file from the
directory.

 Loading...

