○○○○○○○○○○○○○○○○○○○○○○
4•18 Reference Guide
○○○○○○○○○○○○○○○○○○○○○○
4•18 Reference Guide
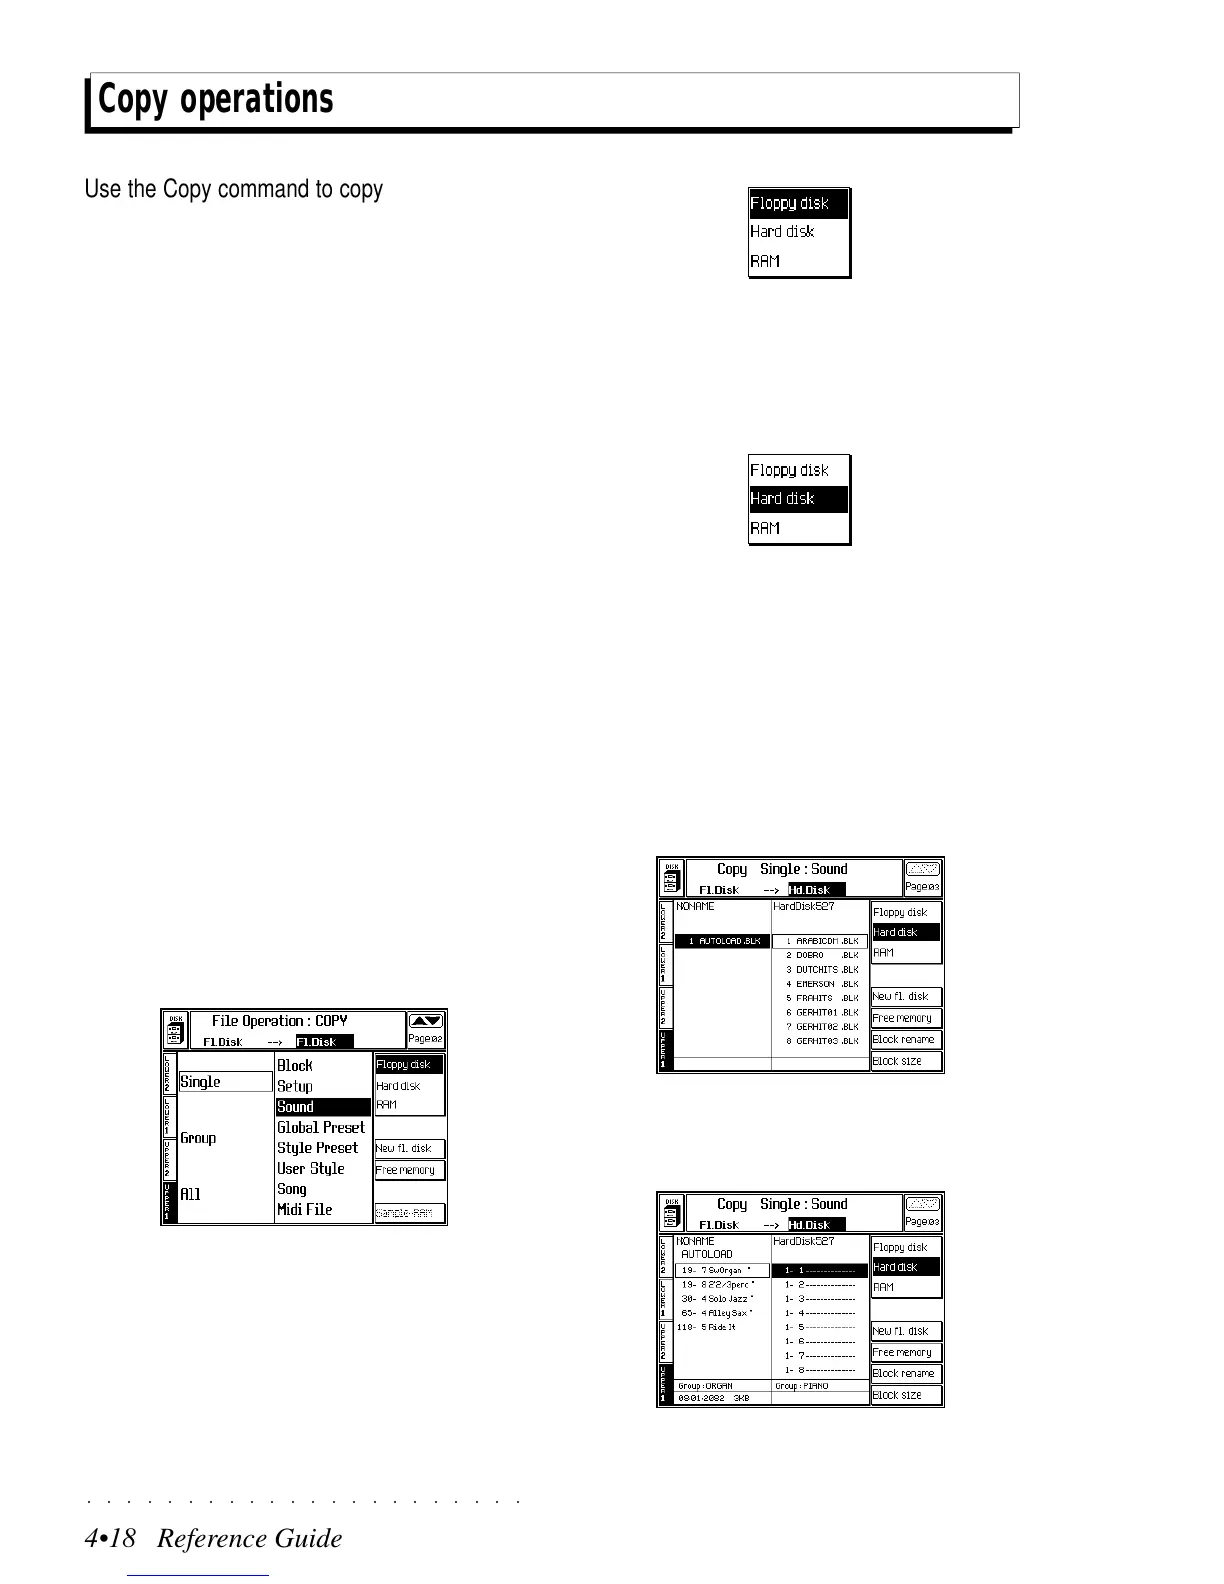
Copy operations
Use the Copy command to copy a file from one
location to another within the same device, or from
the Hard Disk to floppy (bypassing the RAM) and
vice versa. The source file remains intact.
To copy a file from one floppy disk to another,
first load the file to RAM, then save it to the other
floppy.
Copy operations are executed using the same
procedures are those described for the Load and
Save commands. This section provides general
information relating to the Copy operation. The
user is encouraged to apply the same logic to
Copy operations as those used for Load and Save
operations.
The following example shows how to copy a sin-
gle Sound file from Floppy disk to Hard Disk.
COPY SINGLE SOUND
1. Press DISK to enter Disk Mode and use the
+/– Page/Bank buttons to open the main
COPY page.
2. Select the COPY command required from the
main page.
3. Select the source and destination devices with
soft buttons F1, F2 or F3 and directional ar-
rows.
In this case, pass to the source directory and,
if necessary, select Floppy Disk (F1).
Then pass to the destination directory and
select the Hard disk (F2) as the destination.
Entering the Hard disk for the first time takes
some time, depending on the number of files
already present.
A “Please Wait” message appears during the
scanning period.
Selecting «Floppy disk» or «RAM» automati-
cally assigns the same device to source and
destination.
4. Press ENTER to enter the file selector, select
the source Block containing the desired file
and press ENTER to gain access.
5. Select the File to Copy from the source di-
rectory.
○○○○○○○○○○○○○○○○○○○○○○
4•18 Reference Guide
○○○○○○○○○○○○○○○○○○○○○○
4•18 Reference Guide
Copy operations
Use the Copy command to copy a file from one
location to another within the same device, or from
the Hard Disk to floppy (bypassing the RAM) and
vice versa. The source file remains intact.
To copy a file from one floppy disk to another,
first load the file to RAM, then save it to the other
floppy.
Copy operations are executed using the same
procedures are those described for the Load and
Save commands. This section provides general
information relating to the Copy operation. The
user is encouraged to apply the same logic to
Copy operations as those used for Load and Save
operations.
The following example shows how to copy a sin-
gle Sound file from Floppy disk to Hard Disk.
COPY SINGLE SOUND
1. Press DISK to enter Disk Mode and use the
+/– Page/Bank buttons to open the main
COPY page.
2. Select the COPY command required from the
main page.
3. Select the source and destination devices with
soft buttons F1, F2 or F3 and directional ar-
rows.
In this case, pass to the source directory and,
if necessary, select Floppy Disk (F1).
Then pass to the destination directory and
select the Hard disk (F2) as the destination.
Entering the Hard disk for the first time takes
some time, depending on the number of files
already present.
A “Please Wait” message appears during the
scanning period.
Selecting «Floppy disk» or «RAM» automati-
cally assigns the same device to source and
destination.
4. Press ENTER to enter the file selector, select
the source Block containing the desired file
and press ENTER to gain access.
5. Select the File to Copy from the source di-
rectory.
 Loading...

