67
ReACT Pro
Battery Removal
• Remove the Retaining Bar located across the lower portion of the Battery (Fig. 66a).
• Remove the Hatch O-ring. DO NOT use tools
• Using care not to damage the Battery Contacts (Fig. 66b/c), slide the Battery up and out of
the Battery Compartment.
Inspection
• Closely check all of the sealing surfaces for any signs of damage that might impair proper
sealing.
• Inspect the Buttons, Lens, and Housing to ensure they are not cracked or damaged.
• If it is necessary to clean the Battery Compartment, flush it and all components with a solu-
tion of 50% white vinegar and 50% fresh water. Rinse with fresh water, and allow to dry
overnight, or blow dry with a hair dryer (set at 'no heat').
WARNING: If damage or corrosion is found in the Battery Compartment,
return your ReACT Pro to an Authorized Genesis Scuba Dealer, and DO
NOT attempt to use it until it has received factory prescribed service.
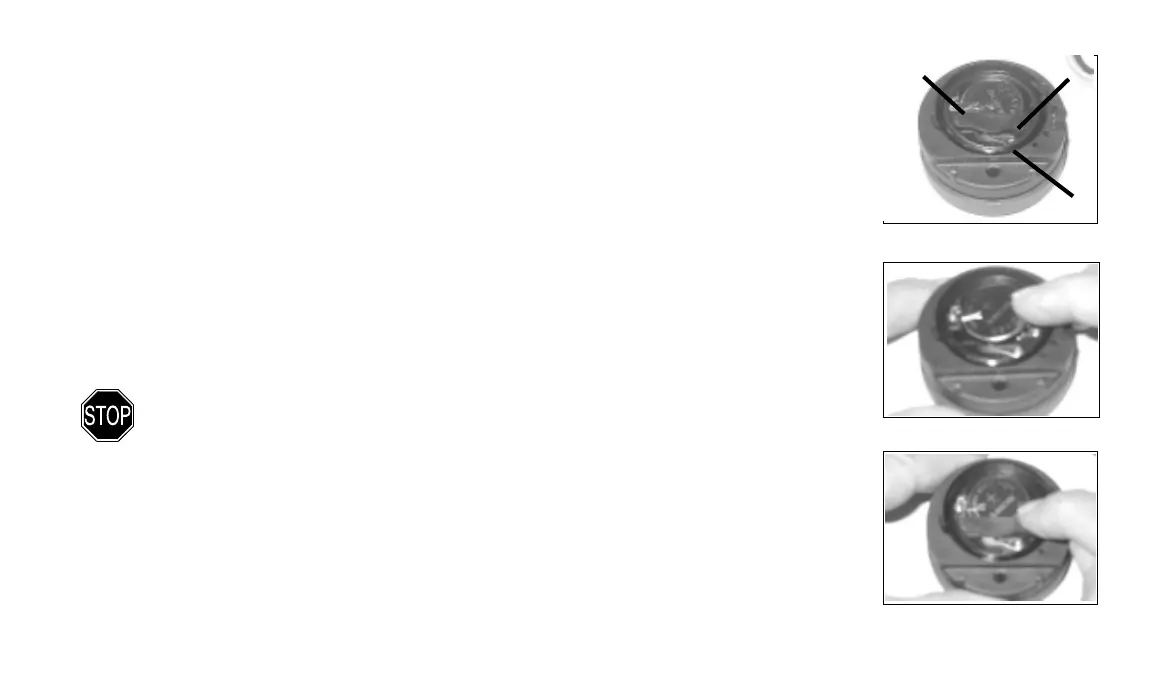
Battery Installation
• Slide a new 3 volt type CR2450 Lithium Battery, negative (-) side down into the Battery
Cavity. Slide it in from the right side and ensure that it slides under the contact clip on the
left rim of the cavity (Fig. 67).
• Orient the Retaining Bar across the lower portion of the Battery and carefully push it down
into position (Fig. 68).
Fig. 66 - Battery Compartment
a
b
c
Fig. 67 - Battery Insertion
Fig. 68 - Retaining Bar