68
Battery Hatch and Hatch Retaining Ring Installation
• Replace the Hatch O-ring with a new one. This O-ring must be a genuine Genesis Scuba
part that can be purchased from an Authorized Genesis Scuba Dealer. Use of any other O-
ring will void the warranty.
• Lightly lubricate the new Hatch O-ring with silicone grease and place it on the inner rim of
the Battery Hatch. Ensure that it is evenly seated.
• Slide the Hatch Retaining Ring, top portion first (small opening), onto your thumb (Fig.
69).
• Carefully place the Battery Hatch (with O-ring) into position on the rim of the Battery
Compartment, then press it evenly and completely down into place with your same thumb.
• Maintain the Battery Hatch securely in place and, using your other hand, slide the Retaining
Ring down off your thumb and into position around the Battery Compartment.
• The tabs on the Retaining Ring fit down into the two slots located at the 2 and 8 o'clock po-
sitions.
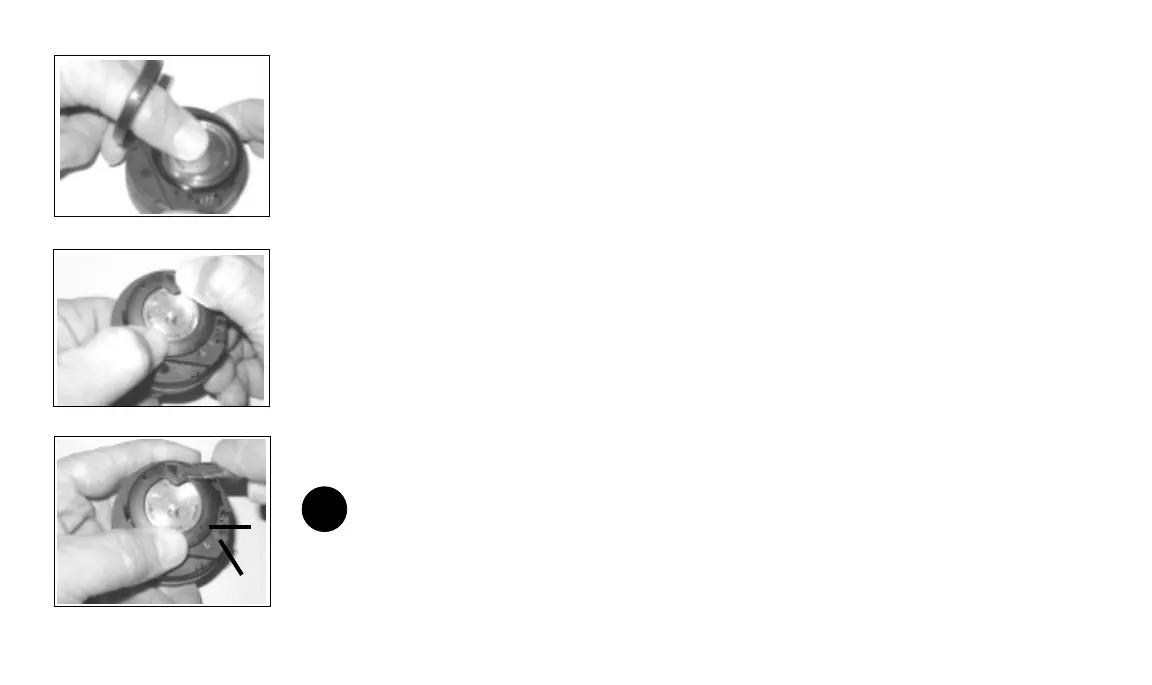
• Using your fingers, turn the Ring counter clockwise 5 degrees until the tabs engage (Fig.
70), then tighten it 5 more degrees by turning it counter clockwise with the aide of a small
blade screwdriver (Fig. 71).
NOTE: While tightening (turning) the Retaining Ring, exert continuous
inward pressure on it until it is secured in the proper position. A small icon
located on the Ring should be aligned with the Locked icon located on the
Housing (Fig. 71 a/b)
Fig. 69 - Retaining Ring
N
Fig. 70 - Retaining Ring Tabs
Fig. 71 - Securing the Ring
a
b