97
GERBERplotter MP Series User Manual
English
7
Paper
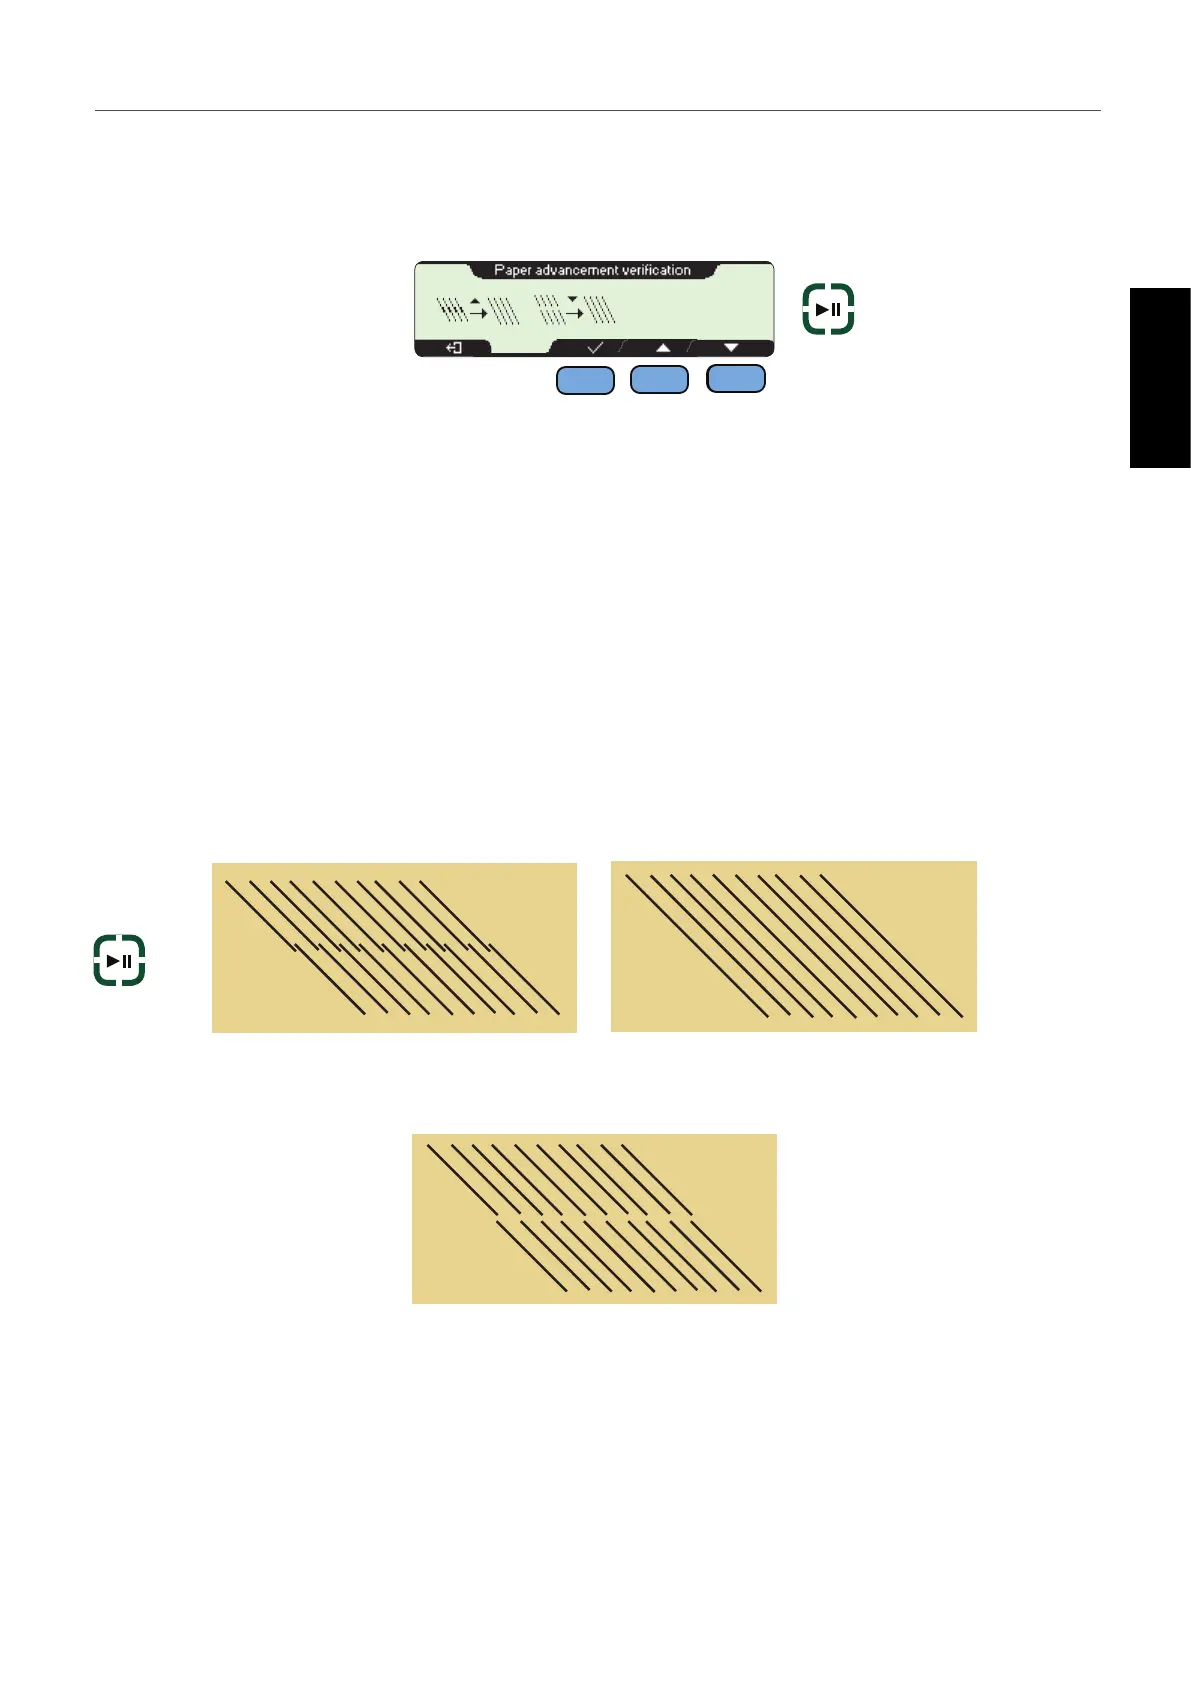
In the last step, the paper advances to be checked again, and diagonal lines are printed.
1
Press PRINT/PAUSE to make the plotter print a test print. Visually determine the value (between 0 and 29)
that best shows a continuous diagonal line.
2
Press PRINT/PAUSE to stop or start the printing of lines in both directions of print-head movement. The
lines should join together perfectly.
If not, look at the gaps in the lines produced by the print head moving in one direction or the other, and
increase or decrease the adjustment values accordingly.
1
Set the plotter in pause mode.
2
Press +/- to increase or decrease the adjustment value. Press PRINT/PAUSE to conrm the change.
3
Press OK to accept the value and access the next adjustment stage.
Decrease (-) the adjustment value.
Increase (+) the adjustment value.
The adjustment value is correct.
+
-
OK
PRINT
PAUSE
PRINT
PAUSE