69
GERBERplotter MP Series User Manual
English
Step 3 of 5
3
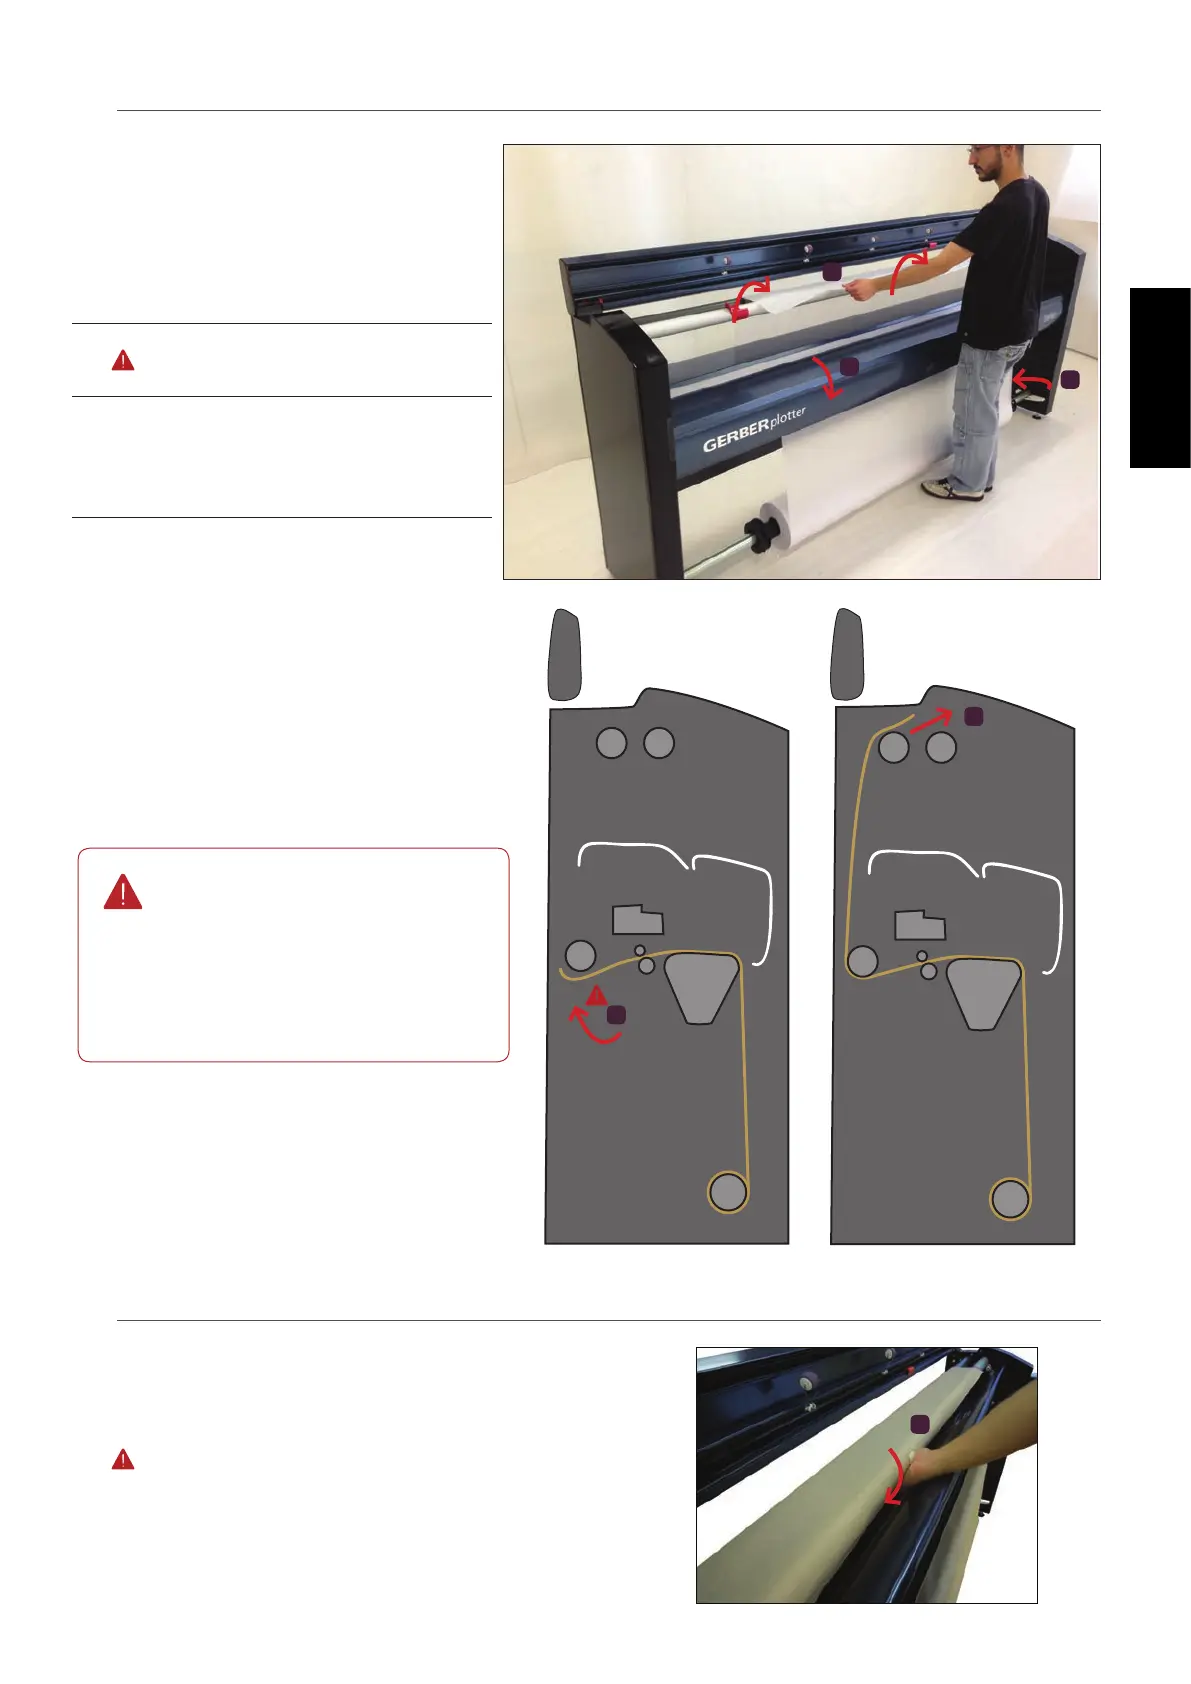
Rear path
1
Close the front cover of the printer bridge.
2
The paper must pass below the free
turning bar situated behind the bridge.
3
Put the paper from the rear of the plotter to
the front. Pass the paper between the drive
bar and the top cover and nally over the
paper take-up bar.
The following step brings the paper from the
rear of the printer bridge up to the drive bar
and slides it through to the front of the ma-
chine.
In this case it is assumed that the
paper is to be fed onto a paper
take-up bar with the inverter in
the standard position. If the in-
verter is in the inverted position,
you must bring the paper below
the paper take-up bar.
Step 4 of 5
4
Hold the paper
The paper is held in the upper part of the plotter ready to
be wound onto the paper take-up bar.
1
Put the paper to the front evenly, maintaining a
uniform tension throughout. You should have
enough paper to go over and to go to the bottom
of the paper take-up bar.
1
4
3
2
3
1