76
GERBERplotter MP Series User Manual
English
CUT modier
1
From User Manager, go to the print queue and add the
modier CUT after the job you want to remove.
2
When a print job is nished, if the next job in the print
queue is a CUT modier, a dashed line and scissors are
printed on the paper to show the position where you can cut
the paper.
User Man-
3
The next job in the print queue is printed until the dashed
line from the previous job reaches the cutting zone. The
cutting zone is between the motorized tube and the paper
take-up bar.
4
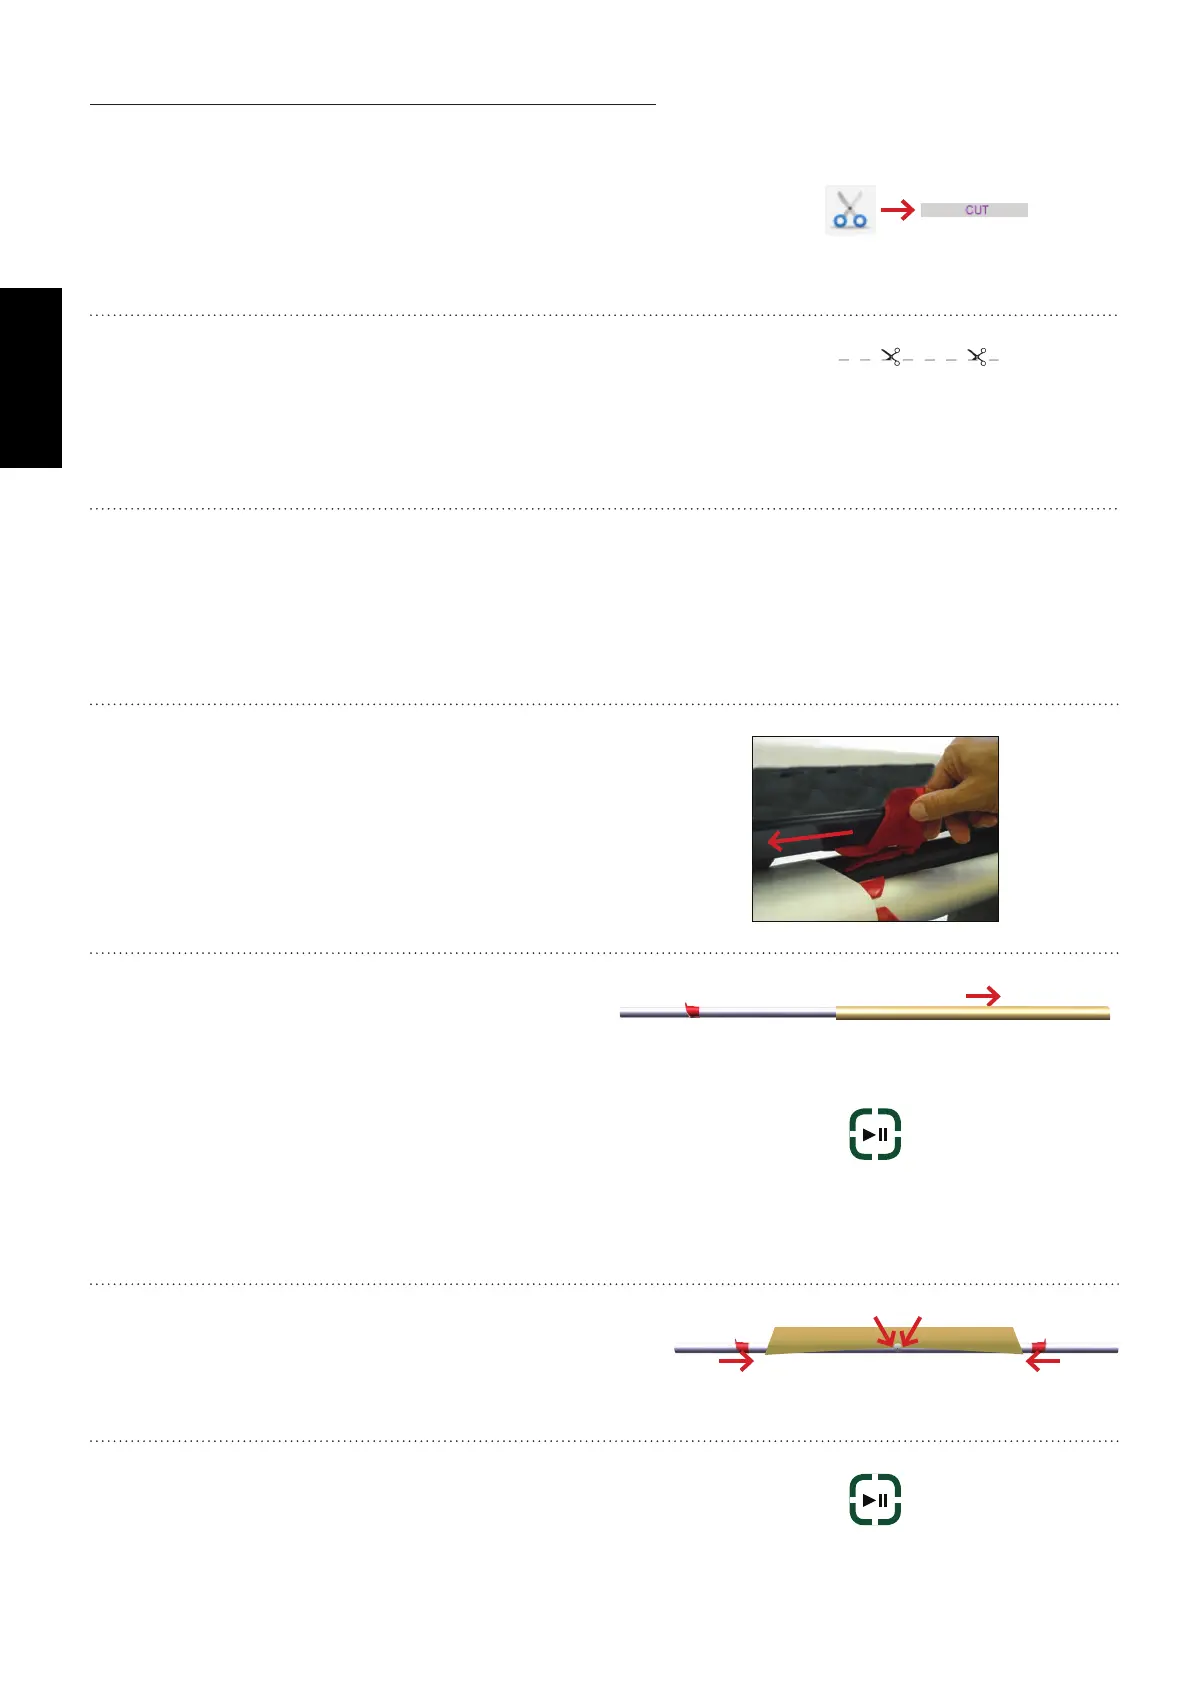
The plotter pauses printing, letting you cut and remove the
paper roll containing the nished jobs. At the same time,
the PRINT/PAUSE and STOP LEDs blink to indicating a
paused state.
5
Remove the paper and return the paper take-up bar to
its normal position. Push the PRINT/PAUSE but-
ton on the plotter keyboard, to let pending print jobs
continue printing. The paper stops automatically to let
you fasten the leading edge of the paper to the paper
take-up bar.
7
After the paper is fastened, push PRINT/PAUSE to
restart the print job.
6
When the paper stops, hold the paper using the side and
center clips.
PRINT
PAUSE
PRINT
PAUSE