© Guldmann GB/US-09/2016 • #550376_3
47
SERVICE AND REPAIR
GH3
Replacement of charger PCB
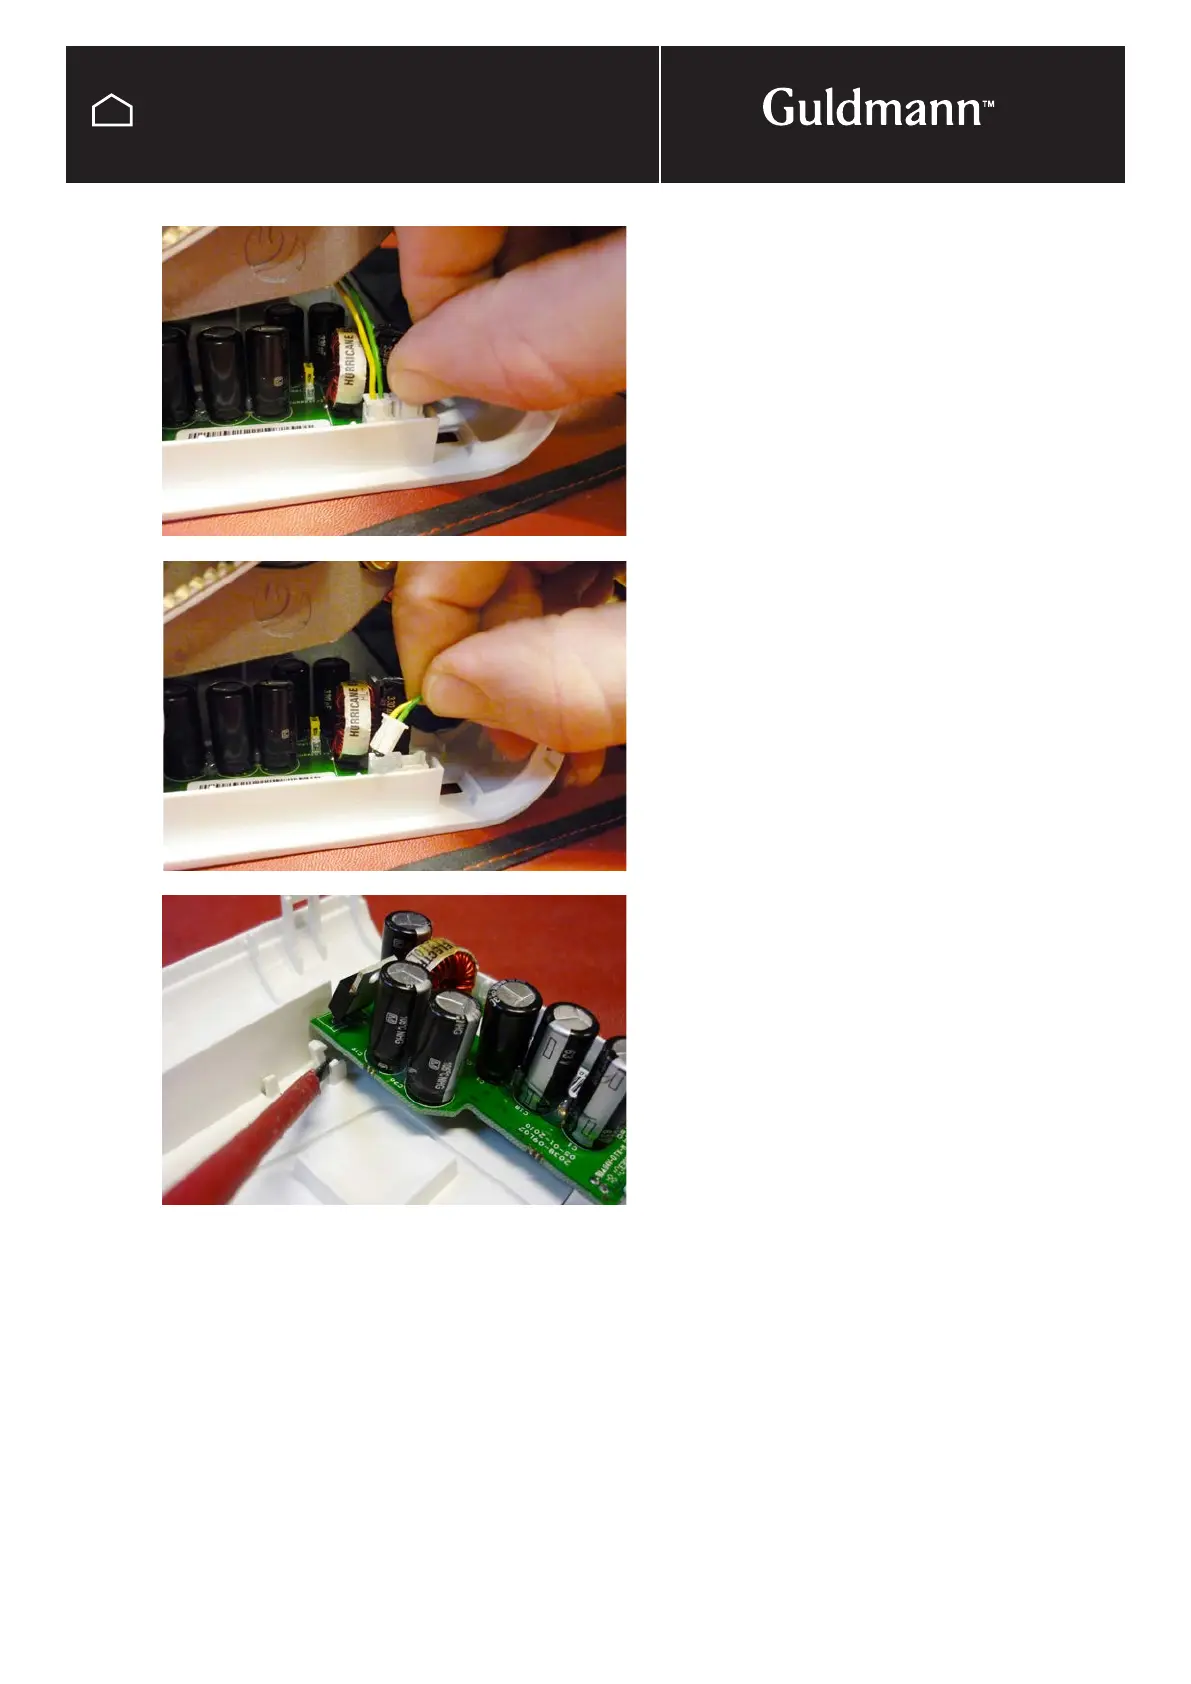
Removing the charger PCB
When changing any PCB it is important to use a ESD mat
and bracelet to protect the PCB from static electricity.
Unplug all wires to the Charge PCB and remove from top
cover by uncliping clips located on the side of the PCB.
Put the new charge PCB in place making sure that it is cor-
rectly mounted, see picture. Put all the plugs back in place.
NOTE: Remember to move the jumpers at the Charger PCB
in a Twin hoist.
NOTE:
It is important to register all PCB exchanges on the
Guldmann traceability web site.