Smartdop
®
30EX Vascular Testing Instructions
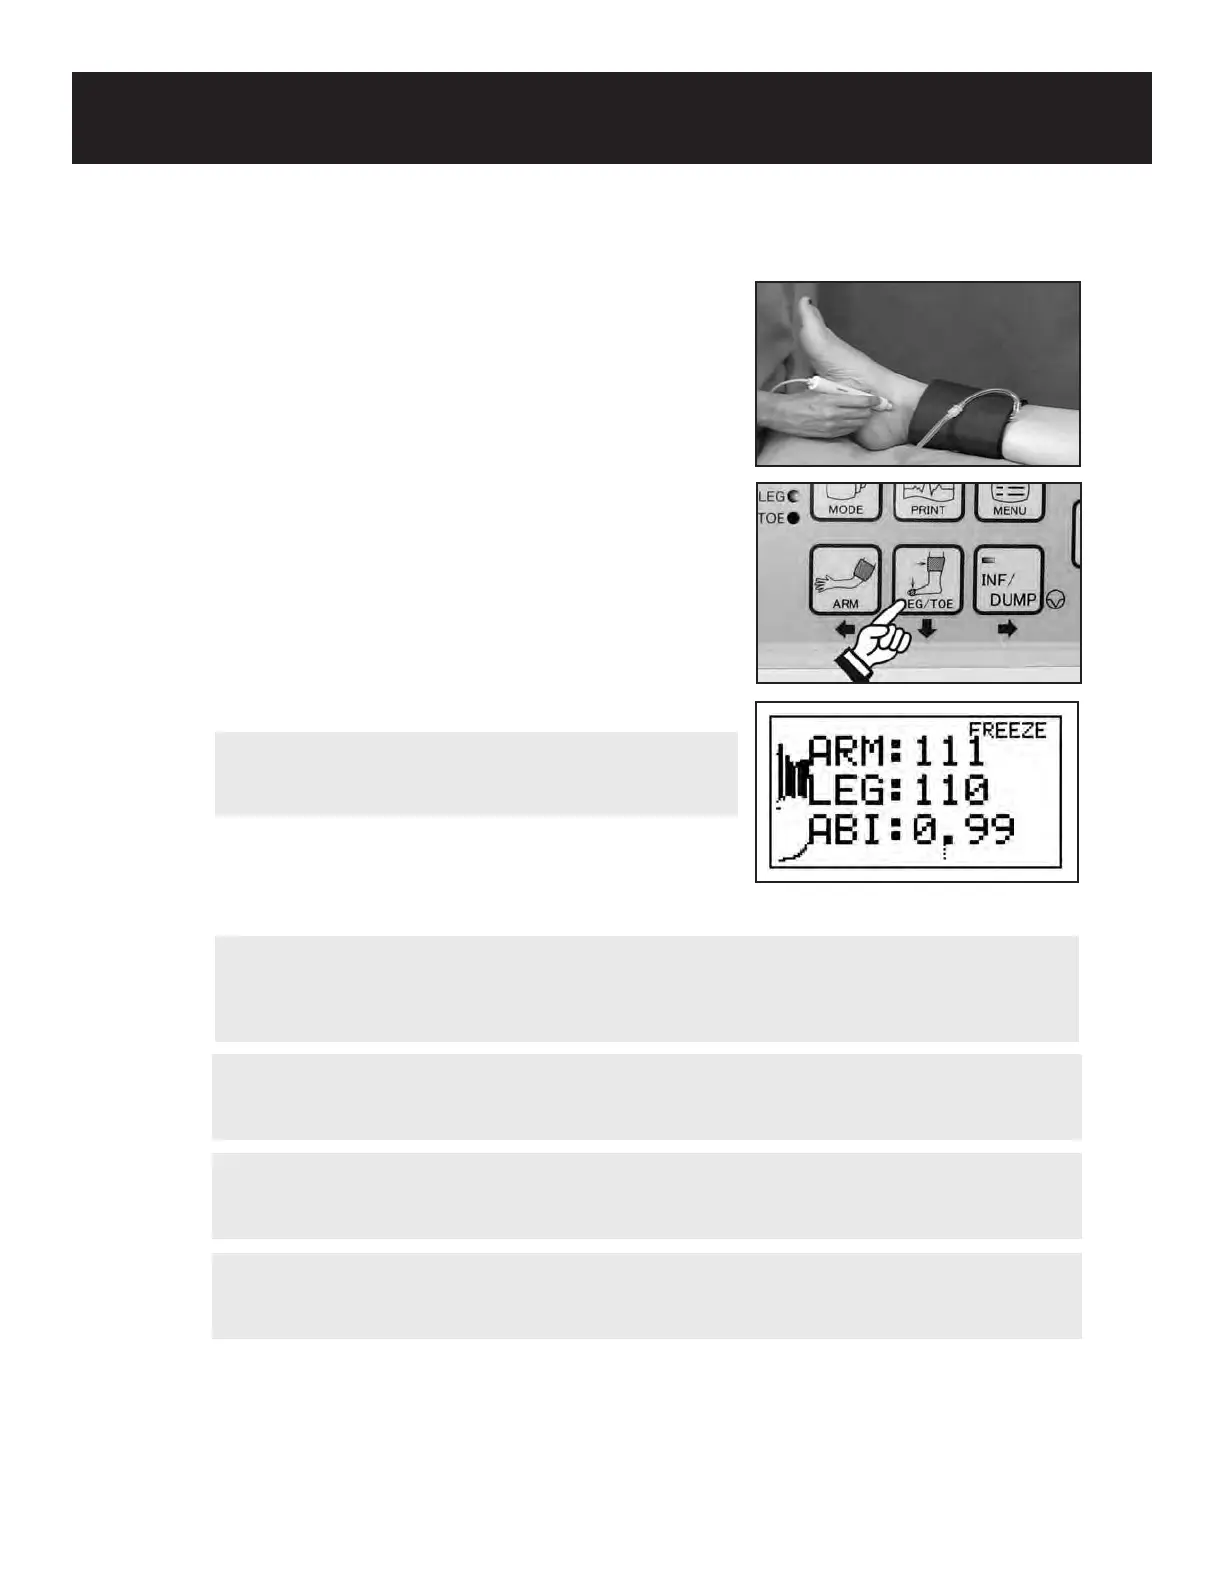
3. Apply ultrasound gel to the posterior tibial artery and
place the Doppler probe on the skin.
Hold the probe on the posterior tibial artery at a 45 to
60 degree angle against ow (see gure C). Adjust
the probe angle until best sounds are heard and a
steady waveform appears on the LCD.
4. Once the waveform is steady and the INF/DUMP LED
begins to blink, press the INF/DUMP or probe button
to activate the automatic cu inator. The Smartdop
®
30EX will automatically inate the cu past the point
of pressure cessation, then slowly deate the cu until
waveform motion returns.
5. Press the LEG/TOE button to store the ankle
pressure. The Smartdop
®
30EX will automatically
calculate the ABI and display the results.
7. If you would like to save the data in memory, see 5-3-
8 “MEMORY-STORE” for details.
8. Press the INF/DUMP button to return to the monitoring screen and repeat on the other leg.
1. ANKLE BRACHIAL INDEX (ABI) (Cont.)
52
NOTE
Pressing the ARM or LEG/TOE button longer than 2
seconds will clear the pressure memory.
NOTE
If you would like to print the pressure results, before pressing INF/DUMP to return to the
monitoring screen, press the PRINT button less than 1 second to print numerical data
only or longer than 2 seconds to print waveform and numerical data.
WARNING
In case of an emergency or unexpected event during automatic ination, press the INF/
DUMP button to dump the cu pressure.
NOTE
If an error message is displayed during the ination/deation process, press any button
other than the probe button to delete the error message and go back to step 4.
WARNING
If any abnormality is found on the unit or patient, discontinue use in a manner safe to the
patient.