64
25.Check the tension of the drive chain in the chain’s middle and use
the chain tensioner if necessary to correct the amount of play.
✎ The drive chain can have about 1 cm of play upward or downward.
✓ The ash removal motor has been installed.
C
ONNECTING THE ASH REMOVAL
MOTOR
26.Open the cable duct (1).
27.Lay the cable of the ash removal motor in the cable duct (1) to the
circuit boards.
28.Connect the plug of the ash removal motor to the board.
✎ See the enclosed circuit diagram “HDG Compatronic”.
✓ The ash removal motor is connected.
A
TTACHING THE ASH REMOVAL
DOOR
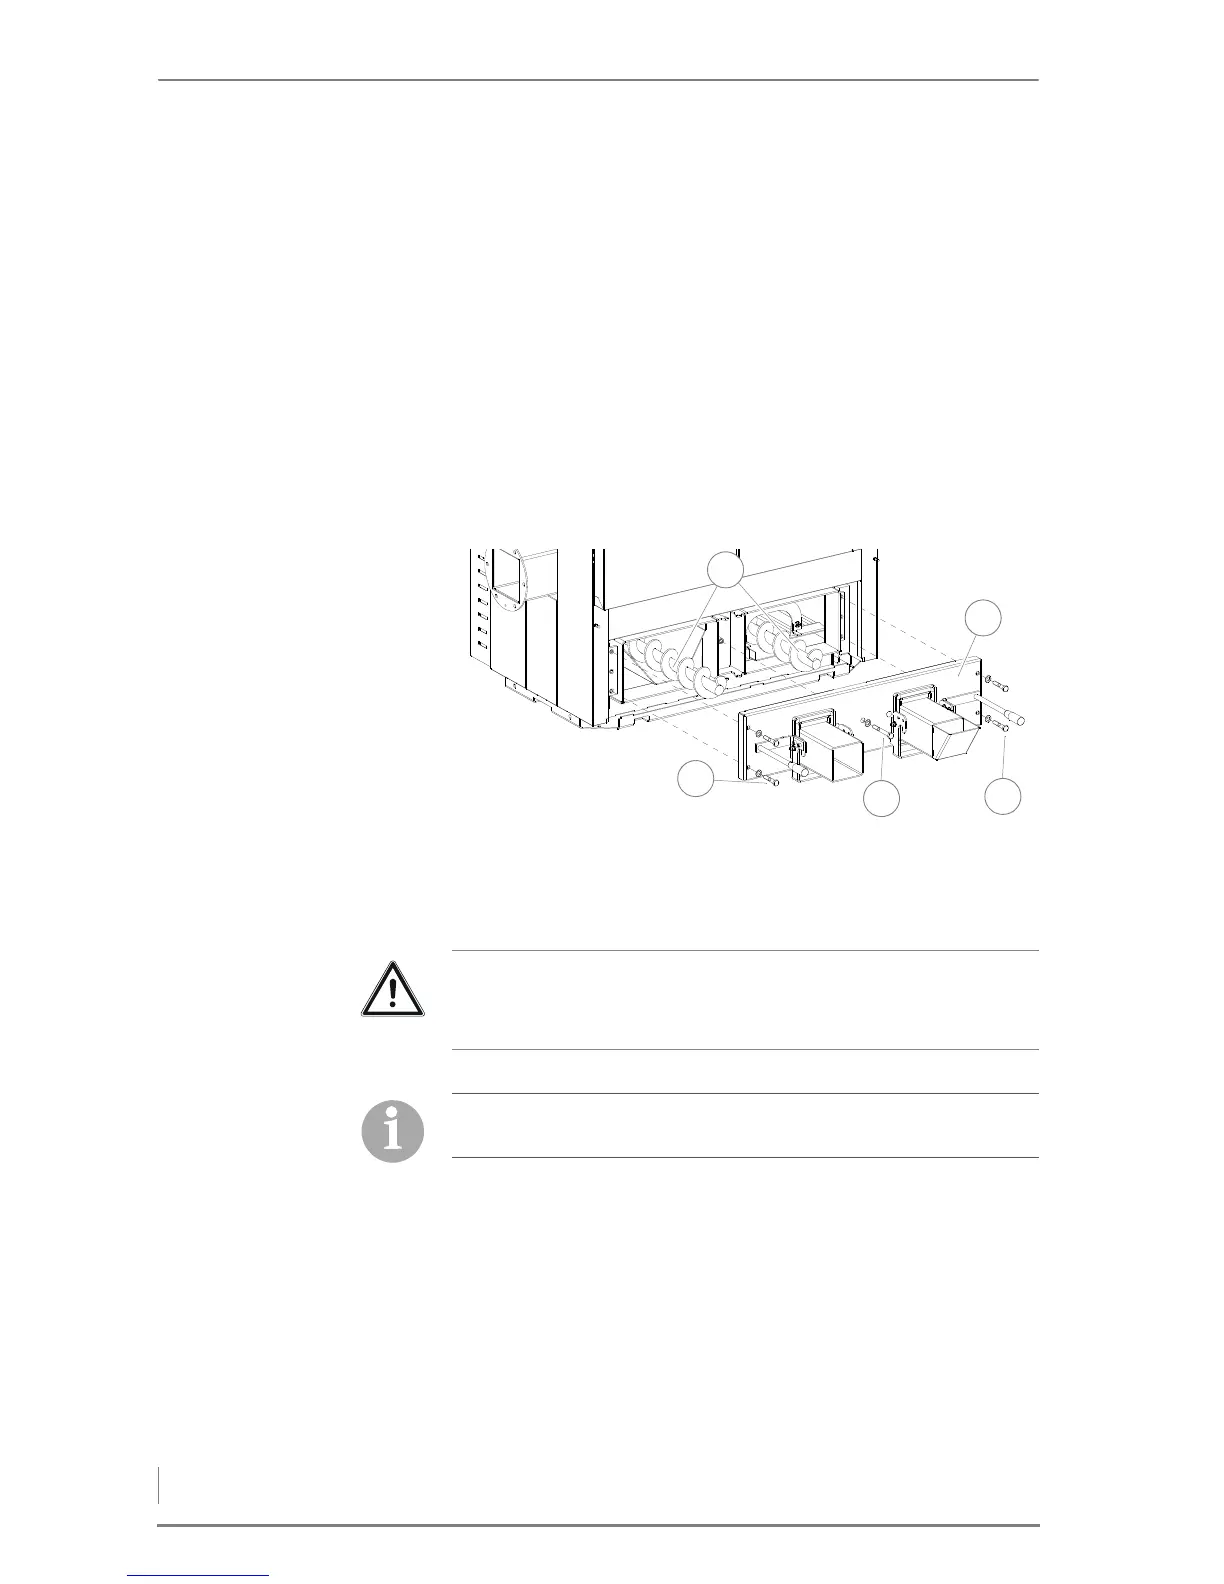
29.Slide the ash removal door (5) onto the two ash removal
augers (1).
30.Bolt on the ash removal door (5) with the long screw (3) and four
short 19 mm M12 short screws (2 + 4).
31.If necessary, align the ash removal augers (1) with the screws of
the ash removal door (2 + 4).
✓ The ash removal door is attached.
Figure 4/30 - Mounting the ash removal door
Important!
The two ash removal augers for the ash removal door do not come
into contact when installed.
Because of the soft seal, the screws should not be screwed in up to
the stop. Only tighten until a resistance is detected.