MDR 710 – WWL Conveyor | Maintenance Manual | 29349817 35
November 16, 2020
b. Insert the replacement roller through any O-belts that were connected to the
original roller. Attach the equivalent O-belts in the positions diagrammed in step
4.
c. Use a tool, such as a putty knife, to depress the spring-loaded axle, lower the
roller into position, aligning the axle with the hex hole in the conveyor frame.
d. At each side of the conveyor, make sure the drive roller is centered, tighten the
nuts on the axle lock(s) to 14 ft-lb to clamp the shaft.
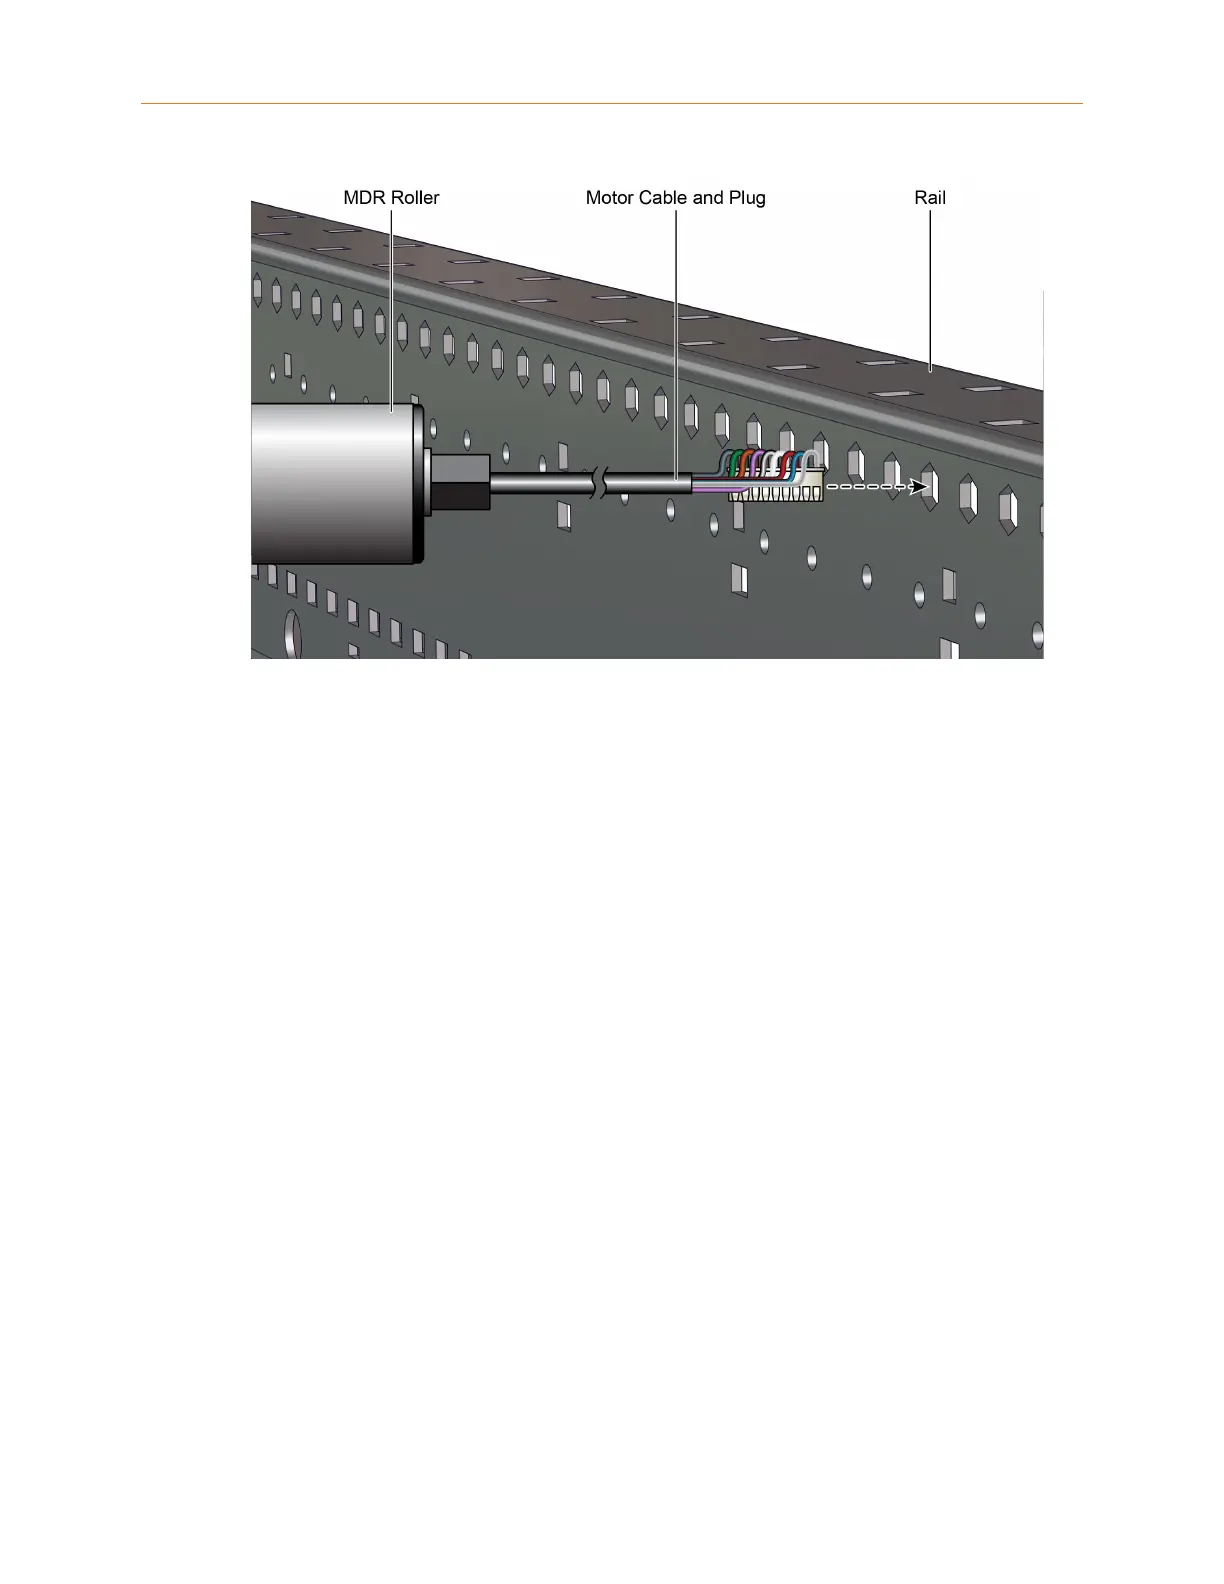
10. Reconnect the drive roller cable and power cable to the control card.
11. At the power supply, remove tag, unlock and turn on the power to the conveyor
section.
4.3.2 Carrier Roller Inspection and Replacement
Inspecting a Carrier Roller
Carrier rollers should have 1/16 to 1/8-inch end play. A bent frame or bracket may
bind the rollers. If the rollers do not rotate freely, make sure the between-frame (BF)
dimension is correct, and replace or adjust frame components as necessary. If the
roller is free in the frame but still sluggish in operation, replace the roller.