NFS2-3030 Programming Manual — P/N 52545:A 11/29/2005 41
Point Program Program
Soft Keys
TYPE: Press this soft key to scroll through the point type choices: stop at the appropriate selection.
If a new point is being added, no other field will be displayed until TYPE: is entered and the
ACCEPT soft key is pressed. At this point, the rest of the fields will appear.
FLASHSCAN CODE LABEL: Press to scroll through a list of FlashScan Codes. Stop when the
appropriate label appears (Table G.4 on page 130 for codes and descriptions). If the detector is not a
FlashScan type, choose NONE.
POINT LABEL: Press this soft key to place the cursor at this field. Type in a 20-character
maximum point label that will appear in message formats. If no entry is made, the field will default
to the point address.
EXTENDED LABEL: Press to place the cursor at this field. Type in a 12-character maximum
extended label to further define the location or nature of the point.
ZONE MAP: Displays the zones mapped to this point. During initial programming, zone map
position one for each detector is set to Z0YY, where YY represents the loop number where the
detector resides. In Figure 3.25 above, zone position one has a value of Z003 (YY = 03). The
detector in the example resides on loop 3.
To add or delete zones for this point, press this soft key to progress to the Detector Zone Map
screen.
MORE: Press this soft key to progress to the next detector point programming screen.
ACCEPT: Press to accept changes. If the user is adding a point, pressing this soft key after entering
the TYPE field will display all the other fields.
Zone Map
The Detector Zone Map screen will display when the ZONE MAP soft key is pressed at the Detector
Point Programming screen.
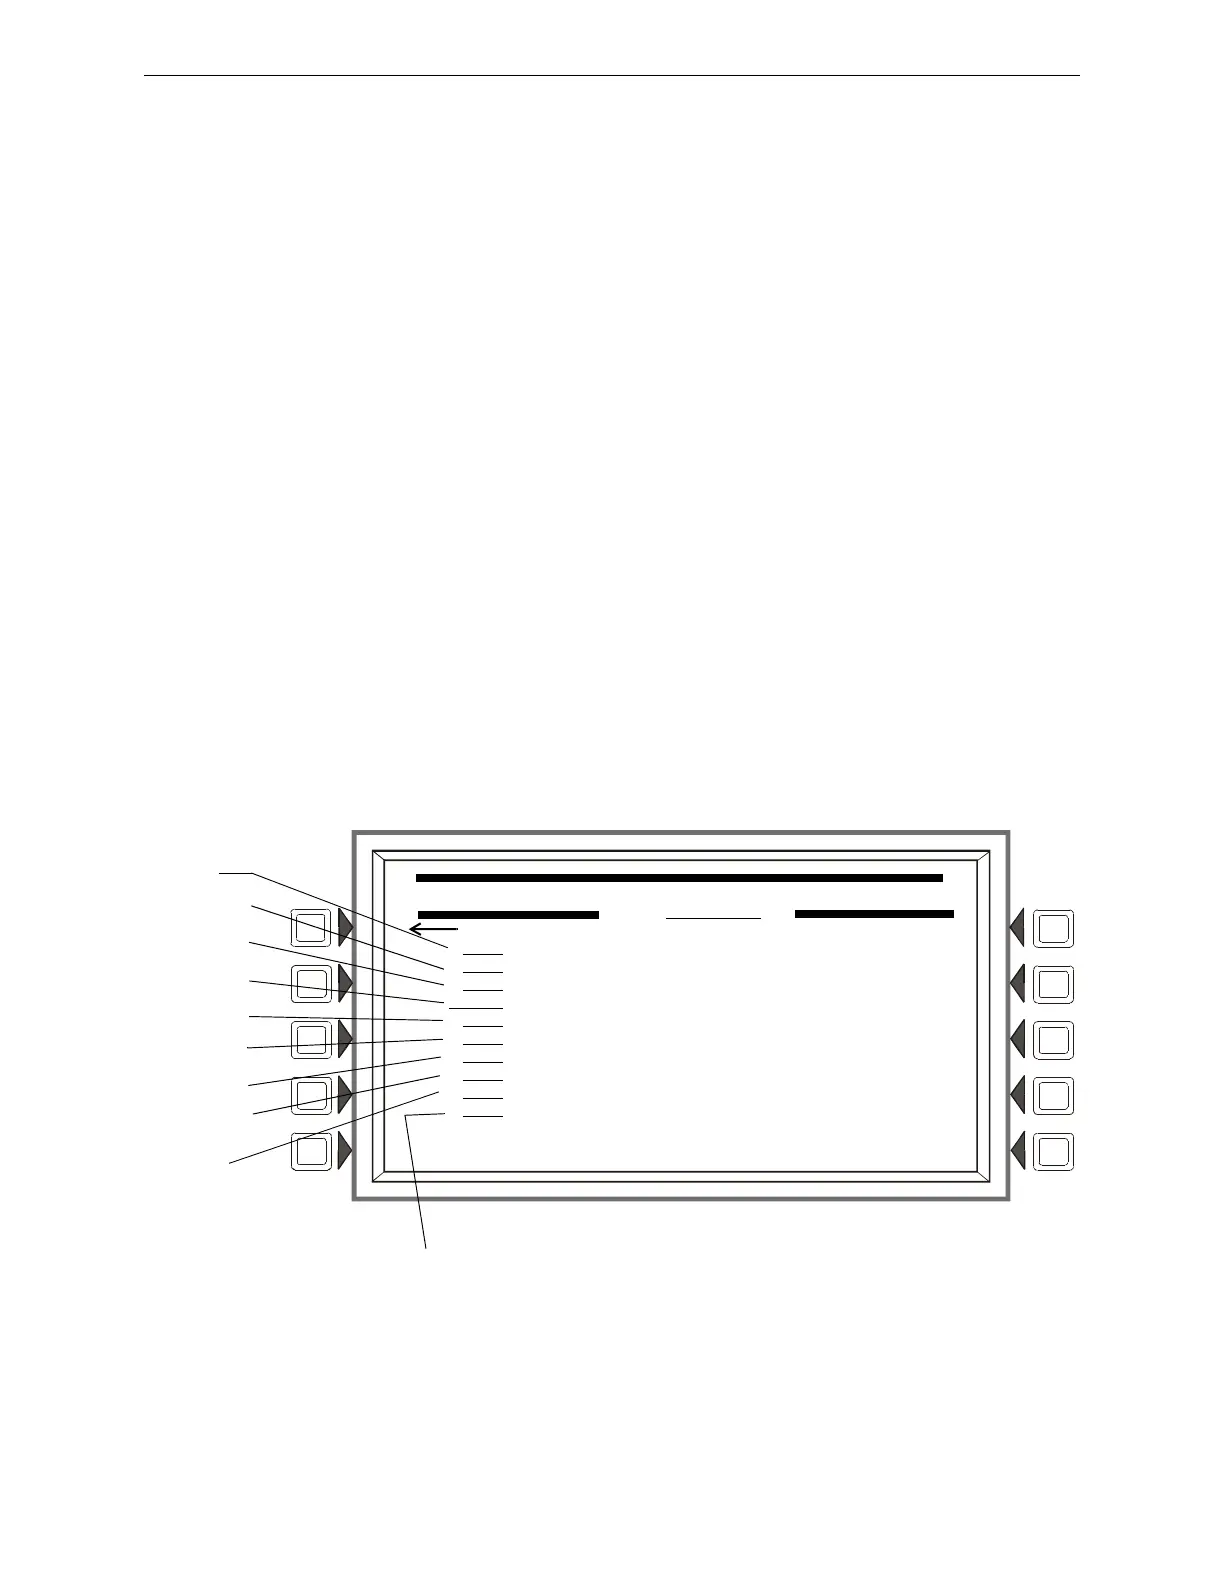
Figure 3.26 Zone Map (Detector Point) Screen
The point address will appear in line 3 of the screen.
Refer to Appendix E, “CBE: Zones and Equations”, on page 119, and Appendix C, “Special Zone
Outputs”, on page 107 in this manual for more information about zones and how they apply to
Control-By-Event.
Zone Map
Position
2
3
4
5
6
7
8
DETECTOR ZONE MAP
L03D123
ZONE SELECTION
Z003, (ZONE)
Z187, (ZONE)
Z234
, (ZONE)
ZXXX (UNMAPPED)
ZXXX (UNMAPPED)
ZXXX (UNMAPPED)
ZXXX (UNMAPPED)
ZXXX
(UNMAPPED)
ZXXX (UNMAPPED) ACCEPT
ZXXX (UNMAPPED)
BACK
Zone Map Position 10 - Use for
detectors set to Prealarm, Action.
Zone Map
Position 9 - Use
to activate
sounder/relay-
bases.
Zone Map
Position 1 -
Use to link
zone label
to detector,
and for
group zone
disable.
 Loading...