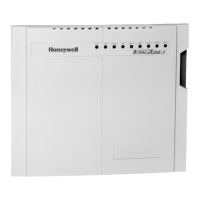
Vigilon 4/6 loop Panels
These procedures assume the respective 1st fix assembly of the Vigilon 4 loop (VIG1-24) / 6 loop
(VIG1-72) panel is already installed. The 1st fix backbox assembly may be surface or flush
mounted.
¨
The second fix parts must now be installed before powering up the control panel.
Second fix parts
¨
Check that you have the second fix parts, which are supplied with the panel:
Parts
EN Vigilon 4 loop
Control panel
(VIG1-24)
EN Vigilon 6 loop
Control panel
(VIG1-72)
Inner door assembly
11
Battery Pack (2 x 12V 21Ah)
12
Battery box
1
Outer door assembly
11
Main Control Card
11
Loop card
1
(Option of
up to 4 maximum)
1
(option of
up to 6 maximum)
Spares pack (see installation
manual for pack content)
1pack 1pack
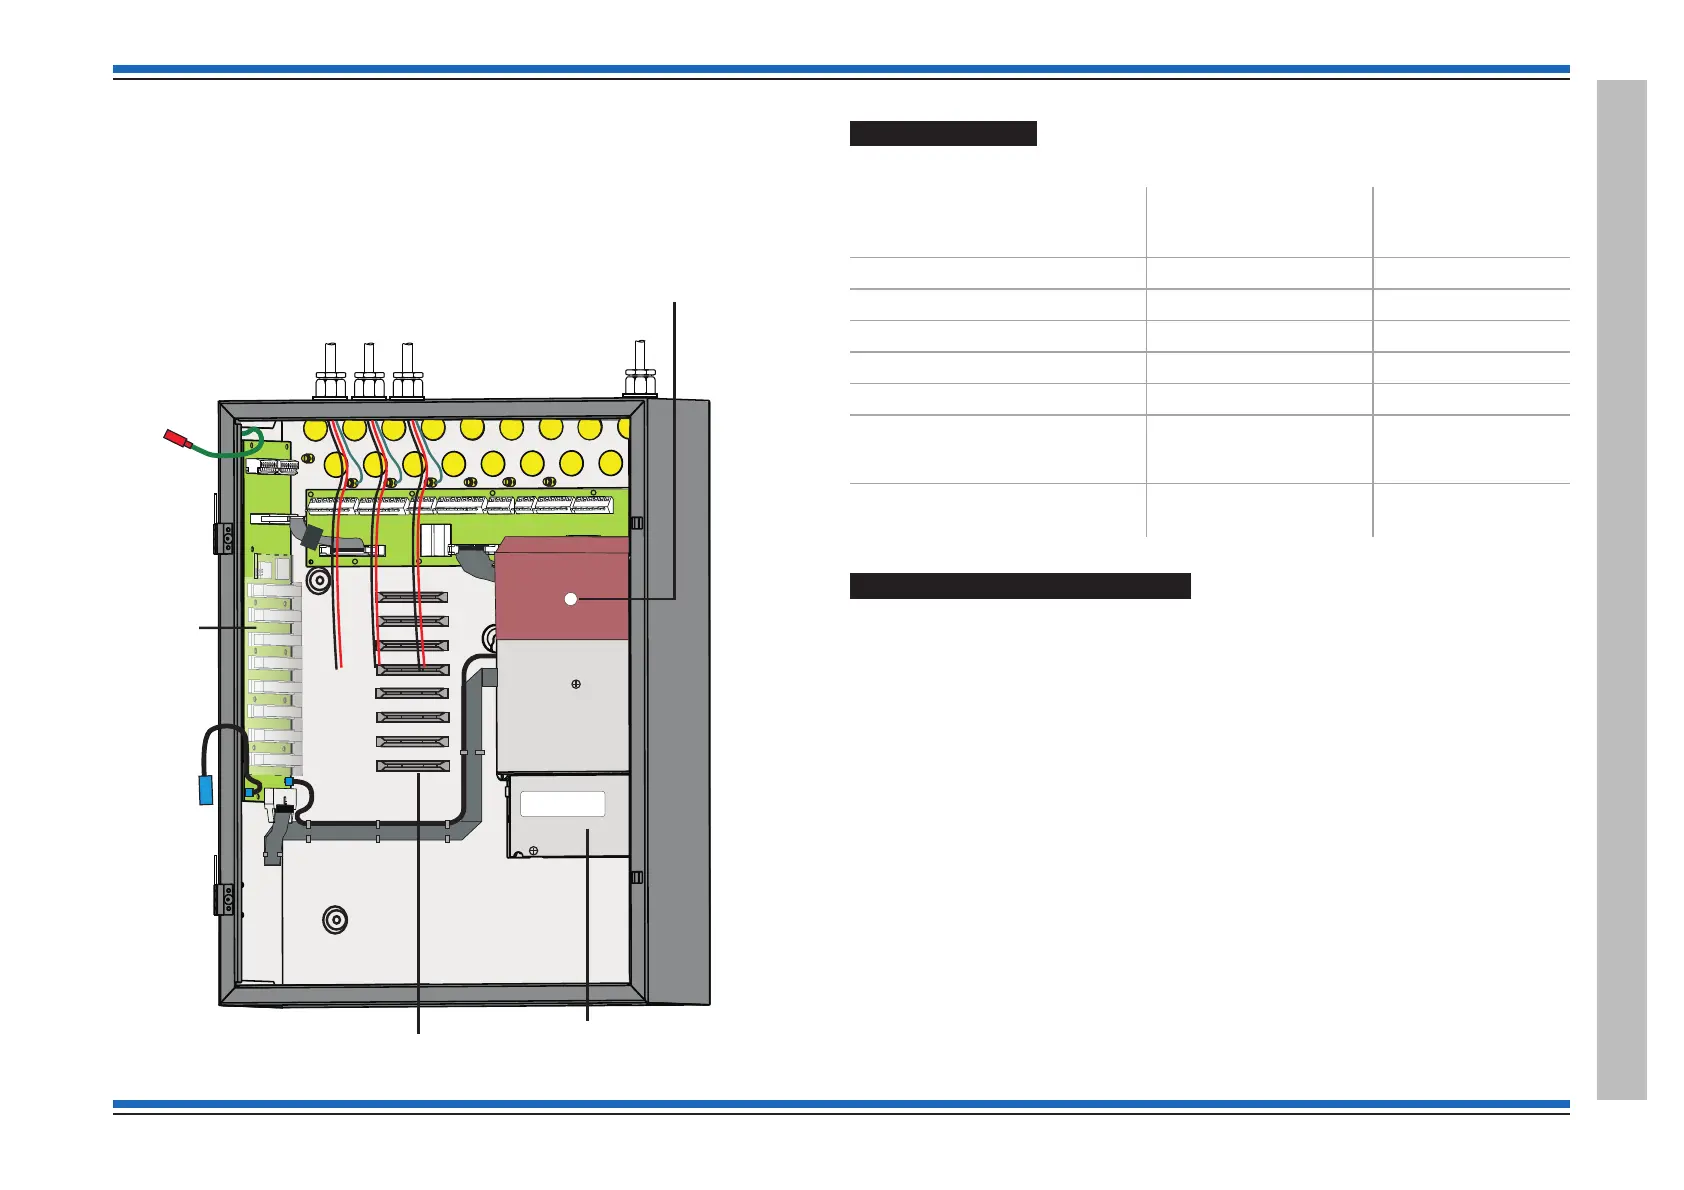
Remove the protective covers
¨
Remove the cardboard protection cover fitted over the PSU. The cover is held in by a
retaining clip.
¨
Remove the transparent protection cover fitted over the backplane held together by an
elastic band.
4188-856_issue 7_07/15_Generic Vigilon (Compact + VA) Comms. 23
Vigilon 4/6 loops & Compact (VA) panels & network nodes
Vigilon 4/6 loop Panels
Earth to
inner door
Hinge
points for
inner and
outer doors
PSU
Hinge
points for
inner and
outer doors
Cardboard cover
over PSU
Cables of external circuits
Mains cable
Printer 0V
Transparent
cover over
backplane
Card guides
 Loading...