+$%&
6
HP
PrecisionScan Pro
User’s Guide
107
Saving scanned images
Book Contents Index
➮
➮
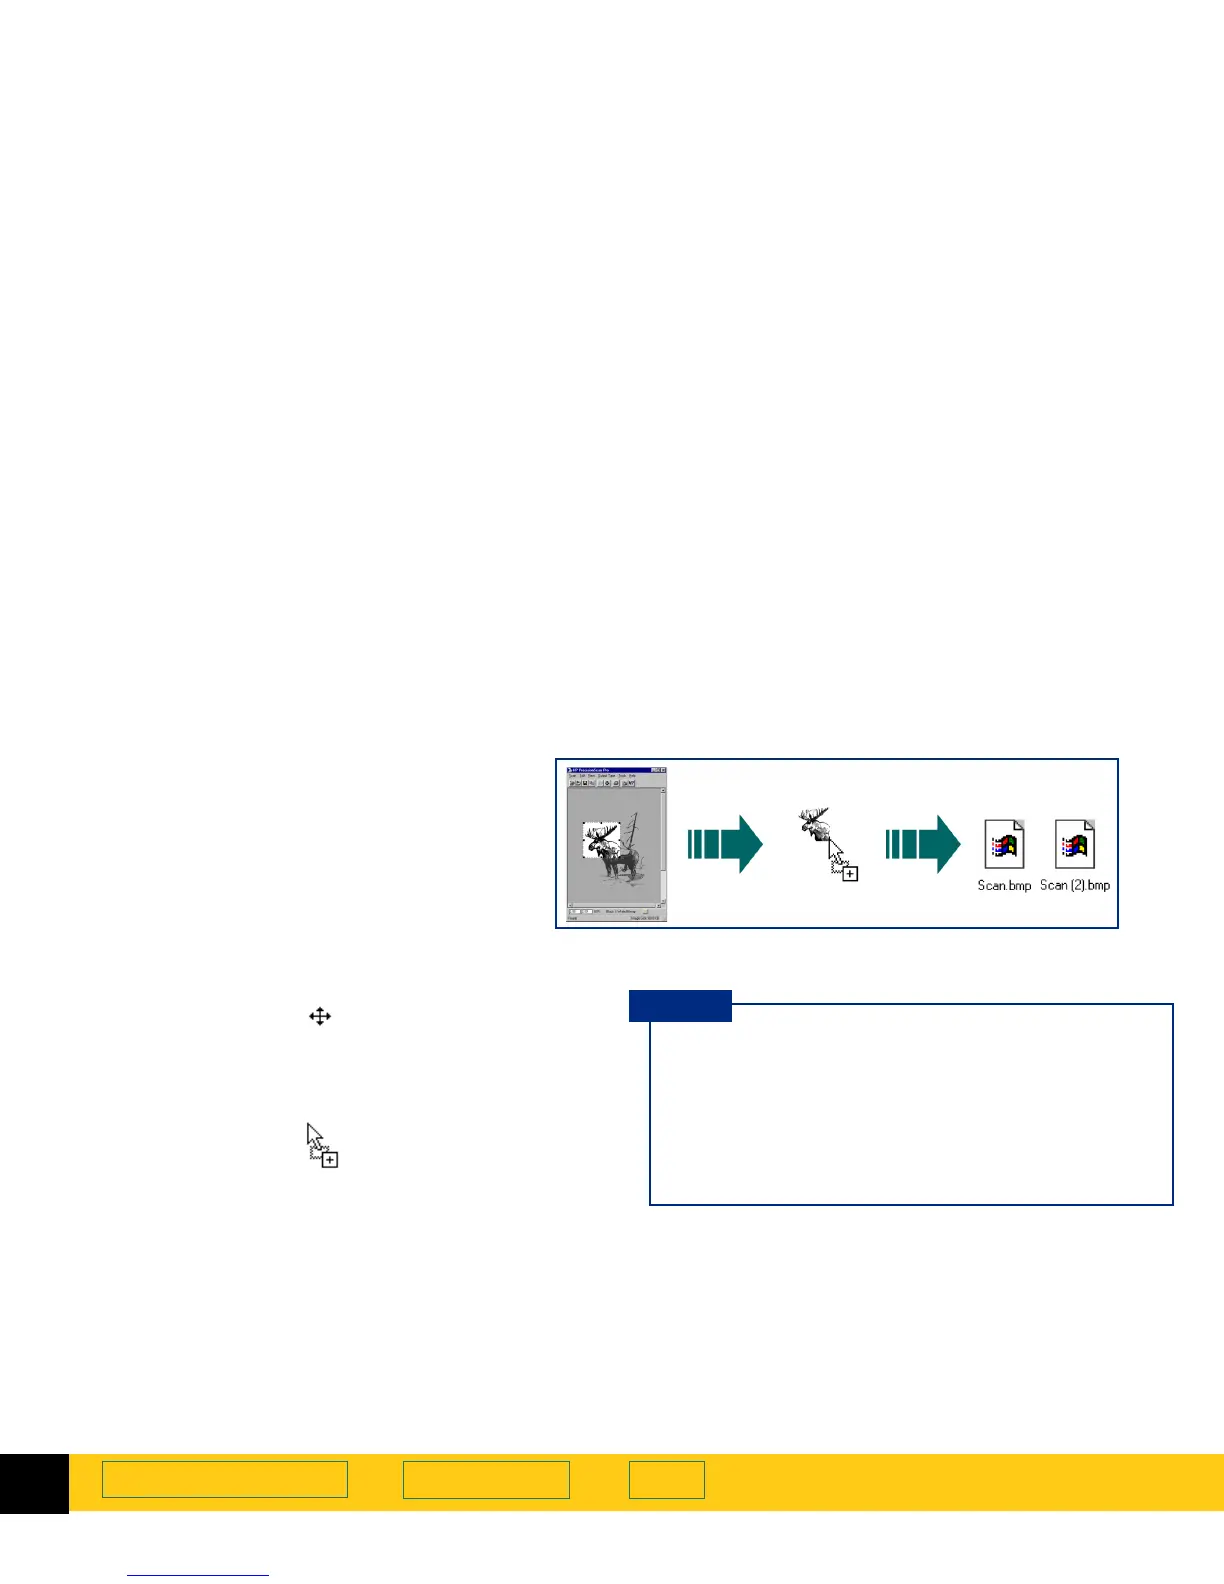
Drag-and-drop to the Desktop
1
In the scanning software window, position the
pointer inside the selection area.
The pointer changes to .
2
Hold the
Ctrl
key down, press the left mouse button,
then drag the selection area to the
Desktop
or to a
folder in the Windows
Explorer
.
The pointer changes to .
3
Release the mouse button.
A final scan of the image is performed.
A bitmap file named
Scan.bmp
is created on the
Desktop
or in the folder in the Windows
Explorer
.
You can create a bitmap file of the image in
the selection area by dragging the selection
area to the
Desktop
or to a folder in the
Windows
Explorer
.
The file name for each new bitmap file after
the first one created this way includes a
number in parentheses.
■
Be sure to keep the original in the same place on
the scanner glass until the final scan of the image
is completed.
■
If you are running
Internet Explorer
, only one
bitmap file named
Scan.bmp
can exist in a folder.
■
Rename the
Scan.bmp
file with a name that
reflects what image is in the file.
TIP