Installing the 100 Mb Ethernet Switch 2510–24 into a Rack
NOTE:
There are no rails associated with this switch.
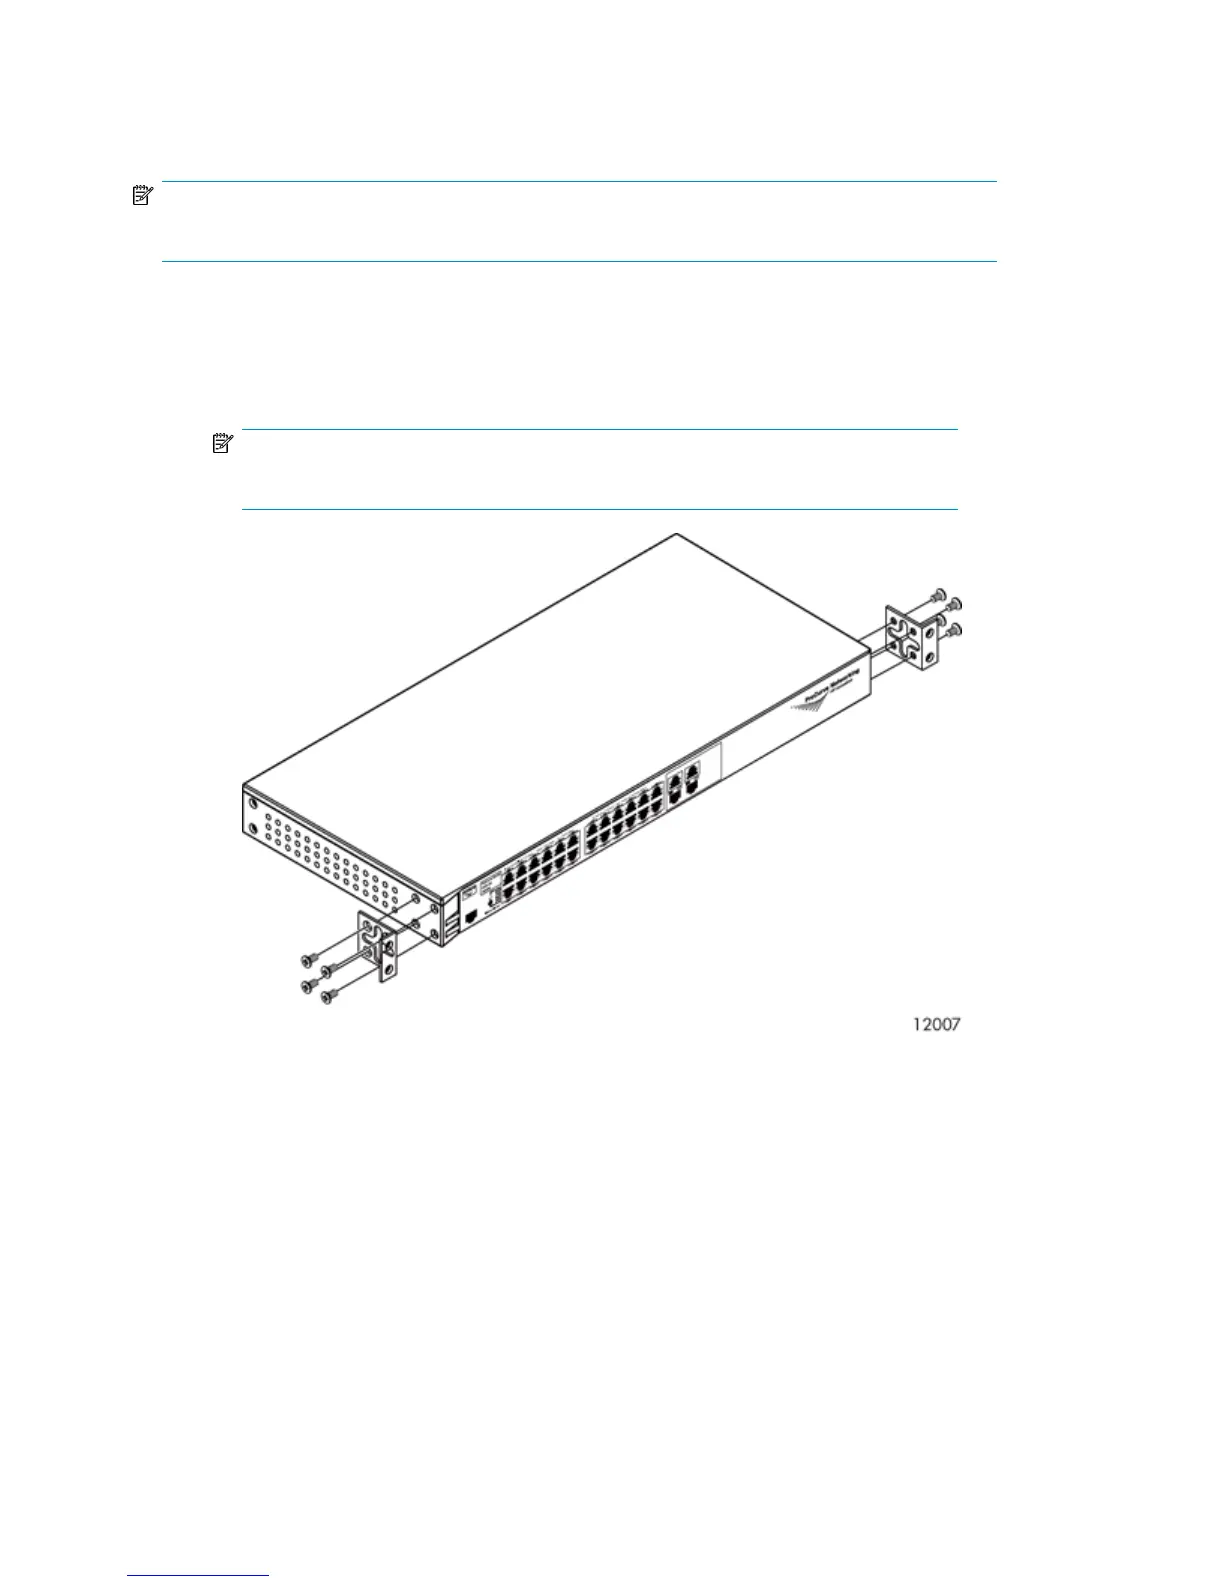
1. If the metal mounting brackets are not attached to the switch, attach them as follows:
a. Align the brackets so that the four screw holes are against the side of the switch. The side
of the bracket with two screw holes extends from the switch and aligns with the front of the
bezel.
NOTE:
When installed, the switch sits flush with Ethernet Switch 2810–24G.
b. Adjust alignment so that the holes in the side of the mounting bracket line up with the holes
in the switch.
c. Use a Phillips (cross-head) screwdriver and the eight M4 screws (included) to attach the
mounting brackets to the switch.
d. Attach cap nuts to the vertical posts where the mounting brackets attach to the rack.
2. On each side of the switch, secure the mounting bracket to the vertical posts with a Phillips screw.
3. Attach a power cable to the switch's power supply.
4. Plug the power cable into an AC power source. If possible, connect the power supply to a
separate power source than that used for Ethernet Switch 2810–24G to provide redundancy.
5. Attach a power cable to the switch's power supply.
6. Attach a 1U cover plate to the front of the rack.
Hardware Installation24