scale: 1/4" = 1"
Scale:
3/8" = 1"
scale: 1/4" = 1"
25188a
2
1 43
7
5
8
9
6
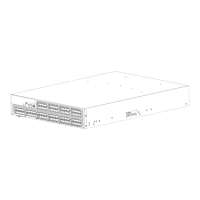
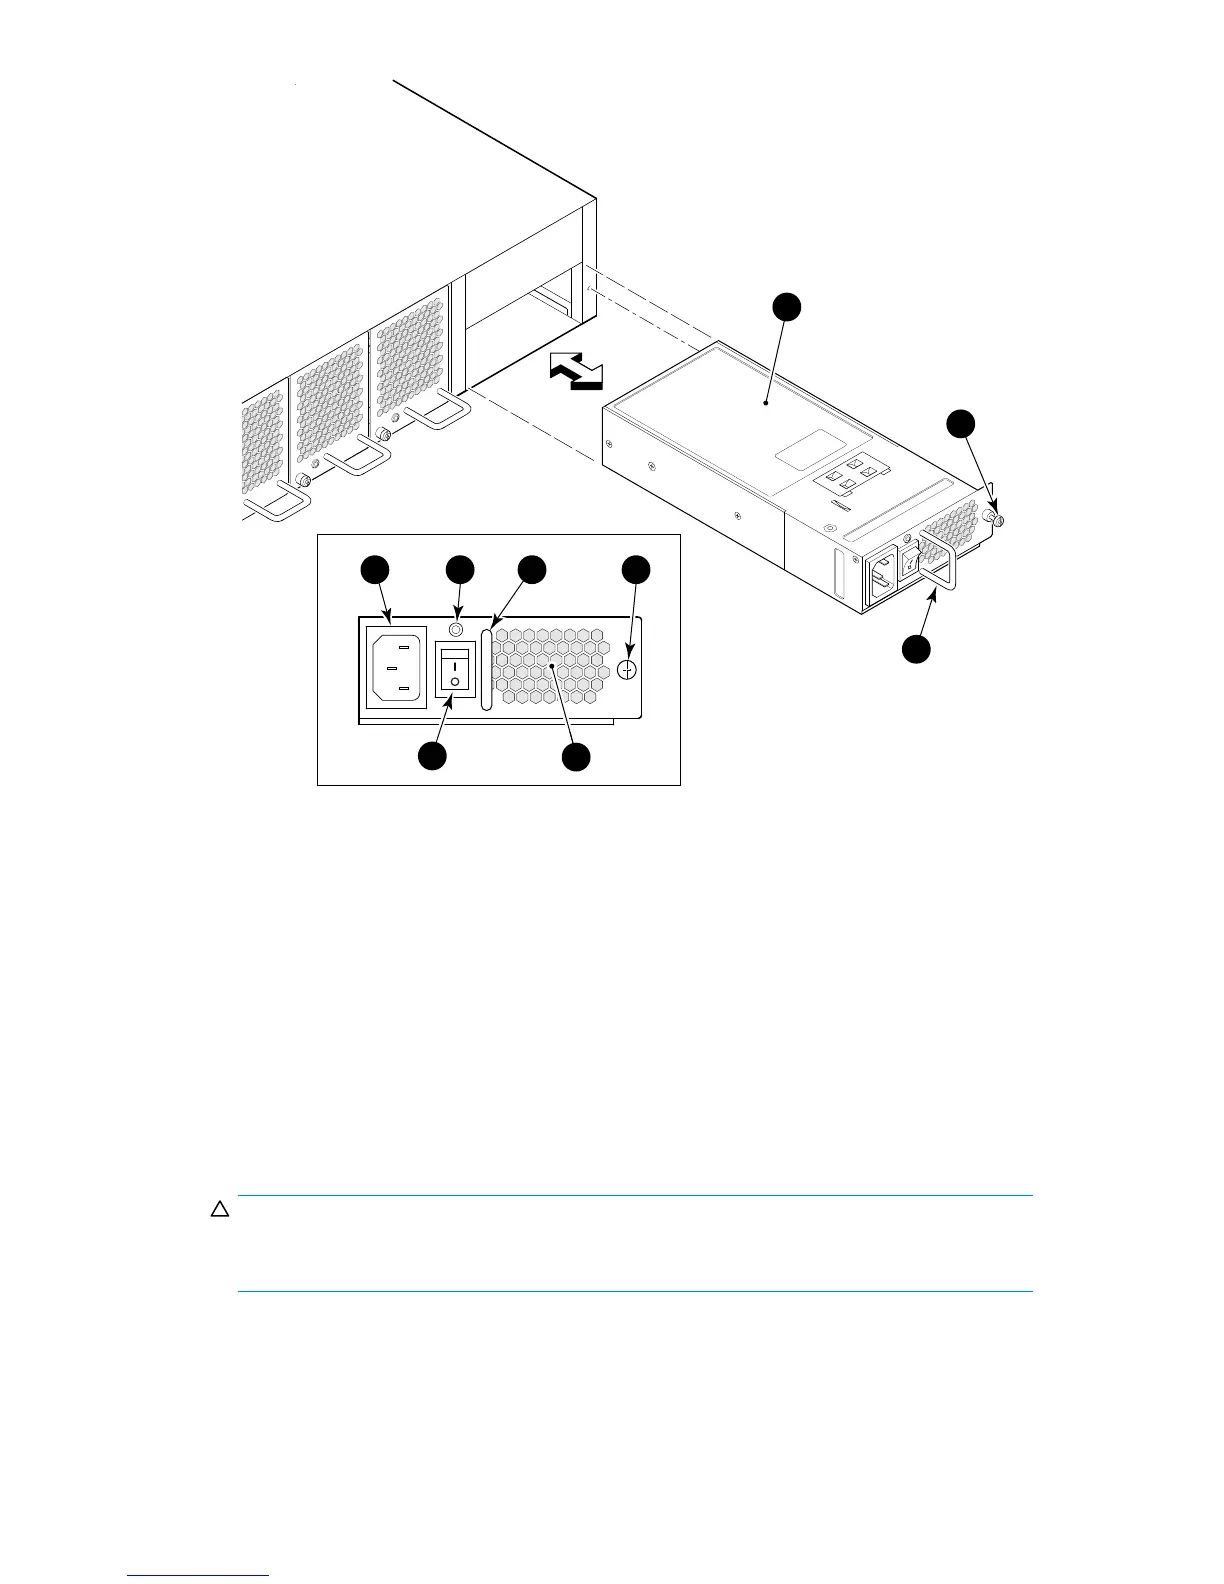
1. AC power receptacle
2. Status L ED
3. Handle (inset)
4. Captive screw (inset)
5. AC power switch 6. Power supply
7. Power s up p ly
8. Captive screw
9. Han
dle
Figure 27 Installing a power supply in the 8/80 SAN Switch
4. Using a Phillips screwdriver, unscrew the captive screw on the power supp ly you are replacing.
5. Remove the power supply from the chassis by pulling its hand le out and away from the chassis.
6. Orient the new power supply as shown in Figure 27,withtheACpowerreceptacleontheleft.
7. Gently push the power supply into the chassis until it is firmly seated.
CAUTION:
Do not force the installation. If the power supply does not slide in easily, m ake sure that
it is correctly oriented before continuing.
8. Secure the power supply to the chassis by tightening the captive screw.
9. Plug the power cord into the power supply and then press the AC power switch to turn it on.
10. Verify that the LED on the new power supply d isplays a steady green light while the switch is
operating. If the LED is not green, make sure that the p ower supply is firmly seated.
8Gb SAN Switch hardware reference manual
61
 Loading...