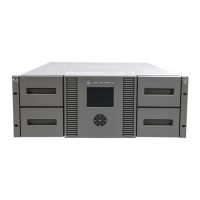
3. By using Previous or Next, you can select from the following information screens:
• Drive activity
• Library status
• Drives status
• Fan status
The second line of the screen will display one of the following:
• Good — the component is operating normally.
• Warning — the component might have an issue that should be addressed. The device is
functional.
• Critical — the component has an error condition that should be addressed. The device may
not be fully functional.
• Failed — the component has a known failure and should be replaced.
Network information (Status/Information > Network Information)
To access network settings for the device:
1. From the Home screen, press Previous or Next until the screen displays Status/Information. Press
Enter to select.
2. Press Previous or Next until the screen displays Network Information. Press Enter to select.
3. Press Previous or Next to access the following information:
• IPv4 Network Enabled or Disabled
• IPv6 Network Enabled or Disabled
• Host Name
• Domain Name
• MAC Address
4. For IPv4 Network or IPv6 Network, press Enter and then use Previous or Next to access the
network addresses and configuration.
Configuration
The Configuration menu provides access to the following configuration functions:
• “Configuring logical libraries (Status/Information > Set Logical Libraries)” on page 113
• “Changing the administrator password (Configuration > Change Admin Password)” on page 113
• “Setting the number of reserved slots (Configuration > Set Reserved Slot Count)” on page 114
• “Configuring the mailslot (Configuration > Configure Mailslot)” on page 114
• “Bar code reporting format (Configuration > Barcode Format Reporting)” on page 114
• “Changing the SCSI address — parallel SCSI devices (Configuration > Change Drive)” on page 115
• “Changing the drive configuration — Fibre Channel devices (Configuration > Change
Drive)” on page 115
• “Setting the master drive (Configuration > Set Master Drive)” on page 116
• “Setting behaviors (Configuration > Library Behavior)” on page 116
• “Setting the date and time (Configuration > Library Date/Time)” on page 118
• “Configuring network settings (Configuration > Configure Network Settings)” on page 118
• “Configuring automatic cleaning (Configuration > Configure Auto Cleaning)” on page 119
• “Restoring factory defaults (Configuration > Restore Defaults)” on page 120
Operating the Tape Library112
 Loading...
