1. Locate an appropriate vacant drive bay on the back of the Library.
• MSL2024: The first tape drive should be installed in the bottom drive bay. If the first tape
drive is a half-height tape drive, you can install an additional half-height tape drive in the top
bay.
• MSL4048: The first tape drive should be installed in the bottom drive bay. Install each addi-
tional tape drive in the drive bay directly above the existing tape drives. If you leave a space
and later add a tape drive in the space, the new tape drive will be assigned the next higher
drive number, leaving the tape drives numbered out of order. If the settings are restored to
the factory defaults or the Library is power-cycled, the drives will be renumbered and you
might need to update the configuration of your backup servers.
NOTE:
The Library will not operate with a full-height tape drive installed in the second and third
half-height drive bays. Install a full-height tape drive either in the bottom two drive bays or
the top two drive bays.
NOTE:
If you plan to partition the Library into two logical libraries, the second tape drive must be
installed in the third half-height drive bay. For tape drive locations for two logical libraries,
see Table 14 on page 30.
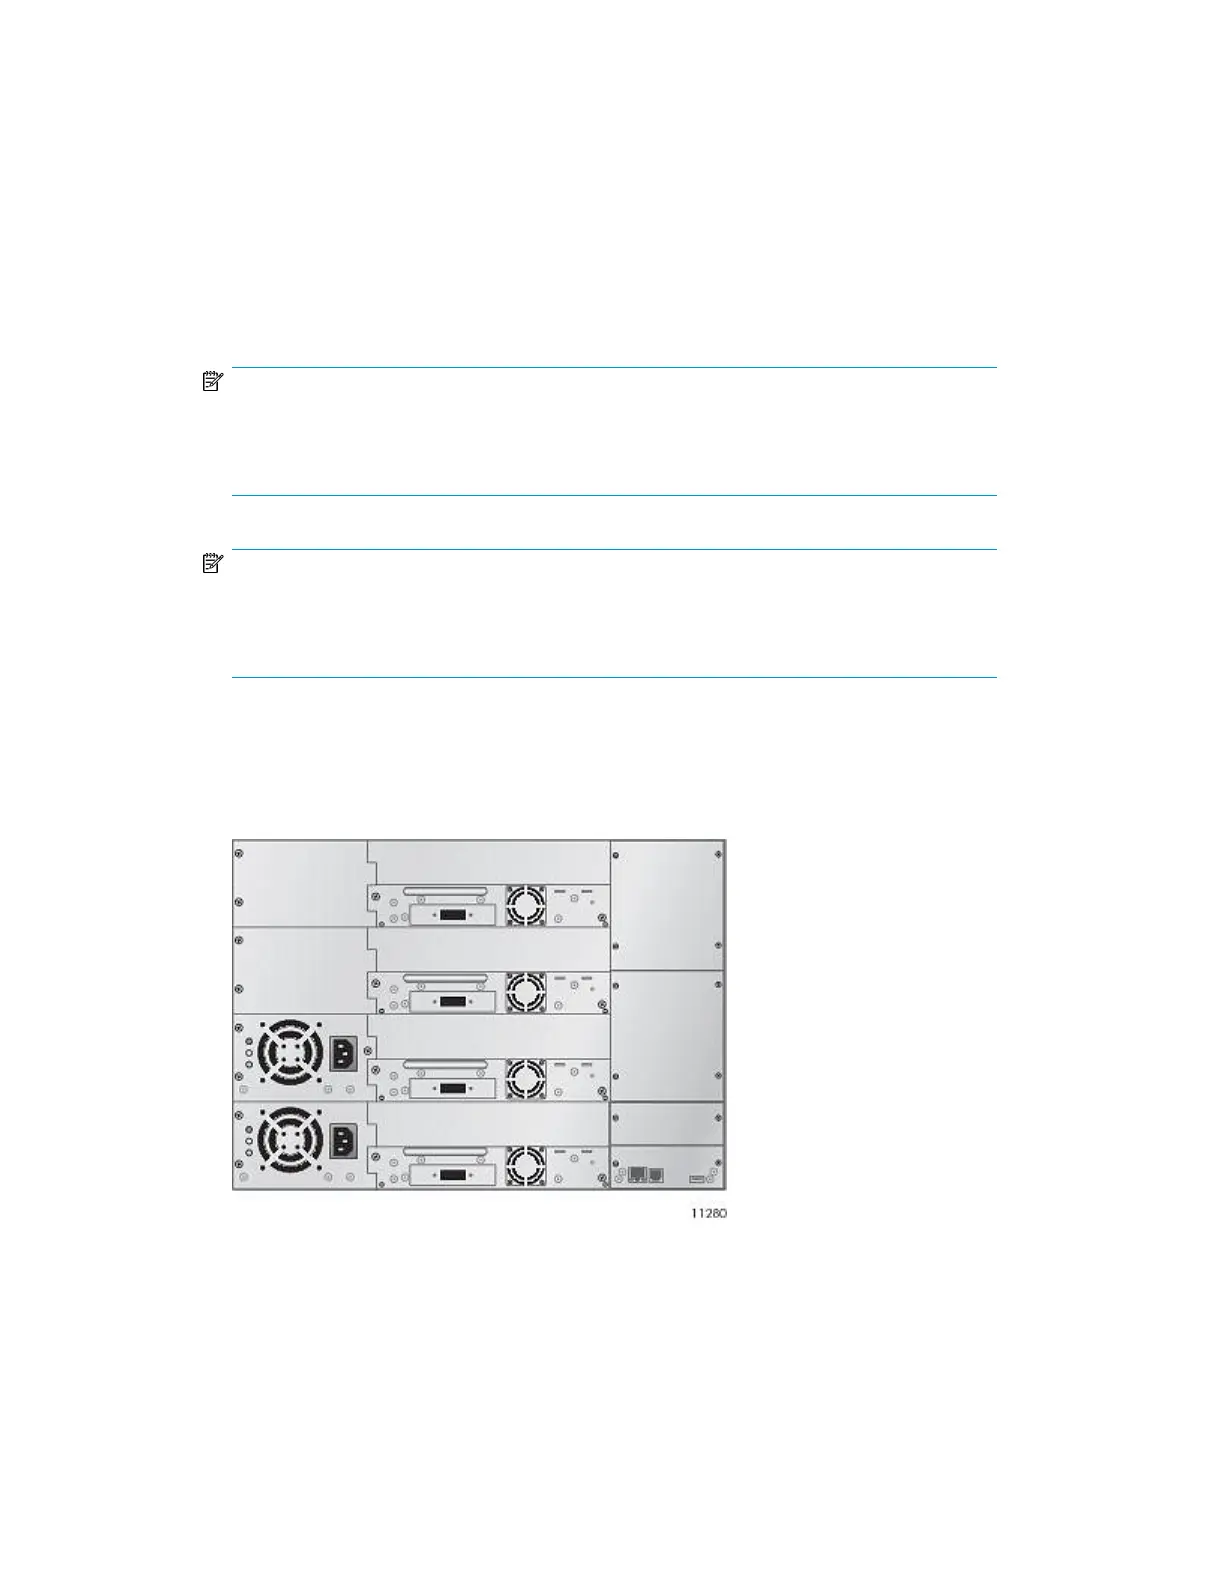
• MSL8048 and MSL8096: The first tape drive should be installed in the bottom drive bay. The
MSL8048 and MSL8096 have four tape drive connectors in the locations where full-height
tape drives would be installed. When installing a half-height tape drive, install it in the drive
bay directly above a full-height tape drive or above a half-height drive and half-height face
plate pair as shown in Figure 24.
Figure 24 MSL8048 and MSL8096 locations for half-height drives
.
Remove the face plate covering the drive bay by removing the screws holding it in place. Remove
one drive bay cover to install a half-height tape drive; remove two drive bay covers to install a
full-height tape drive.
Installing the Tape Library50