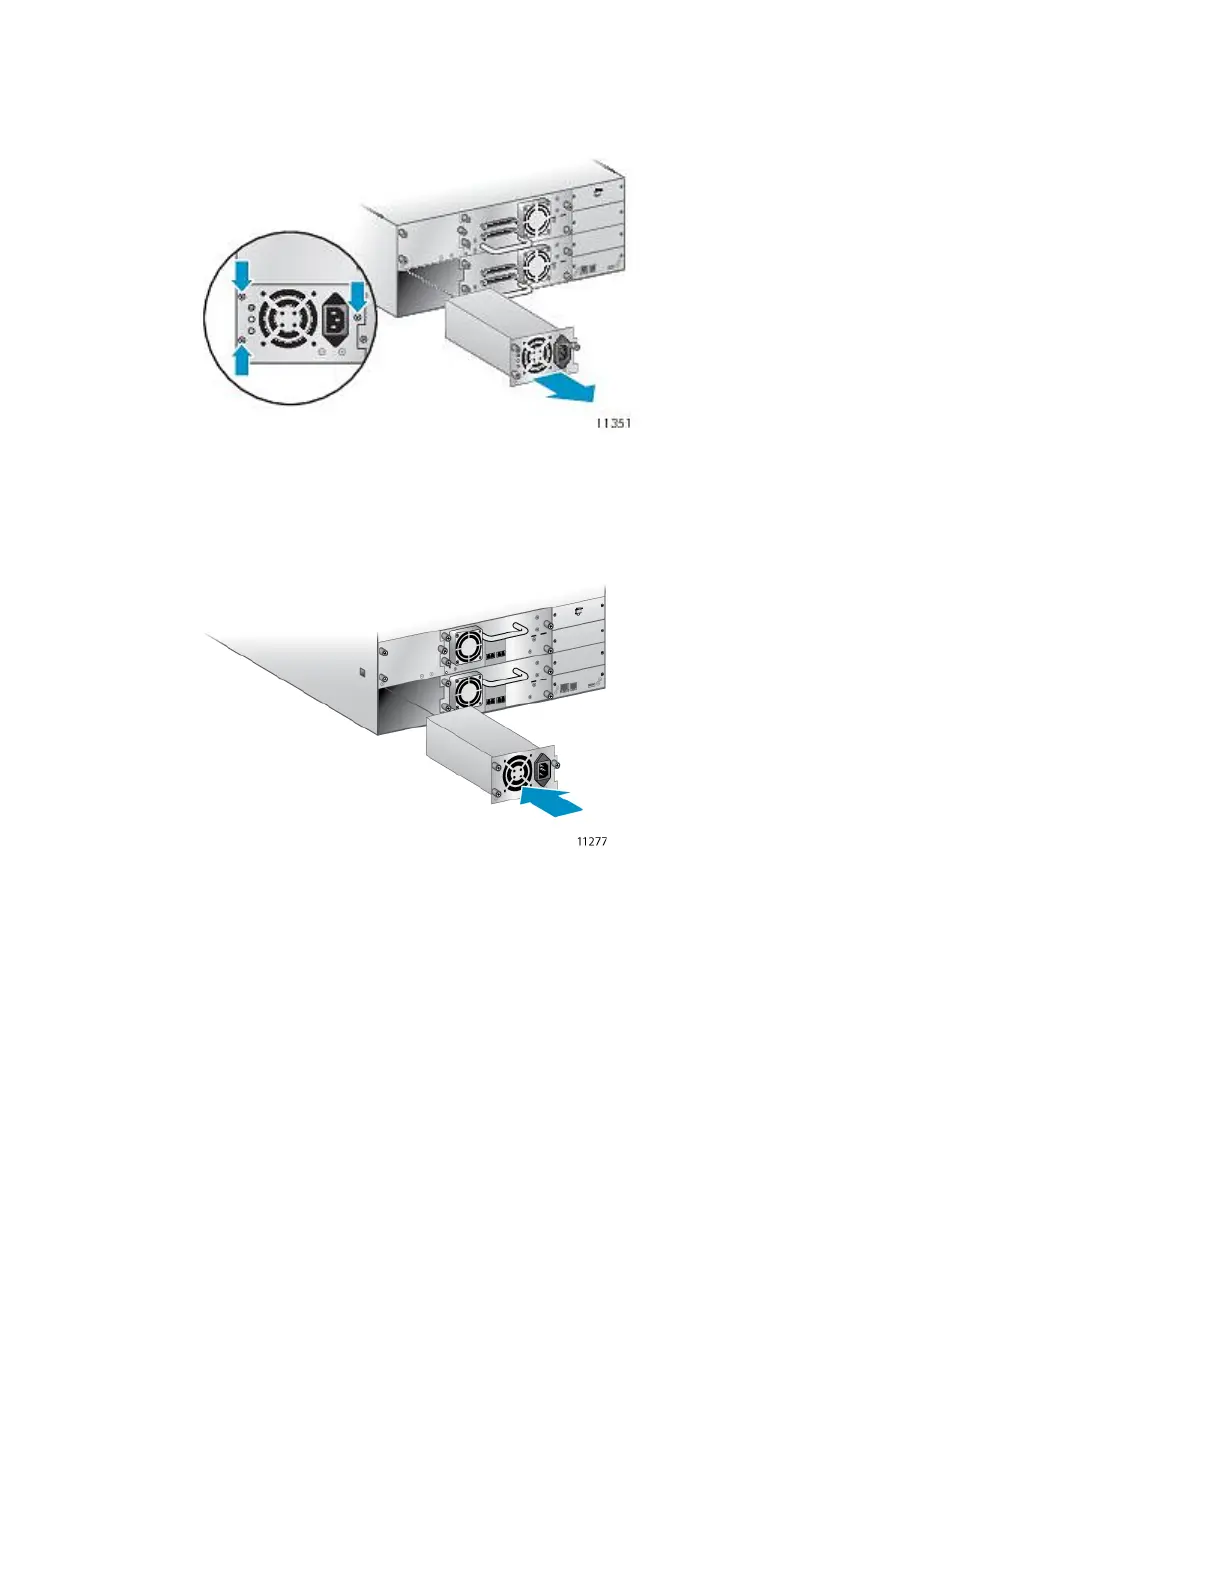
2. Loosen the three captive thumbscrews on the power supply. Grasp a thumbscrew stem on each
side of the power supply and while supporting the bottom, pull the power supply out of the Library,
as shown in Figure 118).
Figure 118 Removing the old power supply
.
3. Position the new power supply on the alignment rails and slide it into the Library until it is flush
with the back panel, as shown in Figure 119. Tighten the three blue thumbscrews to secure the
power supply.
Figure 119 Installing the new power supply
.
4. Attach an AC power cord to the replaced power supply and plug into a power outlet. Power on
the Tape Library, if necessary.
Upgrading and servicing the Tape Library230