EasyManuals Logo

HPE ProLiant MicroServer Gen10 Series User Manual

HPE ProLiant MicroServer Gen10 Series
71 pages
To Next Page IconTo Next Page
To Previous Page IconTo Previous Page
Page #22 background imageLoading...
Page #22 background image
Remove the system board assembly
Prerequisites
Before you perform this procedure, make sure that you have a T-15 Torx screwdriver available.
Procedure
1. If installed, remove the internal USB device.
2. To serve as a reference for system cable connections when the system board assembly is installed back
into the server, take a picture of the current system board cable connections.
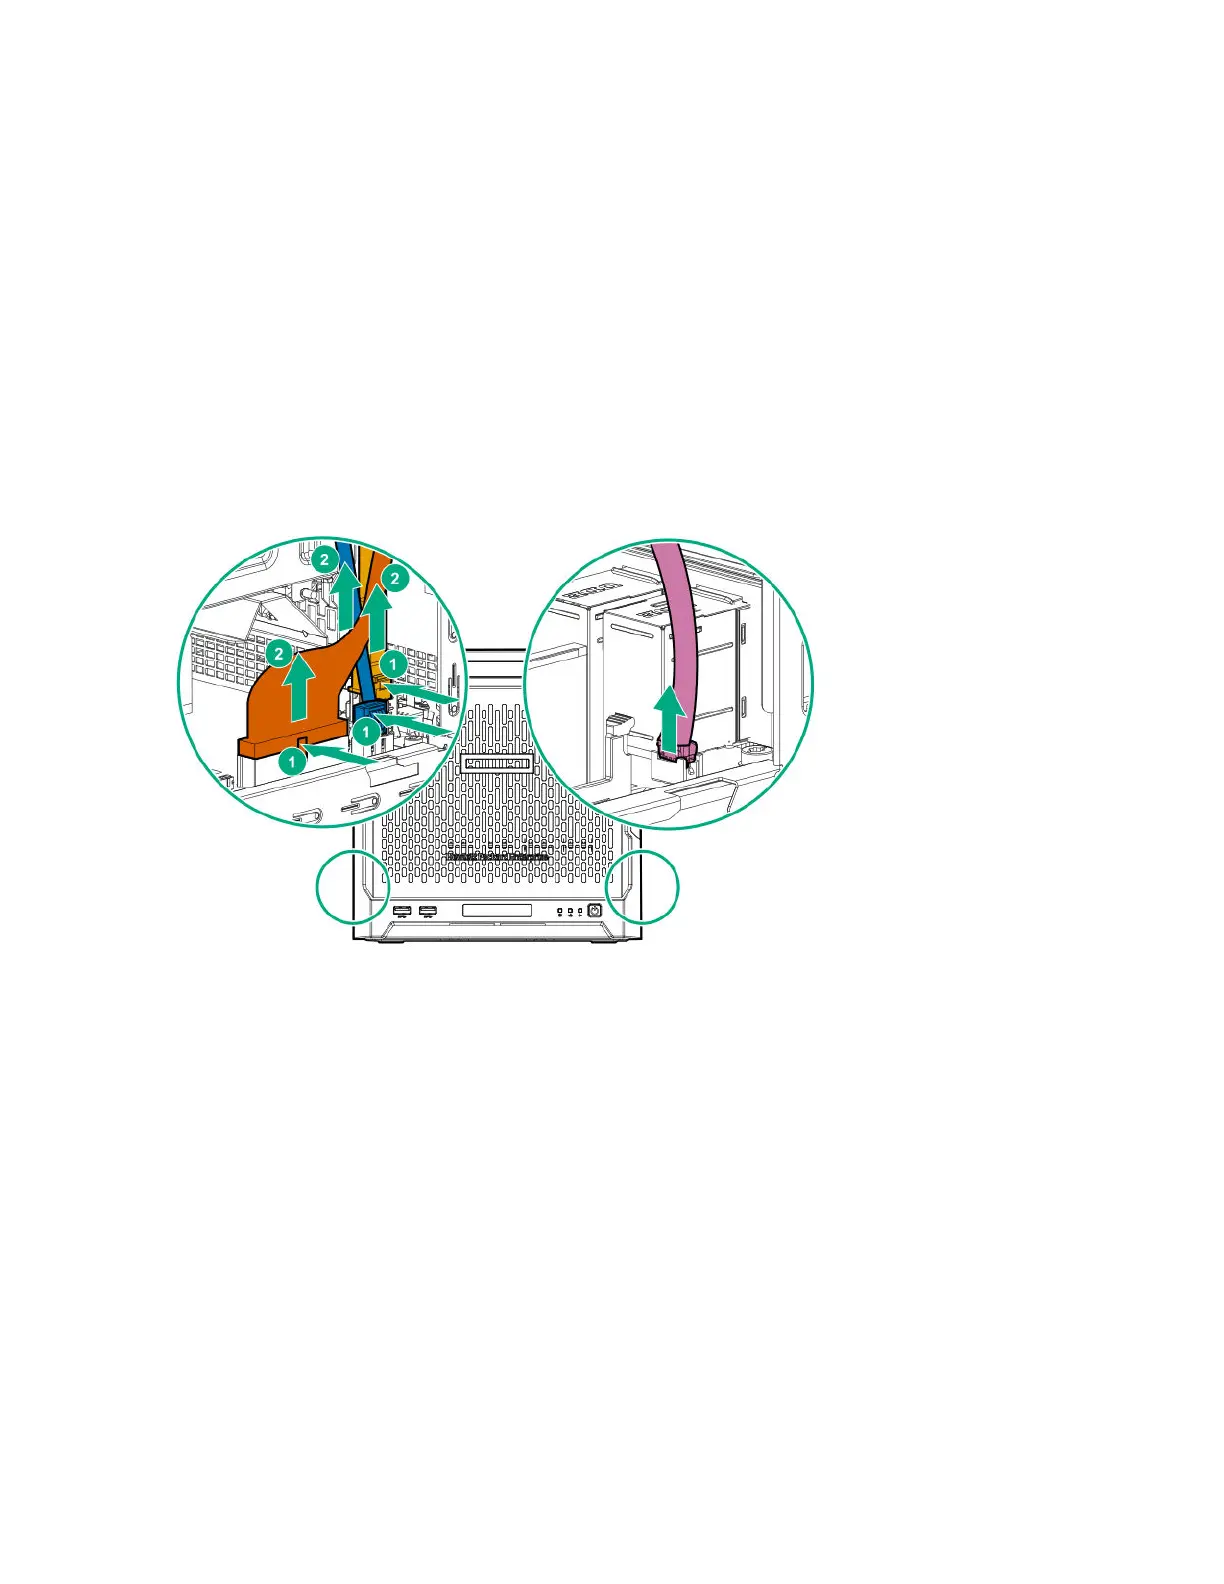
3. Disconnect the following system cables:
Power supply cable
Optical drive or SSD SATA cable (optional)
LFF/SFF drive SATA cable – This cable can either be connected to the system board or to an installed
HBA.
Fan cable
4. Remove the system board assembly screw.
5. Place a finger in the notch on both sides of the system board assembly, and then pull out the assembly.
22 Remove the system board assembly

Table of Contents

Questions and Answers:

Question and Answer IconNeed help?

Do you have a question about the HPE ProLiant MicroServer Gen10 Series and is the answer not in the manual?

HPE ProLiant MicroServer Gen10 Series Specifications

General IconGeneral
Product LineHPE ProLiant MicroServer
ProcessorAMD Opteron X3000 Series
Memory Slots2
Networking2x 1GbE ports
MemoryUp to 32 GB DDR4 UDIMM
Storage4 LFF SATA HDD bays (3.5-inch)
RAID SupportRAID 0, 1
Power Supply200W non-redundant power supply
ManagementHPE iLO 5 Standard
Form FactorMicro Tower
Operating System SupportMicrosoft Windows Server, Red Hat Enterprise Linux, SUSE Linux Enterprise Server
WeightApprox. 6.5 kg

Related product manuals