English - 73
5.16 Replacing the wheel motor
1. Put the main switch in position 0.
2. Disassemble the body. See 5.2.1
Disassembling the body on page 59.
3. Disassemble the chassis. See 5.2.2
Disassembling the chassis on page 59.
4. Disconnect the blade motor cable from the
main board.
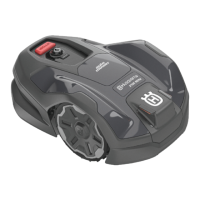
5. Remove the hub cap using a slotted
screwdriver.
6. Remove the nut and washer holding the wheel
in place and remove the wheel.
7. Remove the wheel motor by unscrewing the 4
screws (Torx 20) in the wheel motor bracket.
8. Examine the sealing (O-ring) for damage and
replace the sealing if it is damaged.
9. Fit the new wheel motor and tighten the
screws to recommended torque.
10. Ret the wheel, washer, nut and tighten the
nut to recommended torque.
11. Ret the hub cap.
12. Connect the wheel motor cable to the main
circuit board.
13. Ret the chassis and body. See 5.2.5
Assembling the chassis on page 61
and 5.22 Assembling the sealing strip on
page 77
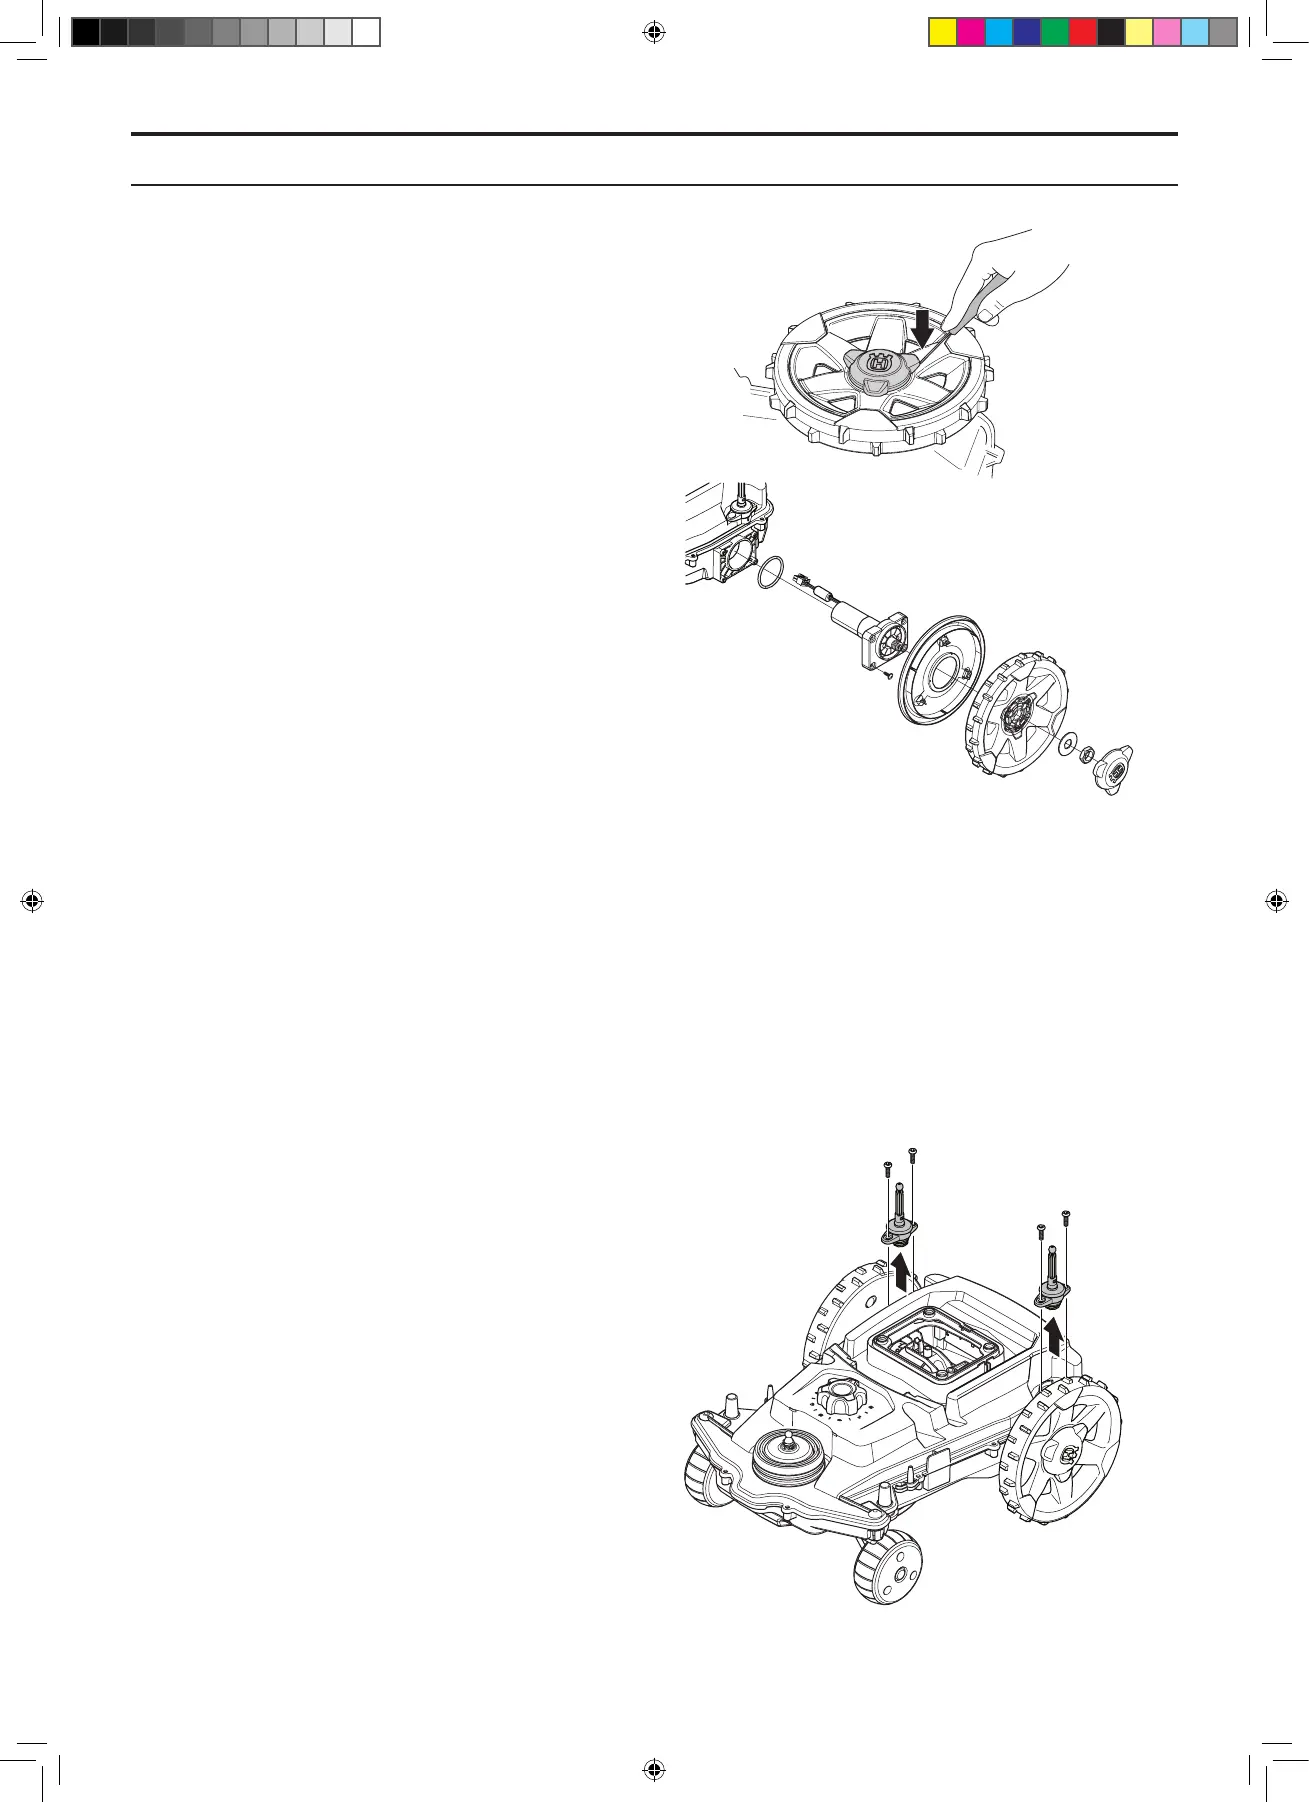
5.17 Replacing the rear collision
columns
1. Disassemble the body. See 5.2.1
Disassembling the body on page 59.
2. Unscrew the 4 screws (Torx 20) securing the
rear collision columns (2 screws per each
column) to the chassis.
3. The collision columns and their brackets can
now be removed and replaced.
4. Ret the collision columns and tighten the
screws to recommended torque.
5. Ret the body.
5. REPAIR INSTRUCTIONS
TH_1158203_310_315_GARDENA_US.indd 73 2016-05-11 10:16:37