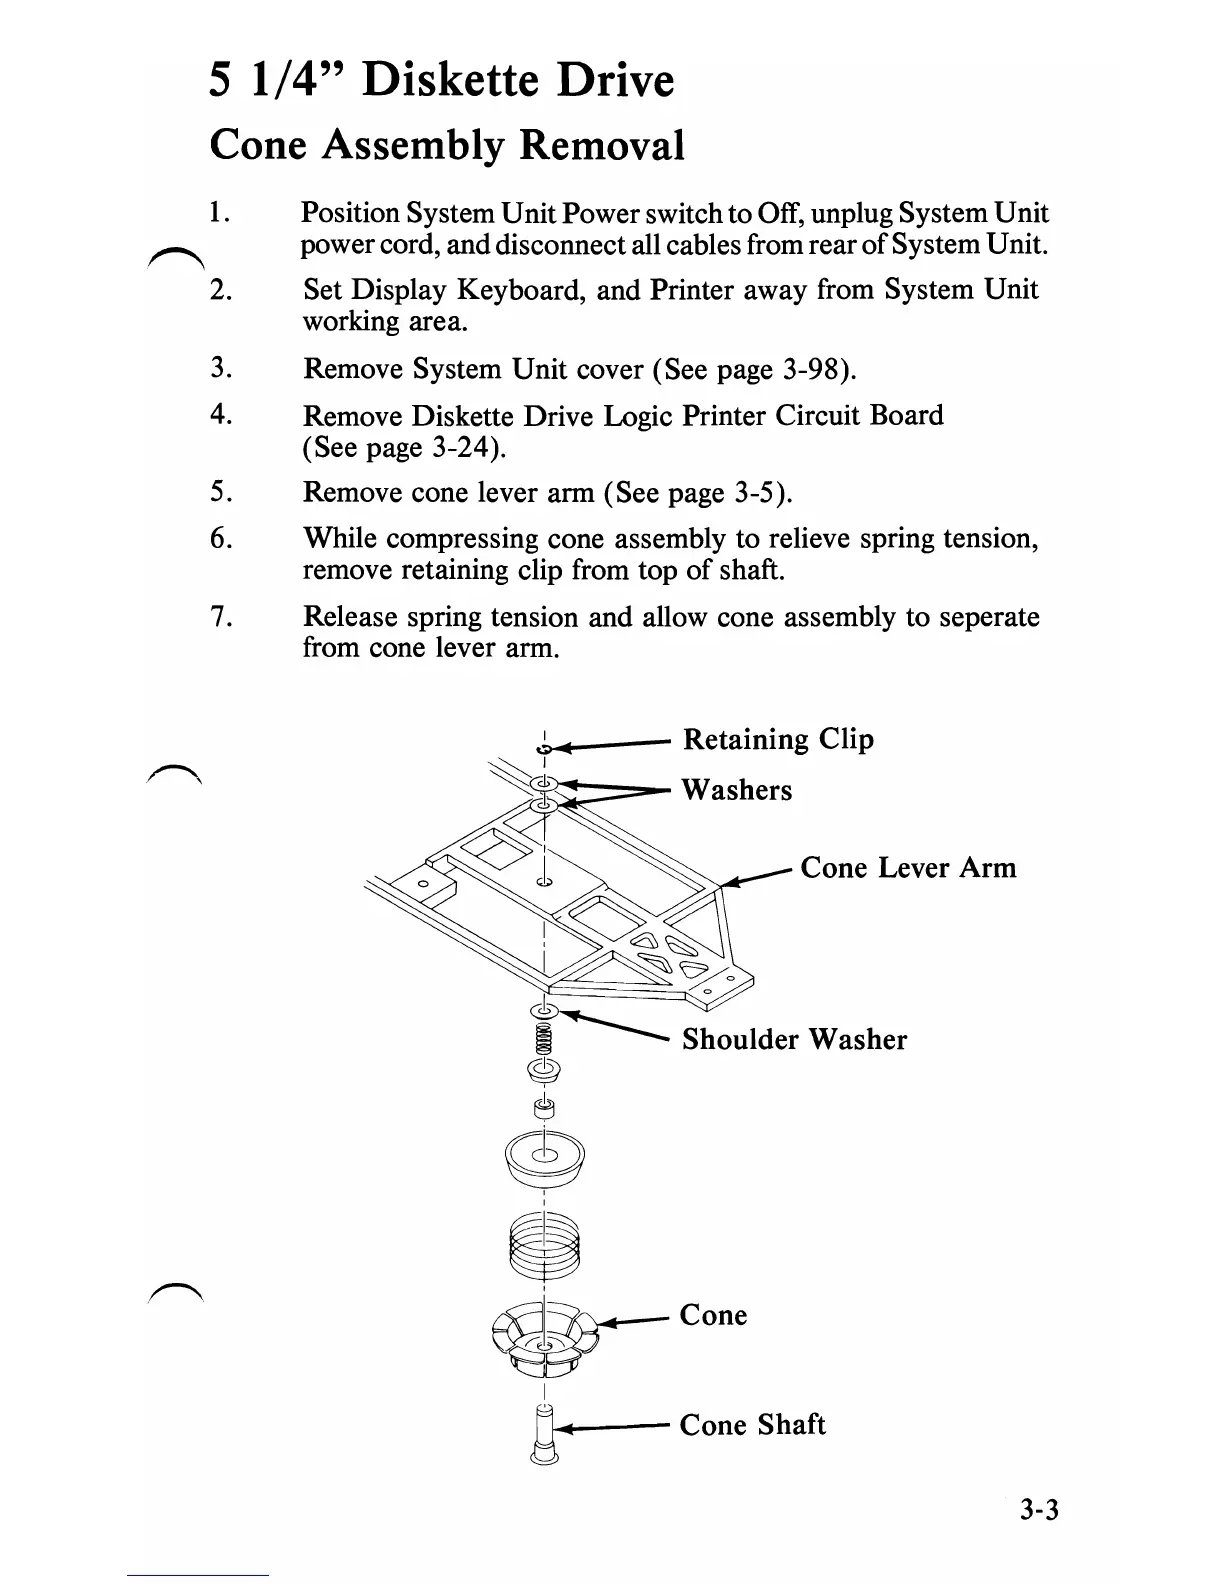
5 1/4" Diskette Drive
Cone Assembly Removal
1.
Position System Unit Power switch to
OfT,
unplug System Unit
power cord, and disconnect all cables from rear
of
System Unit.
~
2.
Set Display Keyboard, and Printer away from System Unit
working area.
3.
Remove System Unit cover (See page 3-98).
4.
Remove Diskette Drive Logic Printer Circuit Board
(See page 3-24).
5.
Remove cone lever arm (See page 3-5).
6.
While compressing cone assembly to relieve spring tension,
remove retaining clip from top
of
shaft.
7.
Release spring tension and allow cone assembly to seperate
from cone lever arm.
__
- Retaining Clip
>~~=-
Washers
Cone
Lever
Arm
_--
Cone
Shaft
3-3
 Loading...