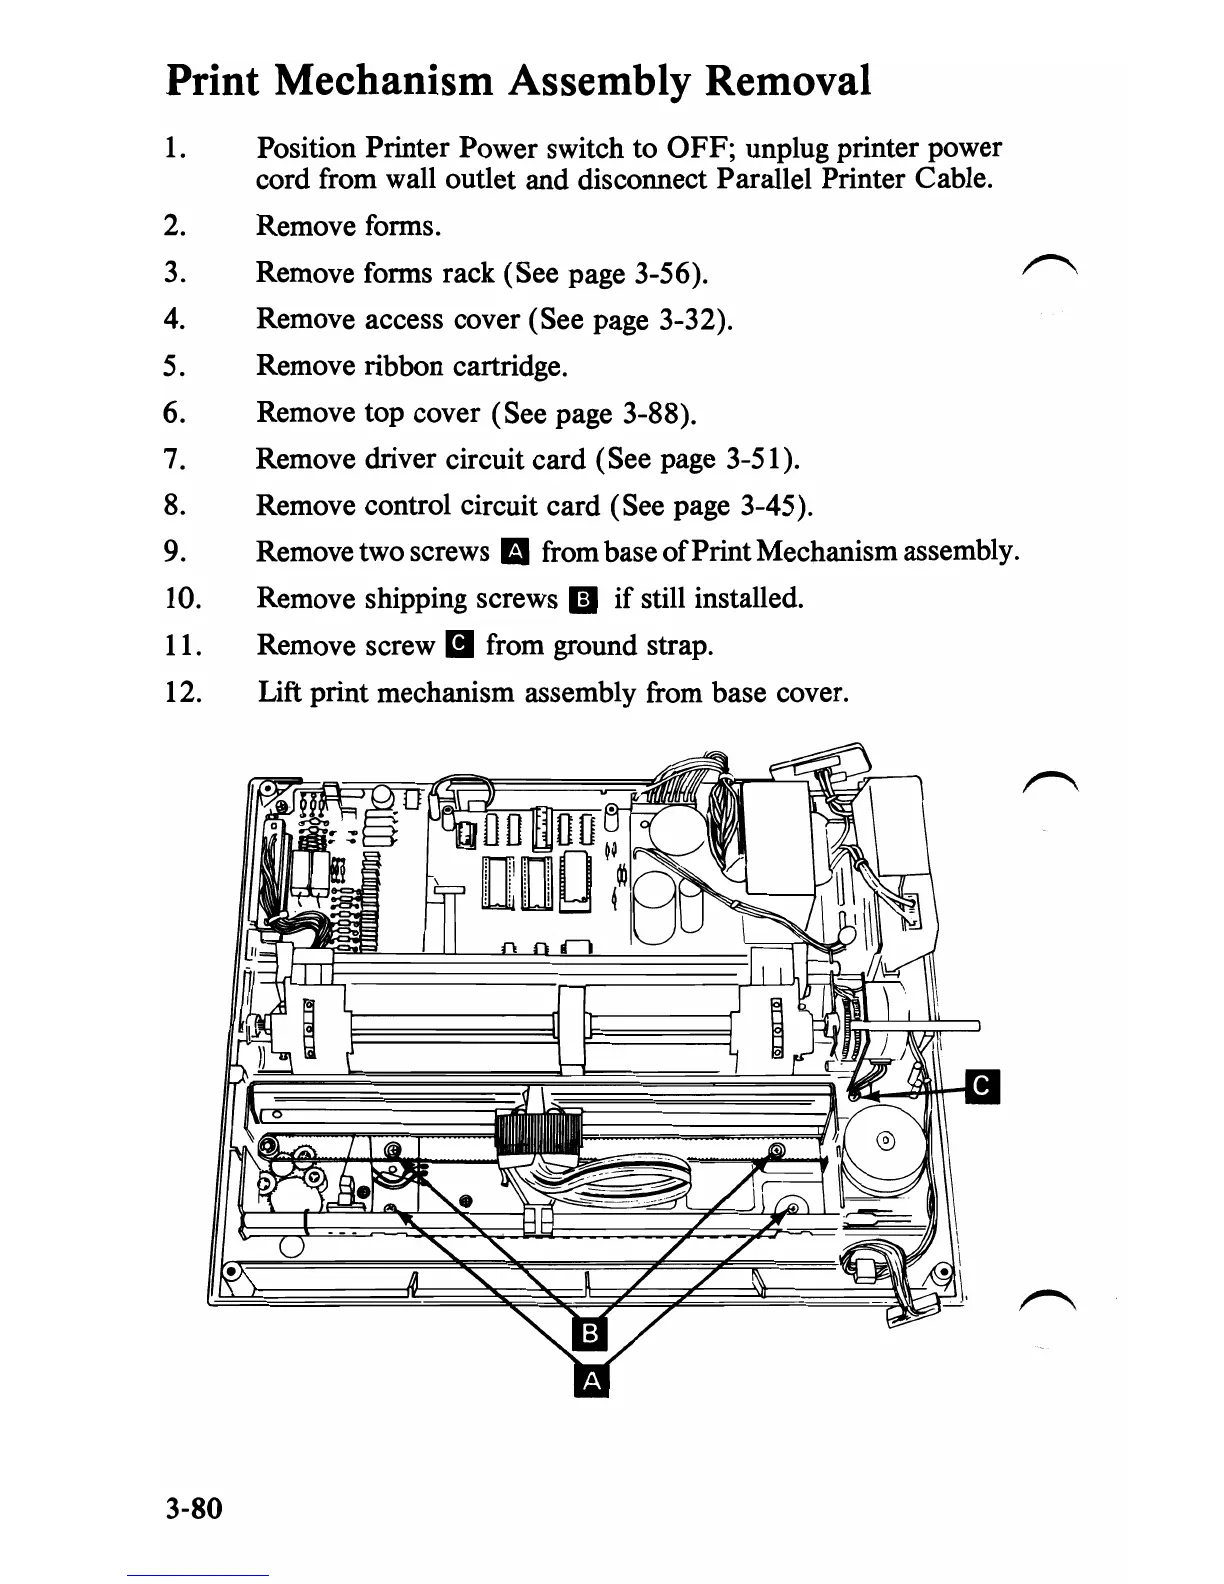
Print Mechanism Assembly Removal
1.
Position Printer Power switch to
OFF;
unplug printer power
cord from wall outlet and disconnect Parallel Printer Cable.
2.
Remove forms.
3.
Remove forms rack (See page 3-56).
4.
Remove access cover (See page 3-32).
5. Remove ribbon cartridge.
6. Remove top cover (See page 3-88).
7.
Remove driver circuit card (See page 3-51).
8.
Remove control circuit card (See page 3-45).
9. Remove two screws
E1
from
base of Print Mechanism assembly.
10. Remove shipping screws
II
if still installed.
11. Remove screw
11
from ground strap.
12.
Lift print mechanism assembly
from
base cover.
3-80
 Loading...