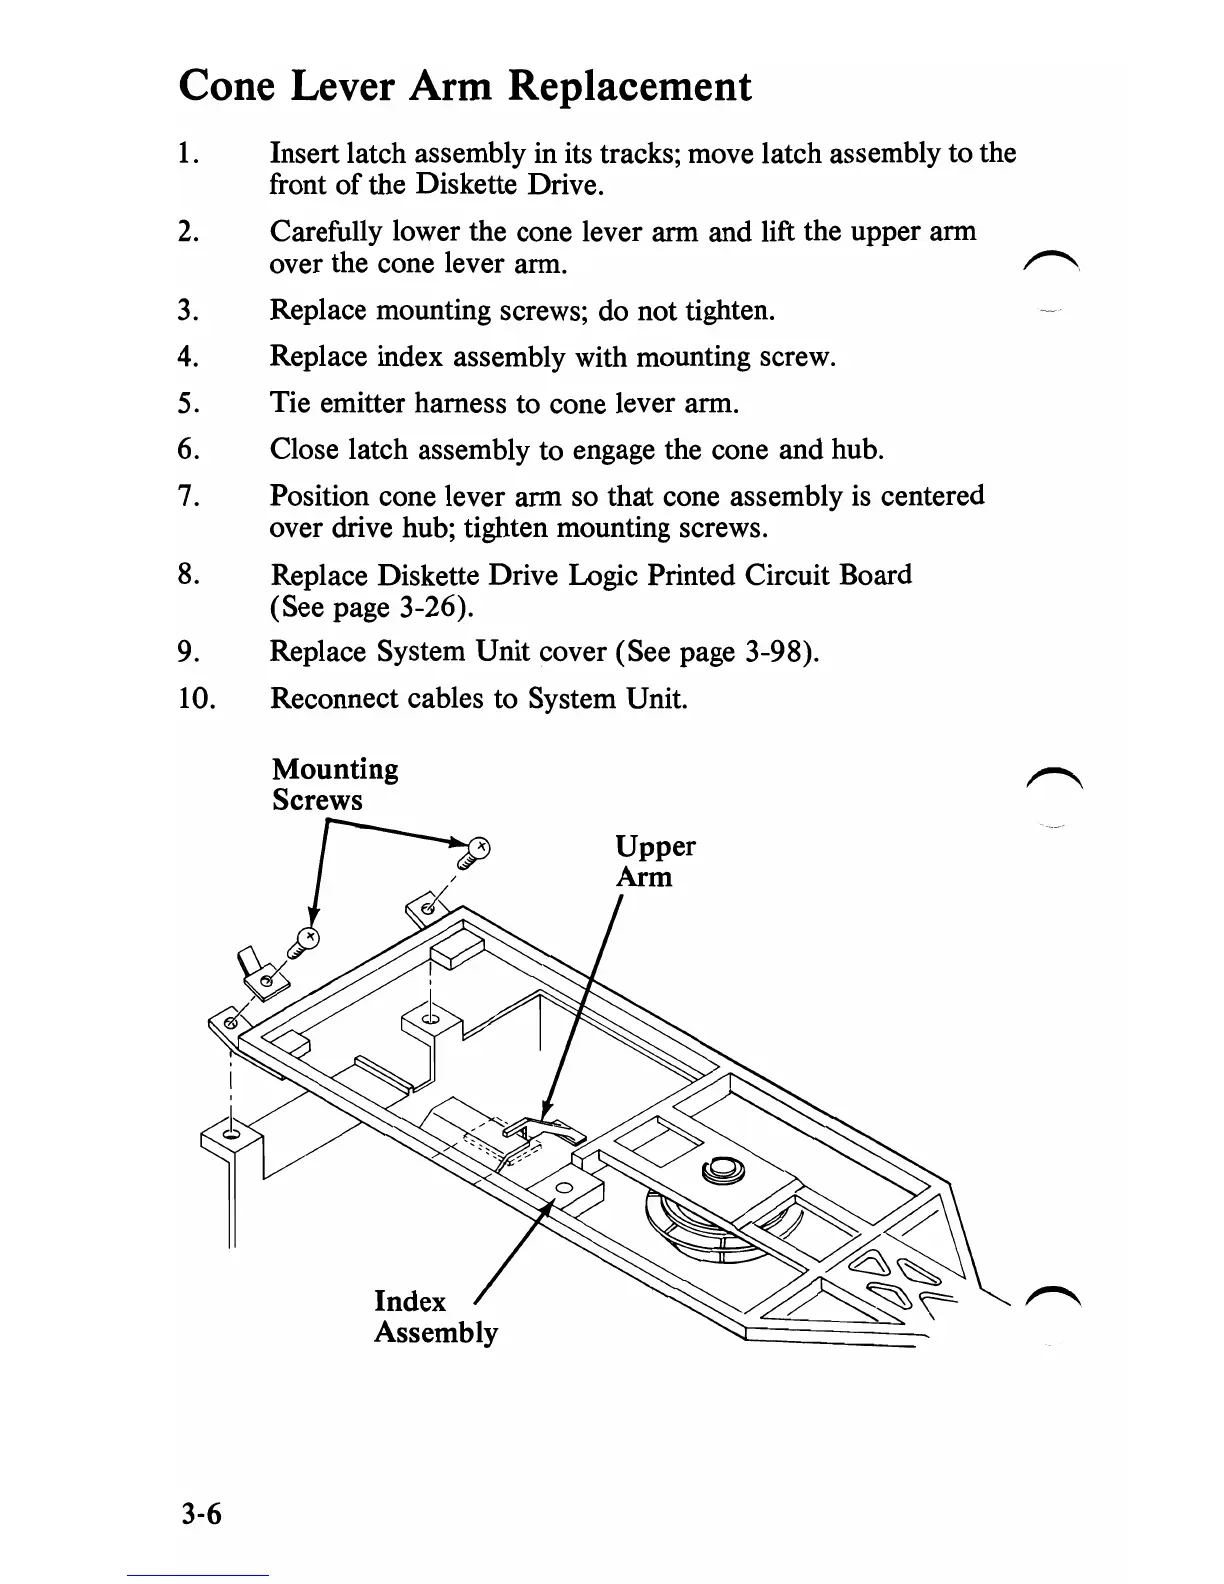
Cone Lever Arm Replacement
1.
Insert latch assembly in its tracks; move latch assembly to the
front
of
the Diskette Drive.
2.
Carefully lower the cone lever arm and lift the upper arm
over the cone lever arm.
r"
3.
Replace mounting screws; do not tighten.
4.
Replace index assembly with mounting screw.
S.
Tie emitter harness to cone lever arm.
6.
Close latch assembly to engage the cone and hub.
7.
Position cone lever arm
so
that cone assembly
is
centered
over drive hub; tighten mounting screws.
8.
Replace Diskette Drive Logic Printed Circuit Board
(See page 3-26).
9.
Replace System Unit cover (See page 3-98).
10. Reconnect cables to System Unit.
Mounting
Screws
3-6
 Loading...