Installing the options
The design of the IBM 4838 allows you to install the options without removing the
external cover. Table 7 describes the components and the respective access door.
Table 7. Components and doors
Door Accessible component
Side Wireless card, flash drive, memory modules, additional memory card,
CMOS jumper
Inset side (small) ExpressCard slot
Hard drive Hard drive
Many upgrade features are factory-installed. See Figure 3 on page 10 to identify the
access doors.
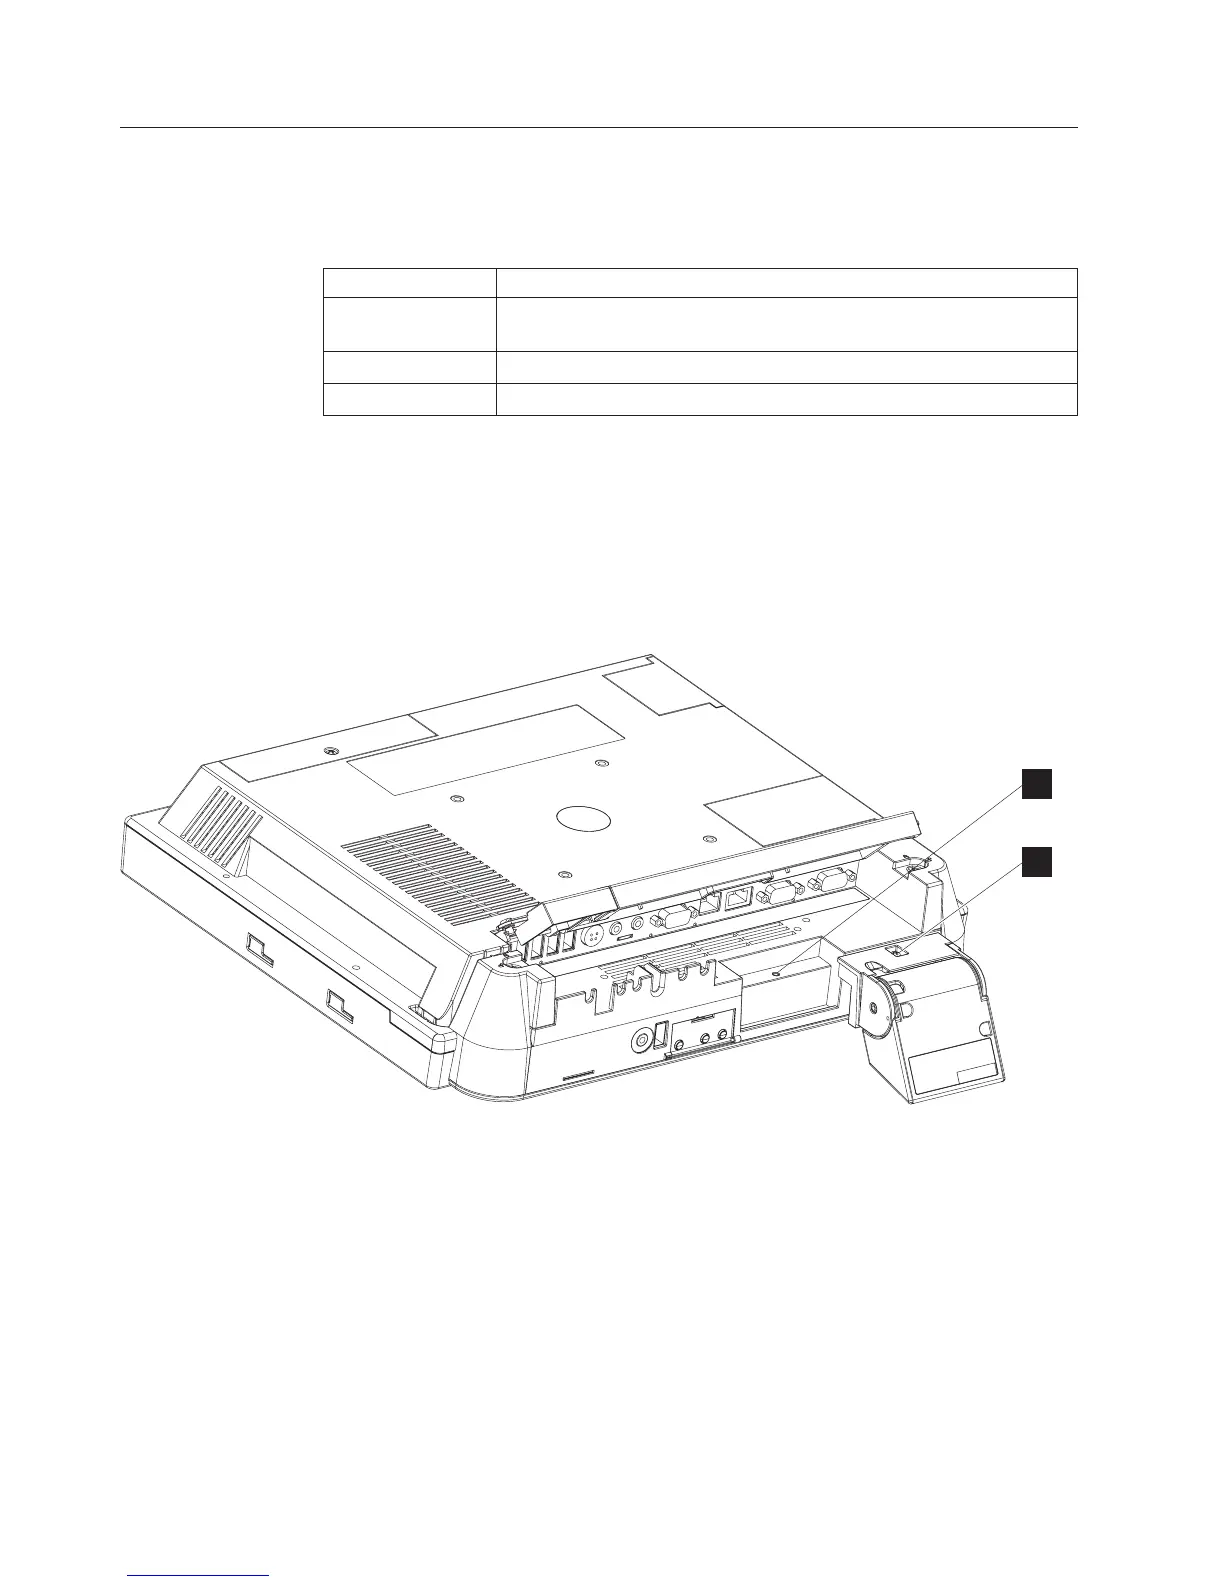
Installing the scanner
Follow these steps to install the scanner:
1. From the rear of the IBM AnyPlace Kiosk, open both cable covers using the
quarter-turn latches.
2. Align the scanner with the screw hole (A in Figure 6) and secure the captured
screw (B).
3. Connect the scanner cable to its indicated connector.
4. Close and latch the cable covers.
Notes:
1. You can adjust the tilt angle of the scanner for optimum performance.
2. For best scanning results, hold the object to be scanned 50 to 100 mm (2 to 4
inches) away from the scanner.
3. Refer to the IBM Knowledge Base at the IBM Retail Store Solutions Web site
(www.ibm.com/solutions/retail/store/support/) for details on configuring the
scanner.
B
A
Figure 6. Installing the scanner
Installing the IBM AnyPlace Kiosk
14
IBM AnyPlace Kiosk 4838