Removing the rear cover
Attention: Establish personal grounding before touching this unit. See
“Electrostatic discharge” on page 94.
Follow these steps to remove the rear cover:
1. Switch OFF the power to the IBM AnyPlace Kiosk. Unplug the power cord
from the external power source.
2. Remove the unit from the VESA mount (tabletop, wall, or third party).
3. If installed, remove the MSR. Place the IBM 4838 face down on a sturdy
surface.
4. One captured screw secures the rear cover to the unit. Locate and loosen this
screw (see H in Figure 3 on page 10) .
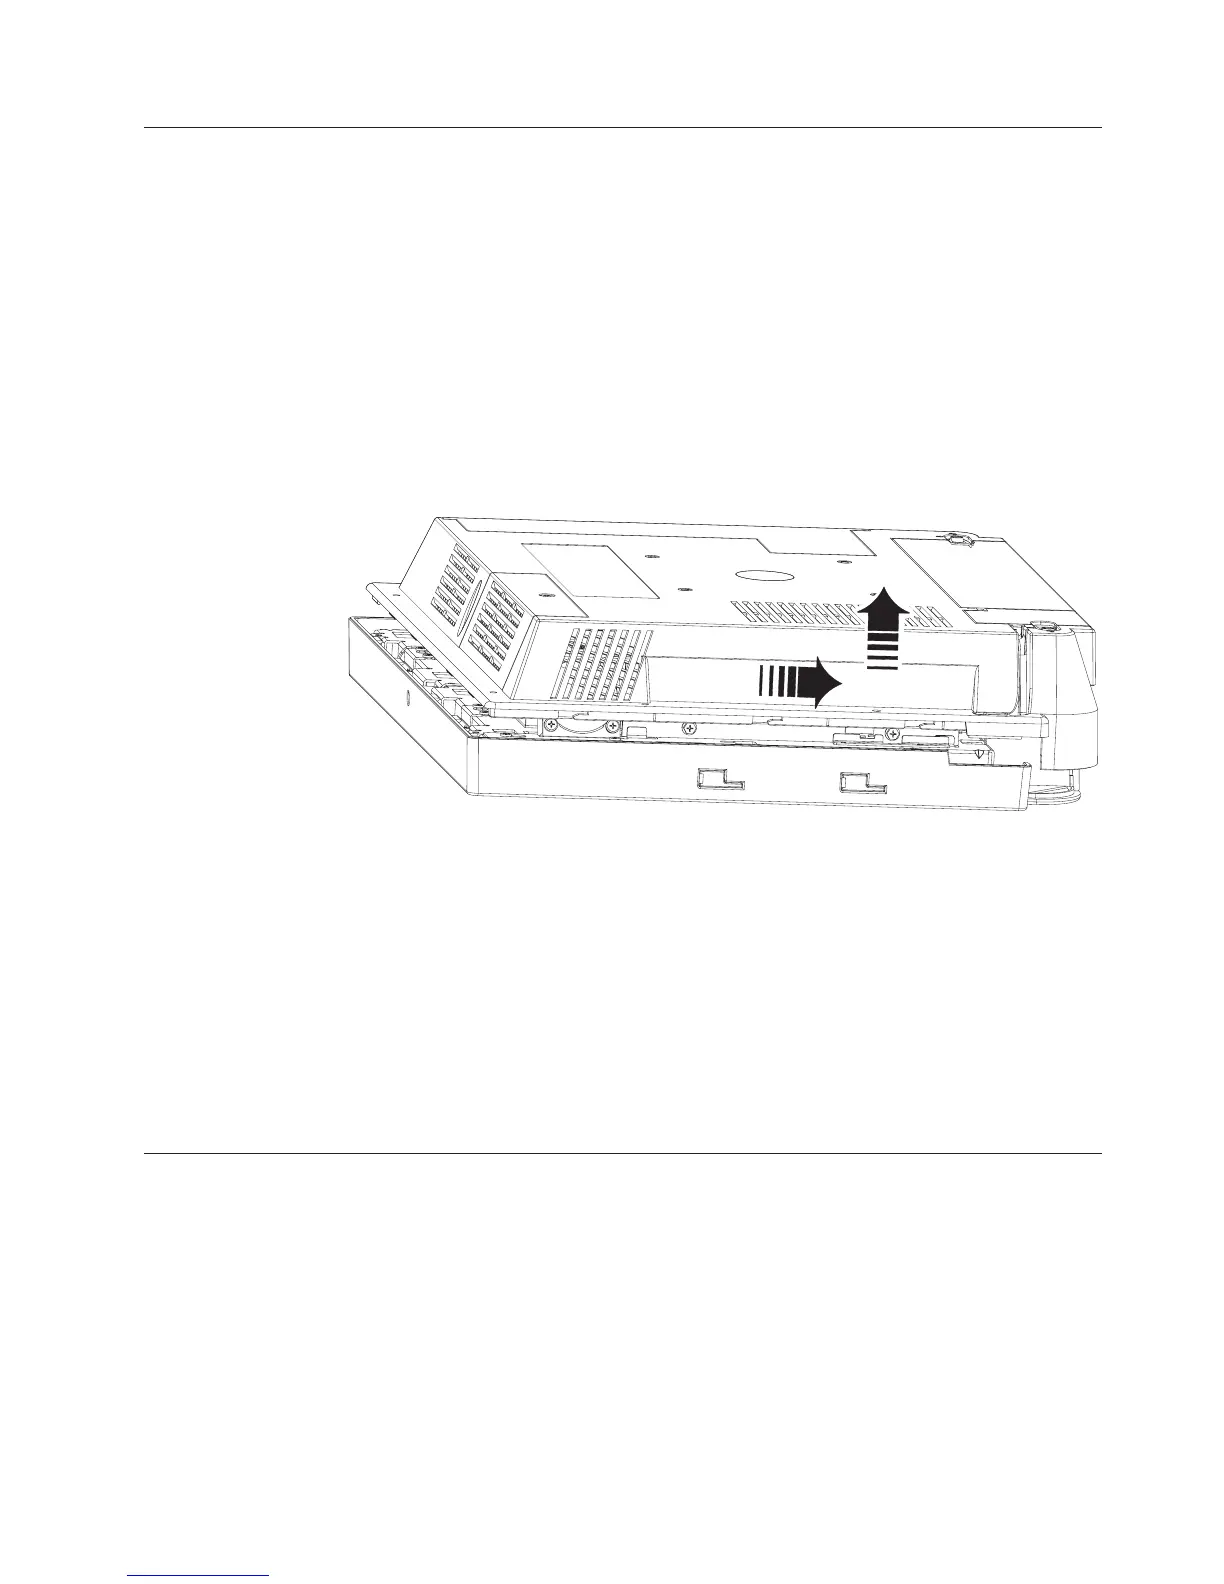
5. Facing the rear of the unit, firmly grasp and slide the rear cover approximately
8 mm (0.3 in) toward the bottom of the unit. Lift to remove.
To replace the cover, follow these steps:
1. Place the unit face down on a steady surface and align the back cover
approximately 8 mm (0.3 in) lower than the top cover (see Figure 20).
2. Firmly slide the back cover to align it with the front bezel and the top screw
hole. Check that the edges of the rear cover are properly aligned with the
mating covers.
3. Tighten the captured screw.
Removing the backlight inverter card
Follow these steps to install the backlight inverter card:
Note: The backlight inverter card and the LCD can be replaced independently. It is
not necessary to replace both parts should one part require servicing.
1. Switch OFF the power to the IBM AnyPlace Kiosk. Unplug the power cord
from the external power source.
2. Remove the rear cover as described in “Removing the rear cover.”
Figure 20. Removing the rear cover
Removing and replacing FRUs
Chapter 4. Removing and replacing FRUs 39