1. Plug the power adapter to the unit. If connecting to the 4838 to the AnyPlace
POS Hub, go to “Attaching the IBM AnyPlace POS Hub” on page 18.
2. Plug the appropriate power cord into the AC power adapter (see “Power
cords” on page 79) and then into an electrical outlet.
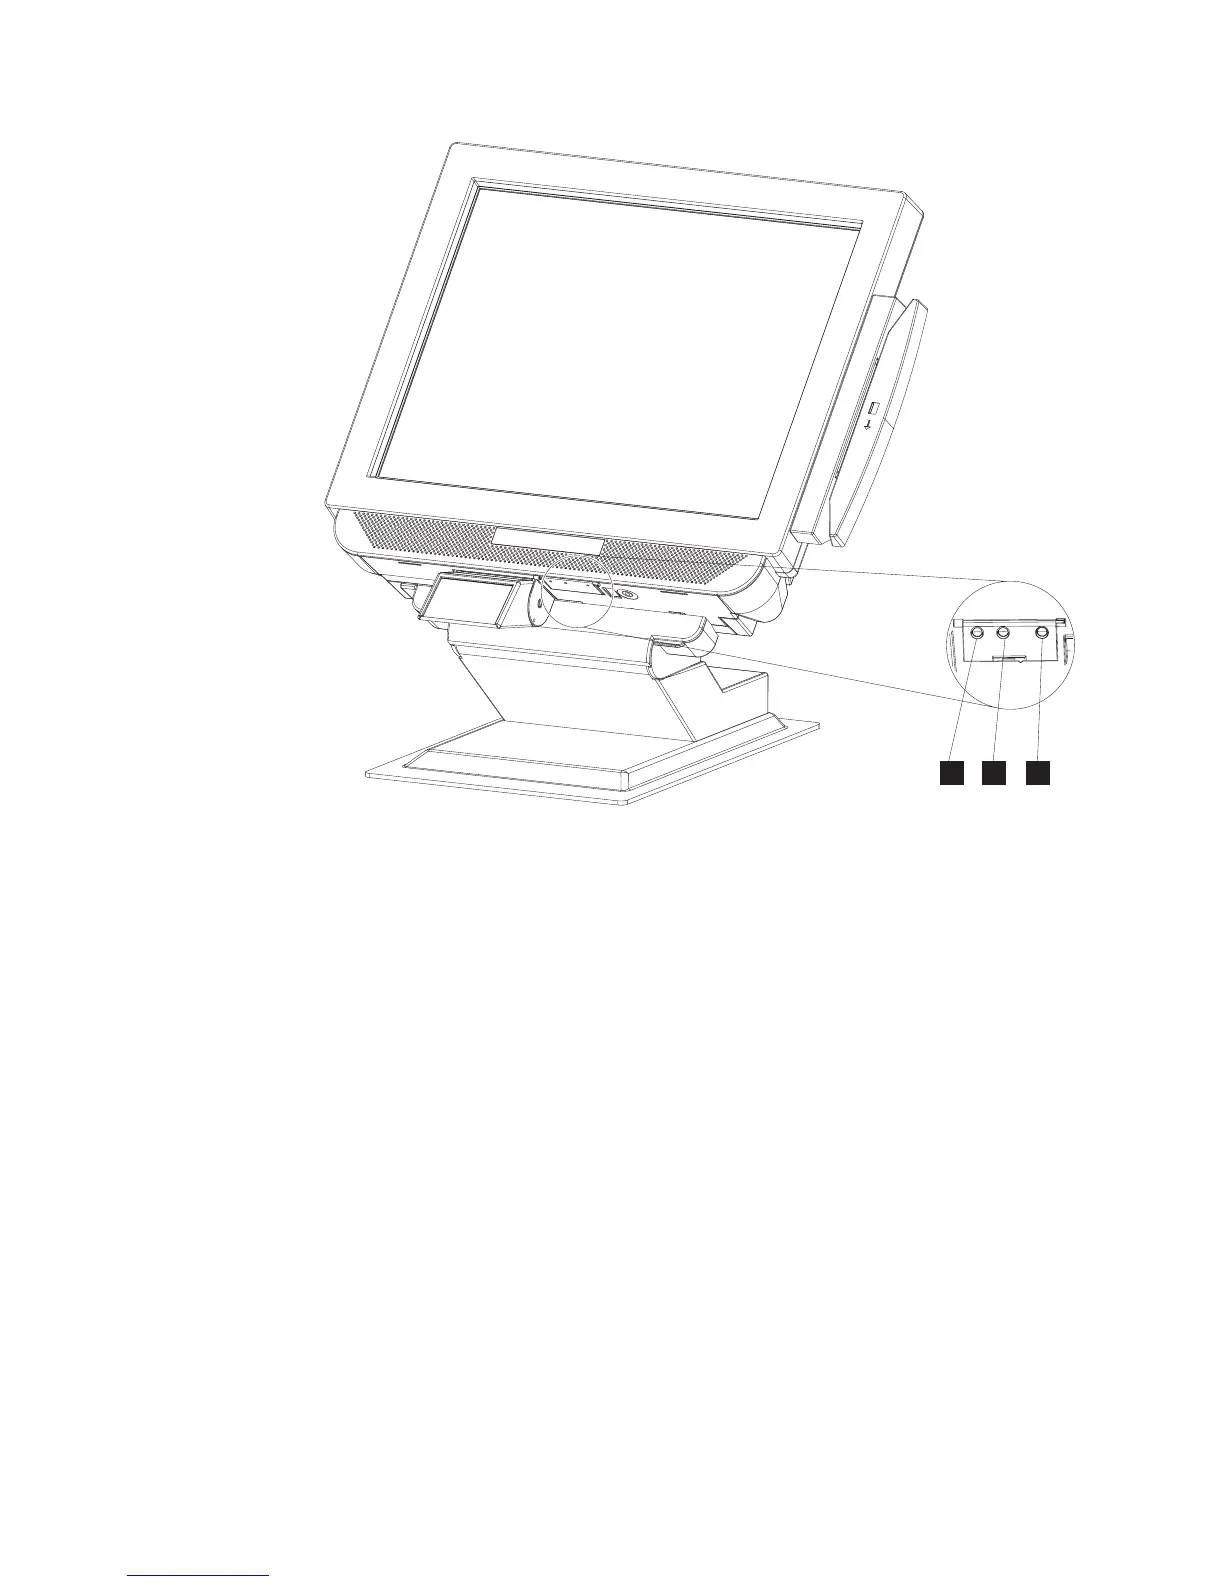
3. Power on the IBM 4838 using the power button (L in Figure 15). The 4838
power indicator light will initially appear green.
4. To adjust the LCD brightness, select the plus + or minus - keys (see M and
Nin Figure 15).
Installing the control button cover
To install the control button cover, follow these steps:
1. While facing the LCD, insert the hinge pin on the left side first, then insert the
hinge pin in the right side.
2. Rotate the cover to swing and snap it into place.
To remove the cover:
1. Insert a heavy-duty metal paper clip in the slot on the bottom of the unit,
approximately 9 to 12 mm (3/8 to 1/2 inch).
2. Push the paper clip to the rear of the unit, then pull down on the paper clip
and pry the cover open.
N
M
L
Figure 15. IBM 4838 controls
Installing the IBM AnyPlace Kiosk
24
IBM AnyPlace Kiosk 4838