Removing and replacing Tier 1 CRUs
Replacement of Tier 1 CRUs is your responsibility. If IBM installs a Tier 1 CRU at
your request, you will be charged for the installation.
The illustrations in this document might differ slightly from your hardware.
Removing hot-swap hard disk drives
Use this information to remove hot-swap hard disk drives.
About this task
Attention:
v To avoid damage to the hard disk drive connectors, make sure that the server
cover is in place and fully closed whenever you install or remove a hard disk
drive.
v To make sure that there is adequate system cooling, do not operate the server for
more than 2 minutes without either a hard disk drive or a filler panel installed
in each bay.
v Before you make changes to disk drives, disk drive controllers (including
controllers that are integrated on the system board), disk drive backplanes, or
disk drive cables, back up all important data that is stored on hard disks.
v Before you remove any component of a RAID array, back up all RAID
configuration information.
To remove a hot-swap hard disk drive, complete the following steps.
Procedure
1. Read the safety information that begins on “Safety” on page vii and
“Installation guidelines” on page 122.
2. Make sure you save the data on your drive, especially if it is part of a RAID
array, before you remove it from the server.
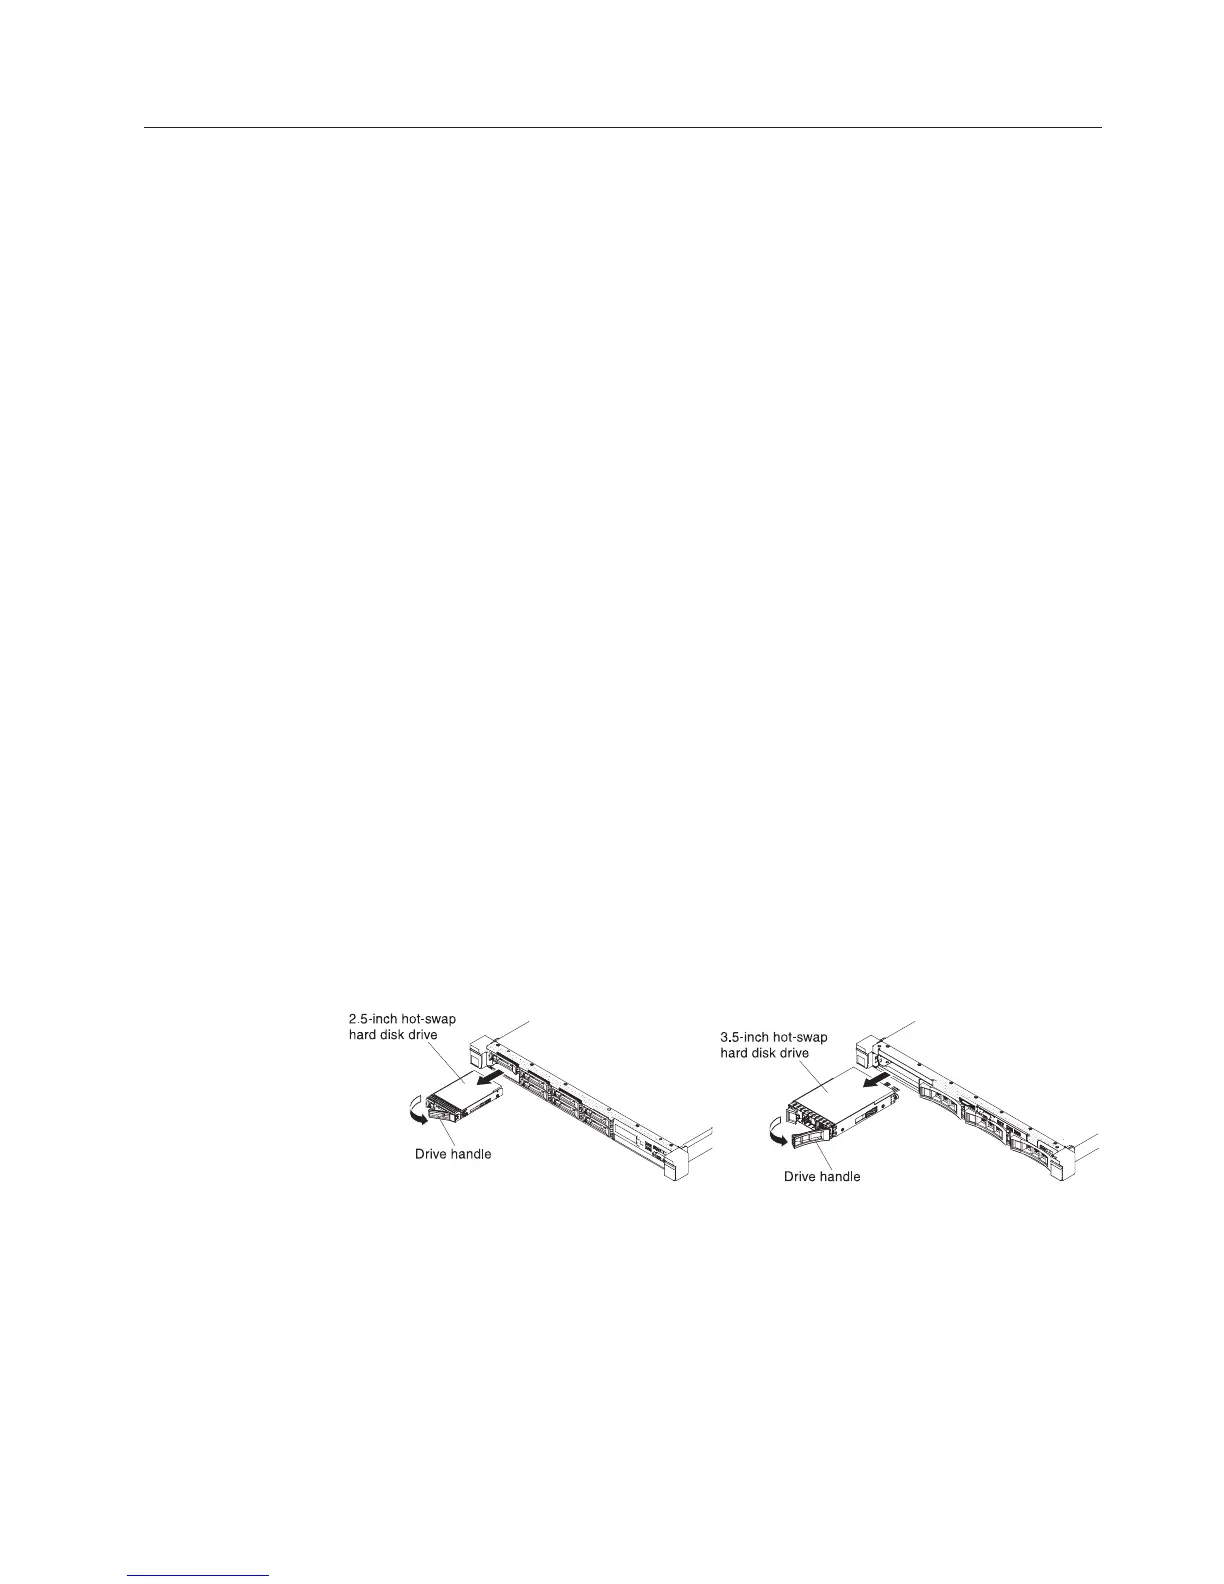
3. Slide the release latch (orange) gently to the left to unlock the drive handle.
4. Grasp the handle and slide the drive out of the drive bay.
5. Reinstall the drive bay filler panel.
6. If you are instructed to return the drive assembly, follow all packaging
instructions, and use any packaging materials for shipping that are supplied to
you.
Figure 53. Hot-swap hard disk drives removal
Chapter 5. Removing and replacing components 143

 Loading...


