28
3 HDD Installation
3.1 A Series
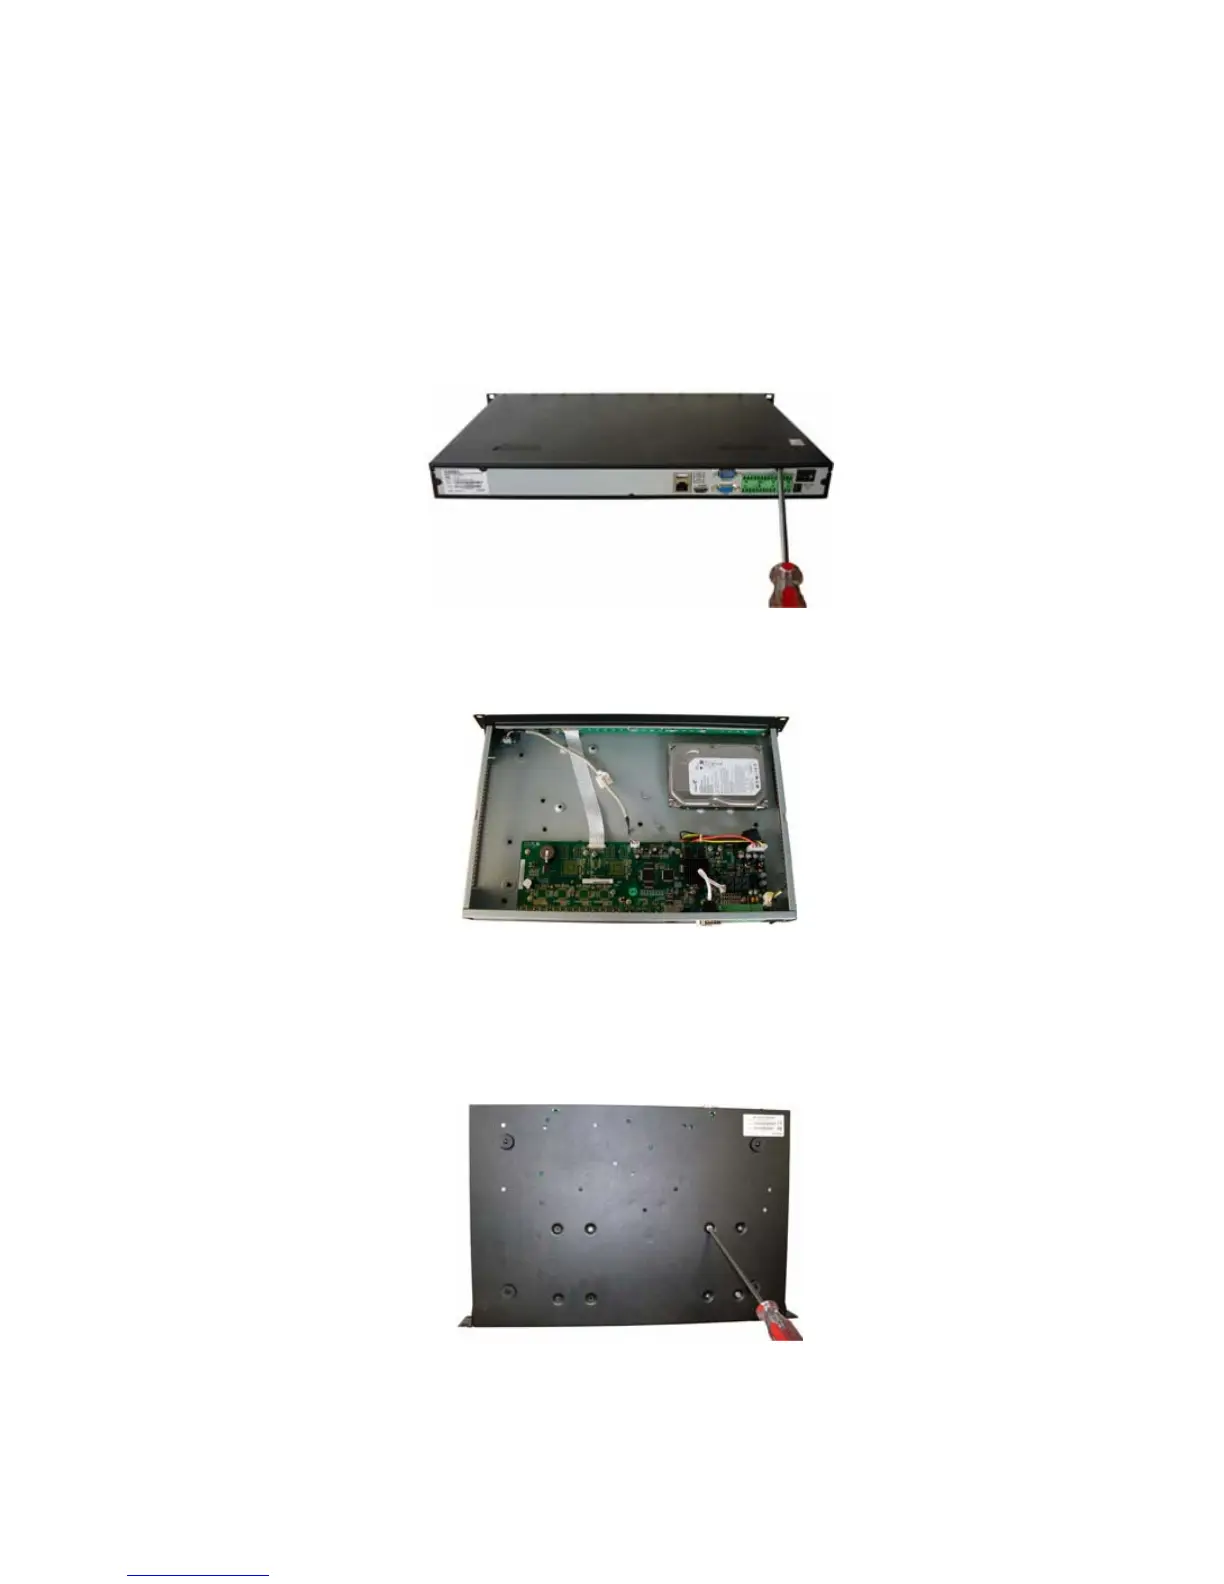
Pleas follow the steps listed below to install the HDD.
Use the screwdriver to loose the screws in the rear panel and the remove the front cover. See
238HFigure
3-1
Figure 3-1
Place the HDD in accordance with the four holes in the device chassis. See
239HFigure 3-2.
Figure 3-2
After you fix the HDD in the chassis manually, please turn the device and the HDD up for 90 degrees,
you can use the screwdriver to fix the four screws in the bottom of the chassis to secure the HDD. See
240HFigure 3-3.
Figure 3-3