45
HDK-99 1803 VER1 (E)
3
INSTALLATION and CONNECTION
3.2 Camera and Peripheral Installation and Connection
Attaching a Microphone
This camera is equipped with two microphone channels (MIC-1 and MIC-2). Please select depending on the operation. This section
explains how to attach a microphone to the microphone holder on the viewnder.
Note:
The microphone holder is optional.
1 Make sure the microphone holder is attached to
the viewfinder.
If the microphone holder is not attached, attach it to the
microphone holder attaching mount of the viewnder.
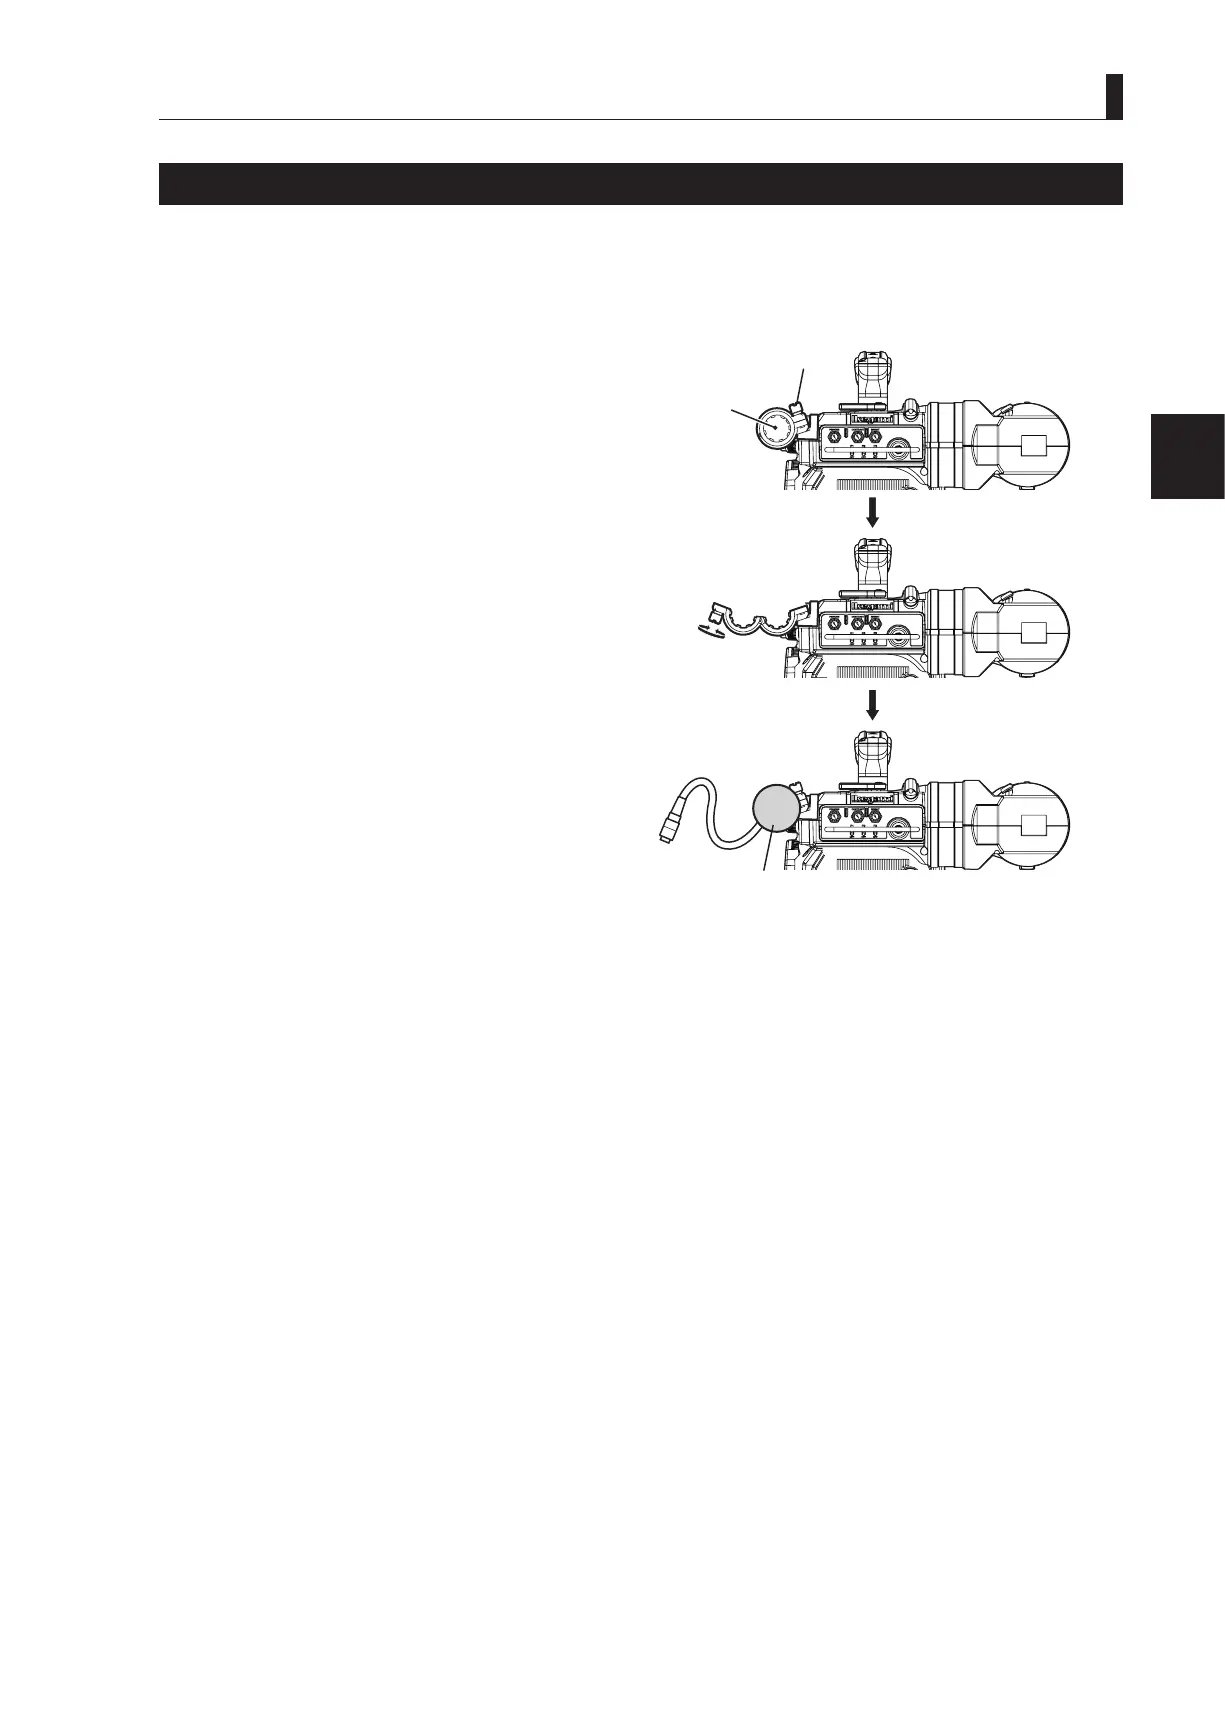
2 Loosen the screw on the microphone holder to
open it.
3 Put the microphone in the opened microphone
holder and tighten the screw to secure it in place.
4 Connect the microphone cable to the MIC-1
connector on the rear of the camera.
(This step is the same if the MIC-2 connector is used.)
5 Secure the microphone cable with the cable clamp
to remove any slack.
Reference:
Power supply methods depend on the type of microphone used. Be sure to set the power supply method for the microphone
before the power is supplied to the camera. Refer to
"4. OPERATION : Switch Position Check" (P58)
for how to select
the power supply.
For details on the microphone, refer to the instructions accompanying the microphone to be used.
②
Open the microphone
holder
③ Put the microphone
and secure
Microphone
holder
Screw
Camera front view
Close
②
③