39
HDK-99 1803 VER1 (E)
3
INSTALLATION and CONNECTION
3.2 Camera and Peripheral Installation and Connection
3.2
Camera and Peripheral Installation and Connection
Mounting/Removing the Camera on/from the Tripod
■
Mounting the Camera on the Tripod
This section explains how to mount the camera on a tripod. A number of different kinds of tripods are available to suit different
applications and purposes. For details on the tripod, refer to the instructions accompanying the tripod to be used. Mounting on a
VIDEO-18 will be described below as an example.
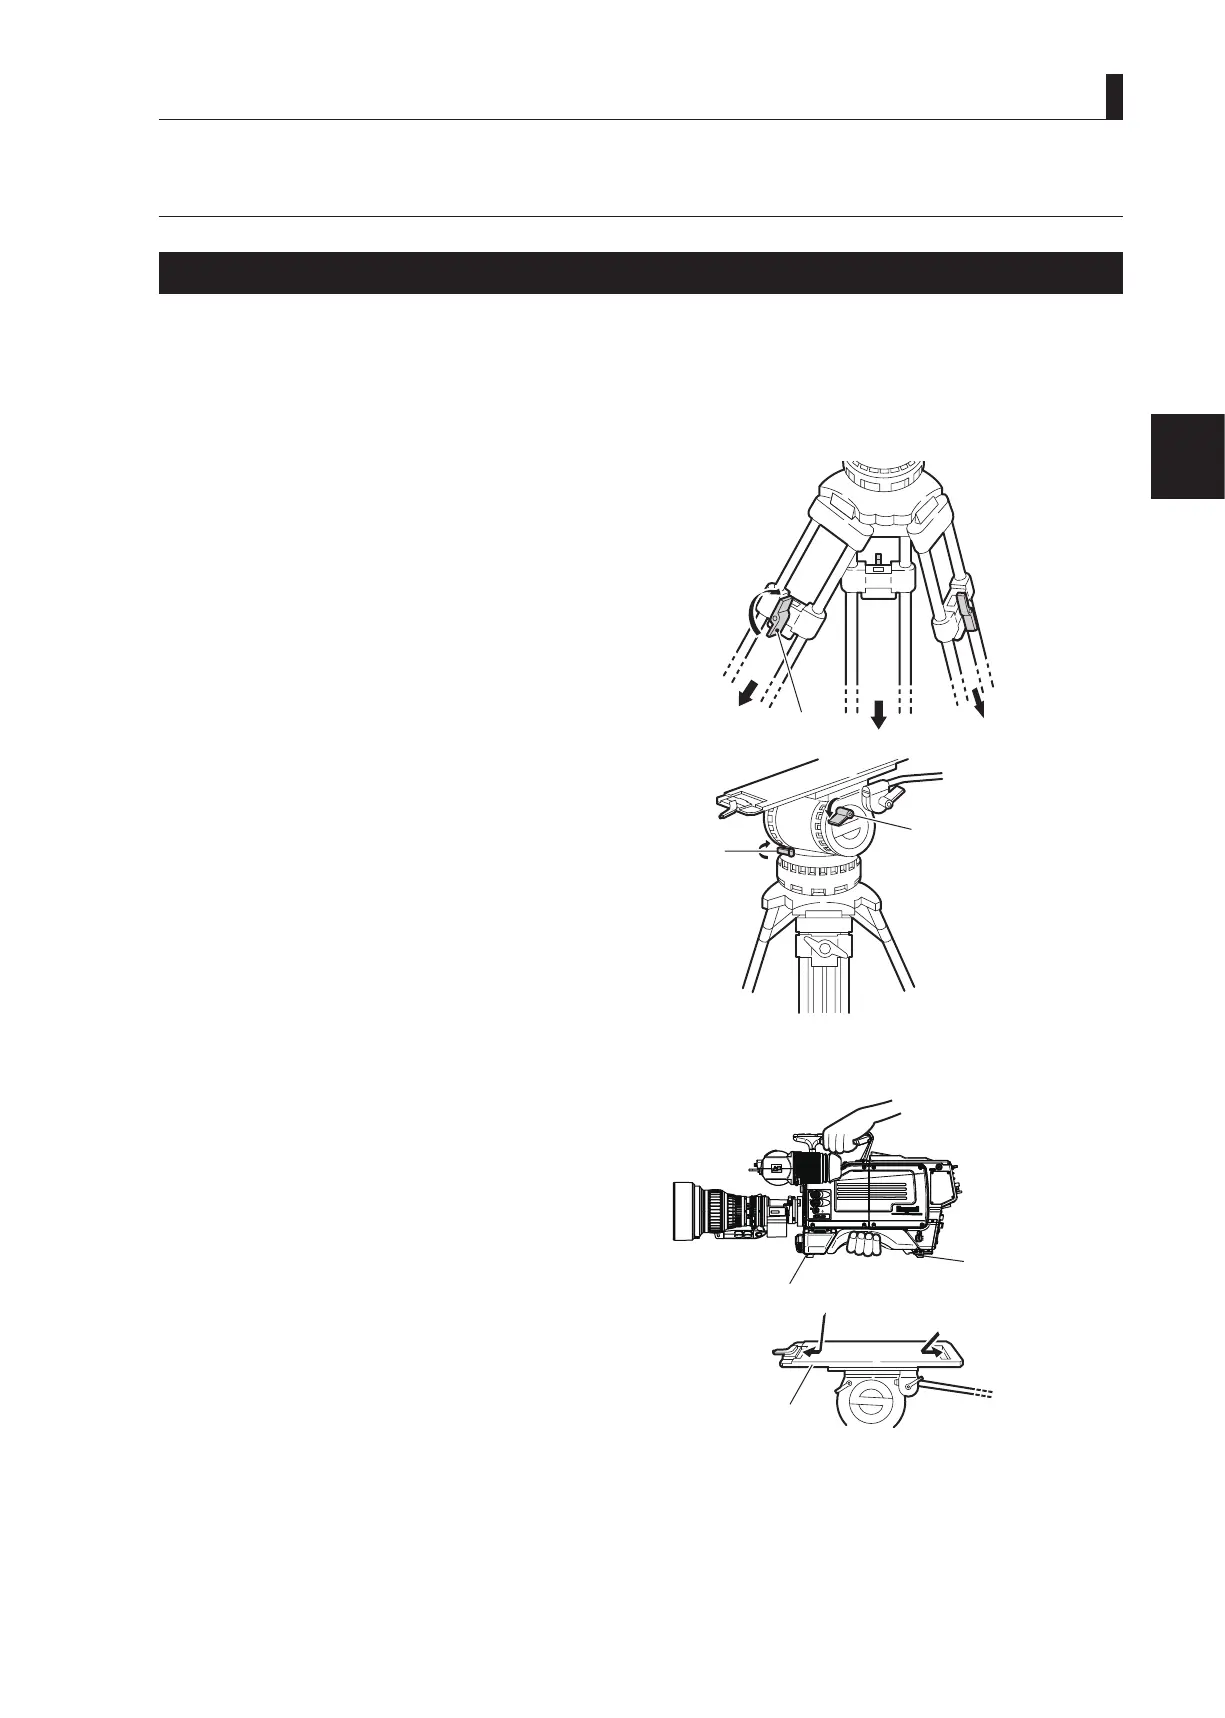
1 Loosen the lock knobs and extend the tripod legs.
Adjust the height of the tripod to the desired height.
2 Tighten the lock knobs to lock the tripod legs.
3 Make sure that the tilt lock and pan lock are locked.
If they are not locked and loose, tighten them.
CAUTION:
Be sure to tighten the lock knobs before mounting the
camera on a tripod. If the tripod is unstable, the camera
might fall when it is mounted on the tripod, resulting in
a damage to the camera or injury to the user.
4 Insert the rear wedge of the camera into the
groove of the tripod mount plate and move it
backward slightly.
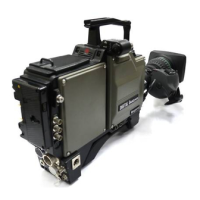
,②
Tripod
Tilt lock
③ Make sure the tilt lock and
㻻㻲㻲
㻱㼄㼀
㻼㻻㼃㻱㻾
㻭㻯㼀㻵㼂㻱
㻿㼀㻭㻺㻰㻮㼅
㻮㻿㻛㻯㻯㼁
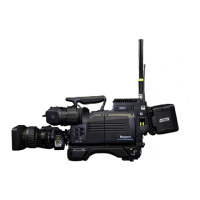
Mount plate
Tripod
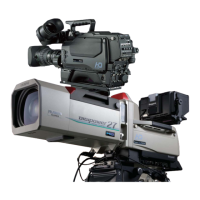
Camera front wedge
Camera right view
Camera rear
wedge
④ Insert the camera wedges.