83
HDK-99 1803 VER1 (E)
5
CAMERA SETTINGS and ADJUSTMENT
5.2 Settings from the Menu
■
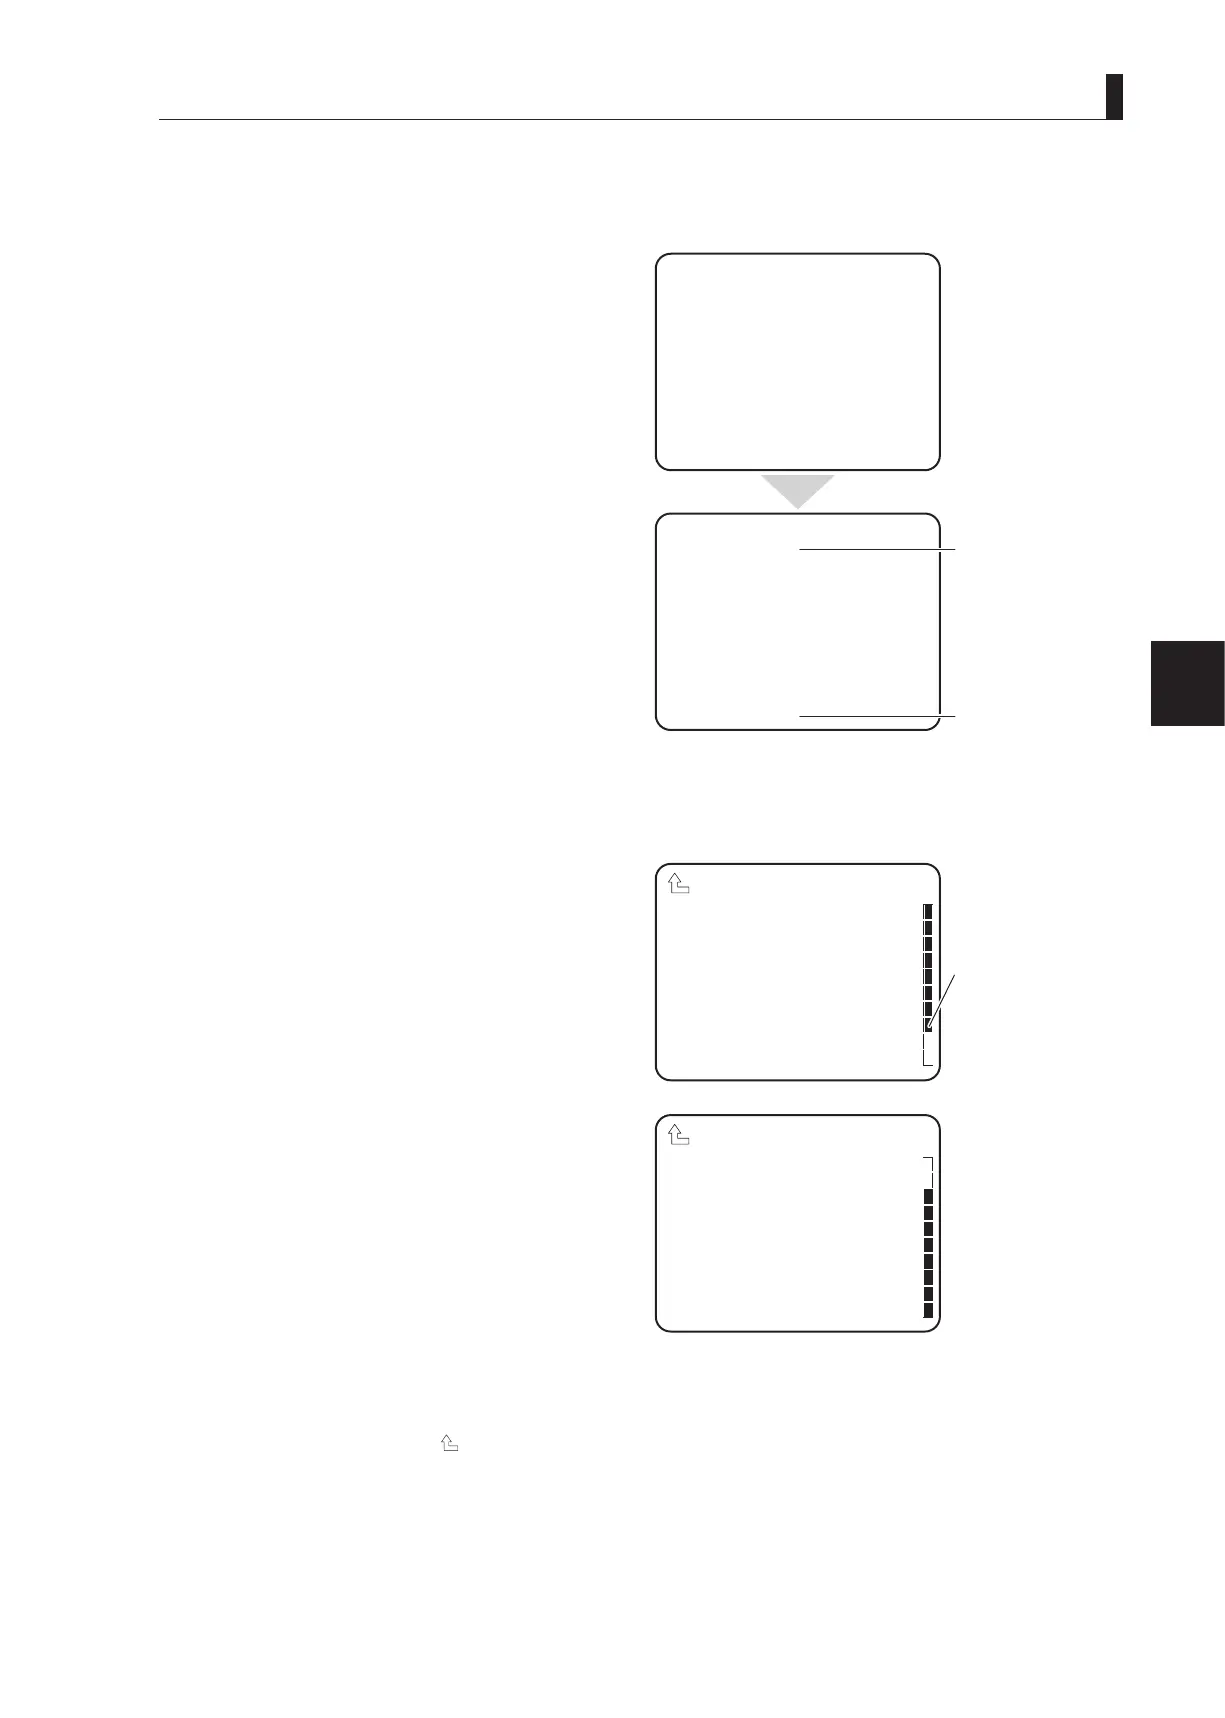
Displaying the Main Menu
This section explains how to display the main menu in the viewnder and monitor.
1 Press and hold the SET button while holding down
the VF CHARA button on the front of the camera.
The simple menu appears in the viewnder and monitor
rst, and then the screen switches to the main menu.
■
Displaying the Submenu
You can perform various settings on the submenu that is displayed from the main menu in the viewnder or monitor.
1 Make sure that the main menu is displayed.
2 Turn the rotary pulse switch on the front of the
camera to position the cursor on the setting item,
and press the SET button.
The submenu appears, on which you can perform
various settings.
CAUTION:
If the SET button is not pressed after selecting a value in the mode selection column, the change may be canceled.
Note:
- To return to the main menu, select " " and press the SET button.
- The scroll guide is displayed on the submenu containing multiple items.
- The sub menu screen during SE operation is displayed by operating the MENU SELECT switch in the "
△
" or "
▽
" direction,
setting the cursor to the setting item and turning the MENU switch to "SET".
*** MENU ***
VF DISPLAY
VF DTL
VF MODE
FOCUS ASSIST
MIC GAIN CONTROL
RETURN SELECT MODE
FILTER SERVO MODE
SW FUNCTION
INFORMATION
▲
*** MENU(1/4) ***
VF DISPLAY
VF DTL
VF MODE
FOCUS ASSIST
MIC GAIN CONTROL
RETURN SELECT MODE
FILTER SERVO MODE
SW FUNCTION
INFORMATION
▲
▲
▲
Simple Menu
Main Menu
Shift to menu (4/4).
Shift to menu (2/4).
DISPLAY MODE 2
MARKER/CHAR LVL 100
FRAME MARKER OFF
VF ASPECT 16:9
SIDE MASK OFF
CONTRAST 50
BRIGHT60
SAFETY AREA ACTION
SAFETY MARKER ON−16:9
CENTER MARKER ON
VF DISPLAY
▲
Scroll Guide
SIDE MASK OFF
CONTRAST 50
BRIGHT60
SAFETY AREA ACTION
SAFETY MARKER ON−16:9
CENTER MARKER ON
FOCUS INDICATE OFF
ZOOM INDICATE OFF
AUTO VF ASPECT OFF
ZEBRA INDICATOR
VF DISPLAY
▲