Page 86 Operation Manual
Press CUT to separate the previously defined area from the complete image and to
display it in detail.
Picture 71: Selected area magnified
The next screen shows the selected area magnified and allows again defining an area for
the OCR process.
Press OCR to start the OCR process.
Press CLR to return to the former screen and to repeat the definition of the OCR area.
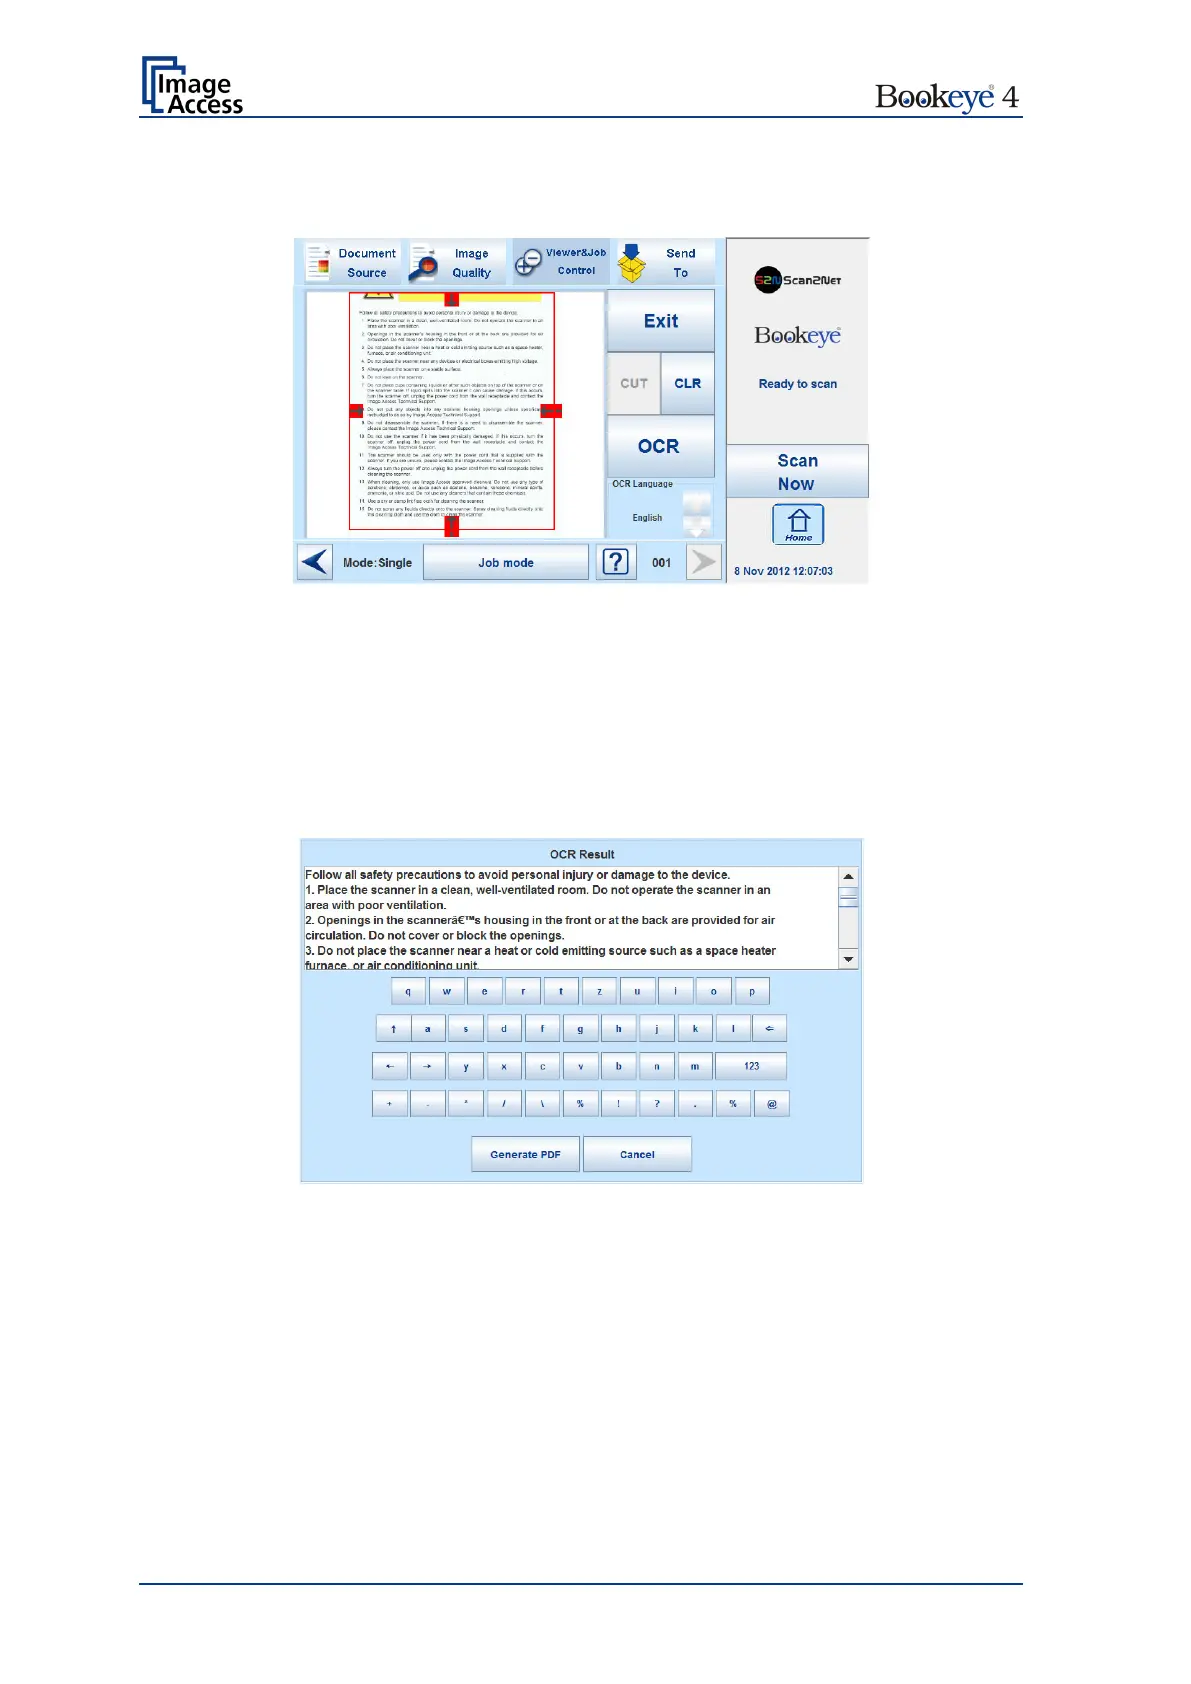
The result of the OCR process will be displayed in the touchscreen.
Picture 72: OCR result
The OCR result shows only the plain text with line feeds, a layout analysis will not be
offered.
The text can be edited by the user with the keyboard displayed at the touchscreen.
Generate PDF: Generates the PDF file of the text, detected by the OCR analysis.
The touchscreen will return to the Viewer&Job control screen (Picture 64).
Press the Send to button to save the image together with the text as PDF file.