Chapter 4 — Troubleshooting and Maintaining the Printer
52 EasyCoder PD42 Printer User’s Guide
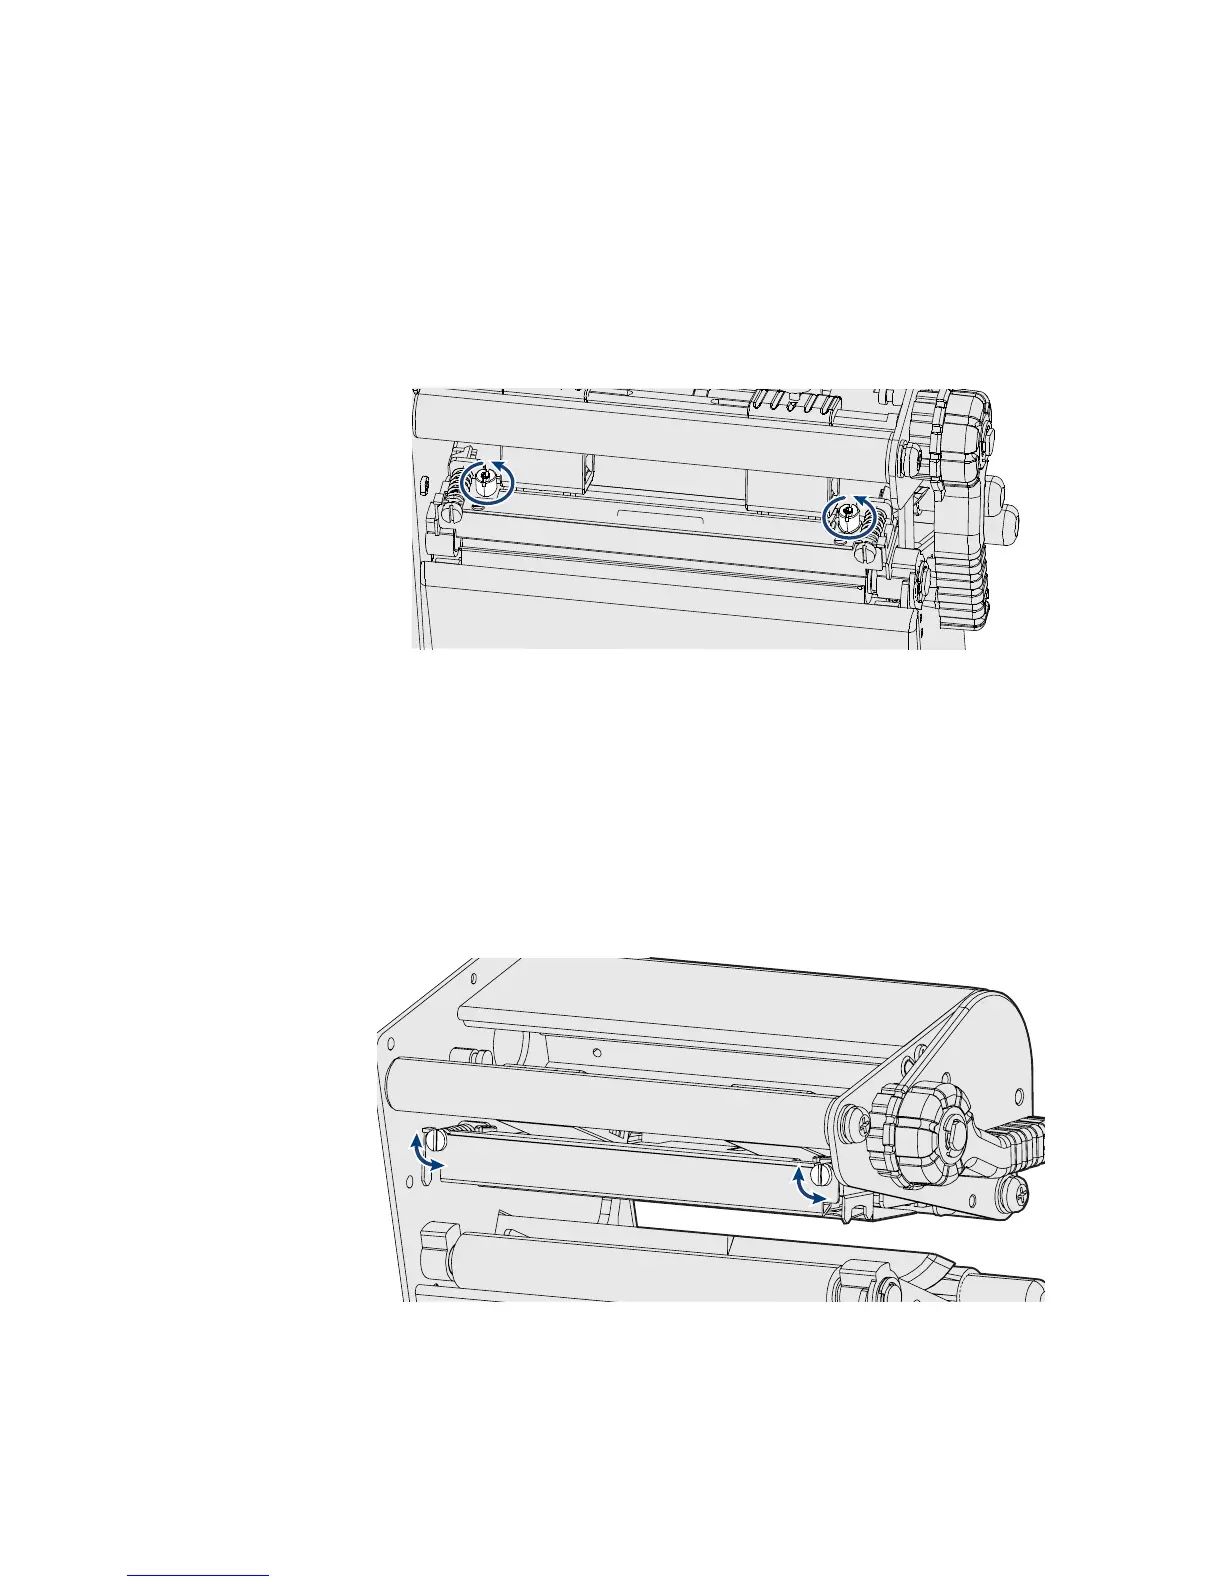
To adjust printhead dot line
1 Open the side door.
2 Remove the ribbon and engage the printhead.
3 Use a straight-slot screwdriver to turn the two screws at the
top of the printhead bracket counterclockwise a single turn.
4 Lift the printhead by pulling the printhead lever and flipping
it counterclockwise a quarter of a turn.
5 Carefully turn both screws at the front of the printhead
clockwise a quarter of a turn at a time (a full turn
corresponds to 0.55 mm, which is a lot). Make sure to make
identical adjustments on both screws. If you are unsure,
tighten both screws completely by turning them
counterclockwise as far as they go and start over.
6 Engage the printhead and lock it by tightening the two screws
at the top of the printhead bracket, that is, the reverse action
of Step 3.