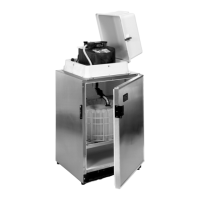
6700SR Refrigerated Sampler
40
Installing Bottle Kits
Isco ships the refrigerator from the factory with the sample bottles
in place, when using the sampler for the first time, you will only
need to remove the bottle lids. When installing cleaned bottles or a
new kit, keep these guidelines in mind:
• Do not mix glass and plastic bottles together.
• Install all bottles to insure that they remain in place.
• Align the racks correctly. If the racks are misaligned, the sam-
pler may miss the bottle mouth, or the sampler will deposit
samples in the “wrong” bottle.
Each time you change from one size bottle to another, you must ad-
just the length of the distributor arm, install a discharge tube of
the correct length, and possibly install a different distributor shaft
extension.
Each time you install a bottle kit, check the program settings for
the number of bottles and bottle volumes. Also rotate the distribu-
tor arm to each bottle position to ensure the arm is correctly posi-
tioned over each bottle. Use the controller to move the arm. DO
NOT MANUALLY ROTATE THE DISTRIBUTOR ARM. (See Mov-
ing the Distributor on page 88).
Installing Racks
Install the bottle rack with bottles by sliding it into the cooling com-
partment until the rack drops over the two semicircular ramps
which hold it in place (
Figure
3
).
The five posts and two ramps which position the rack under the dis-
tributor arm are adjusted at the factory. When you change bottle
kits, you may need to readjust the stops and ramps and install a
different distributor arm extension.
Figures
4
and
5
show you how
to install the bottle kits.
Check the kit’s alignment by rotating the distributor arm with the
programming steps shown in Moving the Distributor on page 88.
DO NOT ROTATE THE DISTRIBUTOR MANUALLY,- MOVING
THE ARM MANUALLY DAMAGES THE DISTRIBUTOR DRIVE.
If you see any misalignment, adjust the posts and ramps until the
discharge tube at the end of the arm stops over each bottle.