DVR Integration Option Operation
24-10515-13 Rev. – 3-9
This document contains confidential and proprietary information of Johnson Controls, Inc.
© 2010 Johnson Controls, Inc.
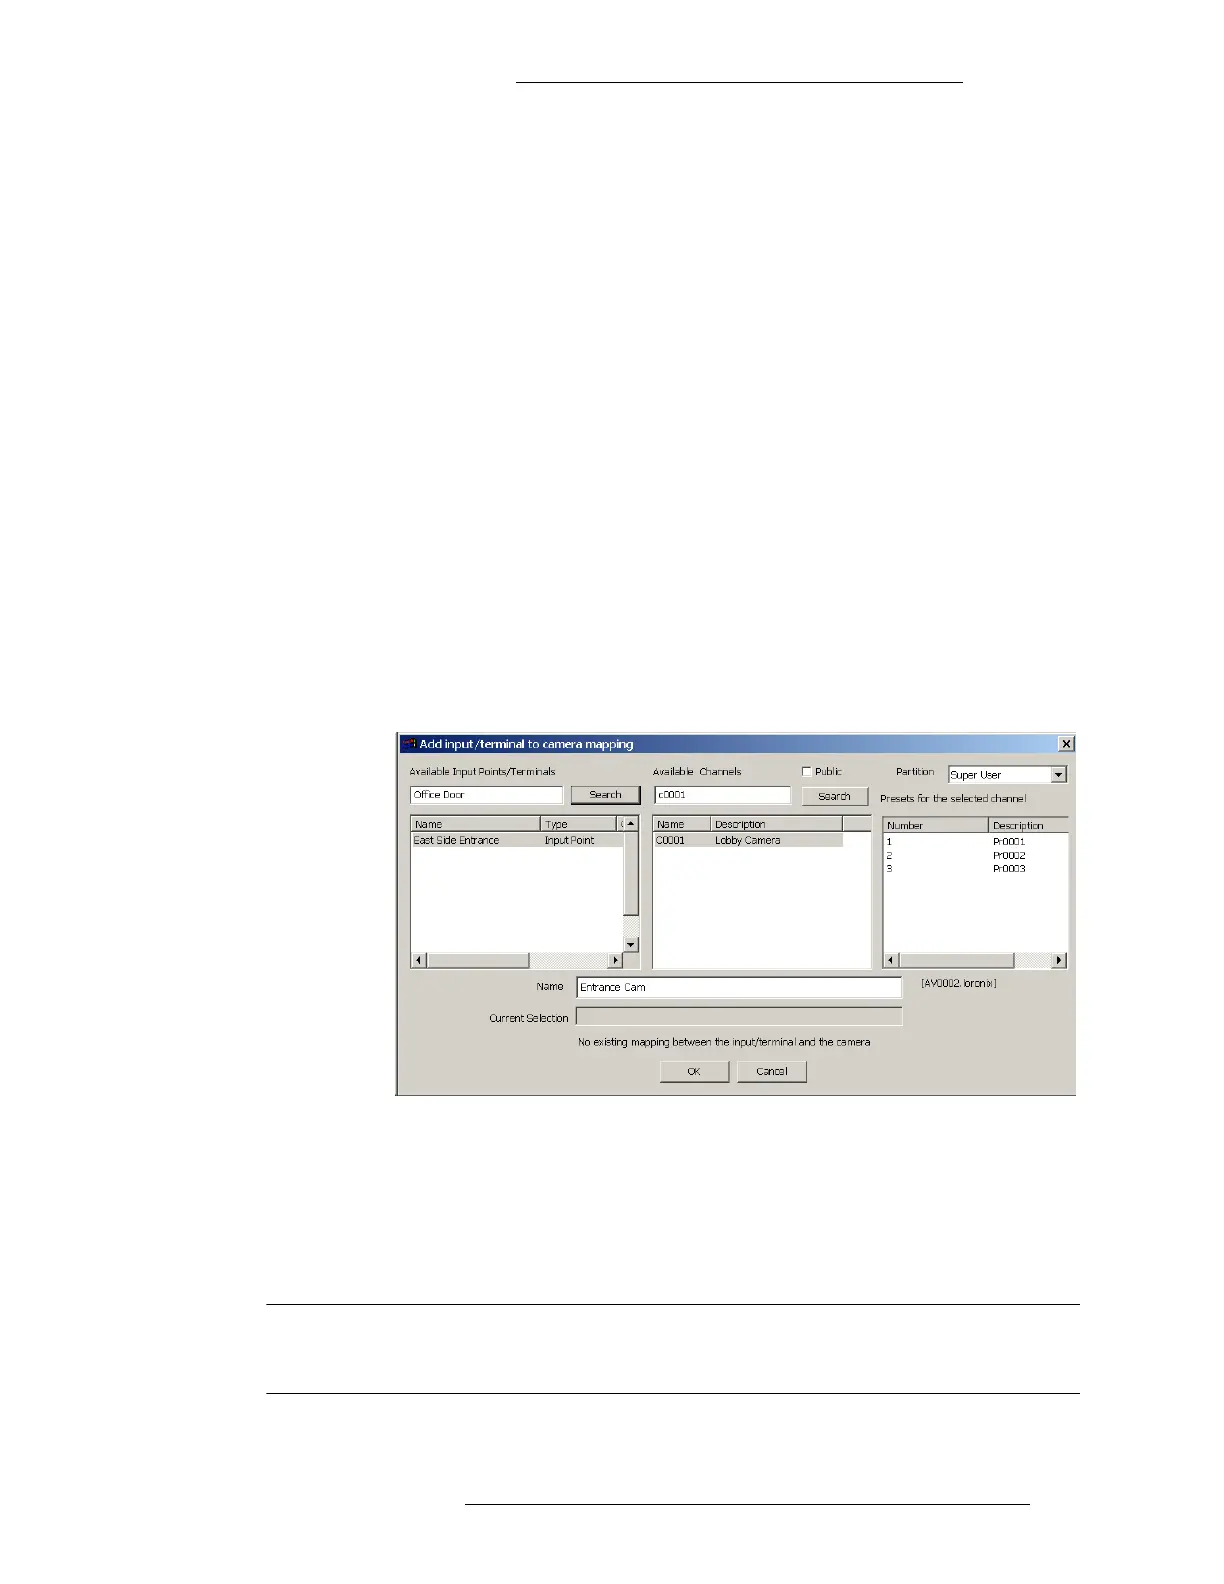
3. In the Available Input Points/Terminals box enter the name of the Input
Point or Terminal that will be associated with a Camera, and click the Search
button. As an alternative, you can also enter a filter string, the list box will
display all Input Points and Terminals that meet the search criteria. If you do
not enter any names or filter strings, and click the Search button, the list will
display all Input Points and Terminals defined in the system.
4. Select the Input Point or Terminal in the list.
5. In the A
vailable Channels box enter the name or filter string of the Camera
that will be associated with the Input Point or Terminal, and click the Search
button. The list box will display all Cameras that meet the search criteria. If
you do not enter any names or filter strings, and click the Search button, the
list will display all Cameras defined in the system.
6. Select the camera name
from the list. The Presets for the selected channel
box will display all Presets defined on the Camera.
7. Select the Preset that you want to use for the Camera.
8. In the Name
box, enter a descriptive name for the mapping so that it can be
easily recognized by the operator monitoring the system.
9. The Cu
rrent Selection box displays the current selection of Input
Point/Terminal, Camera, and Preset. Click OK to add this mapping to the
Existing Mapping list.
10. To edit the content of an existing mapping, select the mapping from the list
and click the Edit button. Repeat the same steps.
11. If you wish to delete a mapping, select the mapping from th
e list and click the
Delete button.
12. Click Done to close the Input to
camera mapping window.
NOTE
The mapping will fail if changes are made to the Input Point or Terminal
name and you do not redefine the mapping using the new values.