Section 3 Installation
33
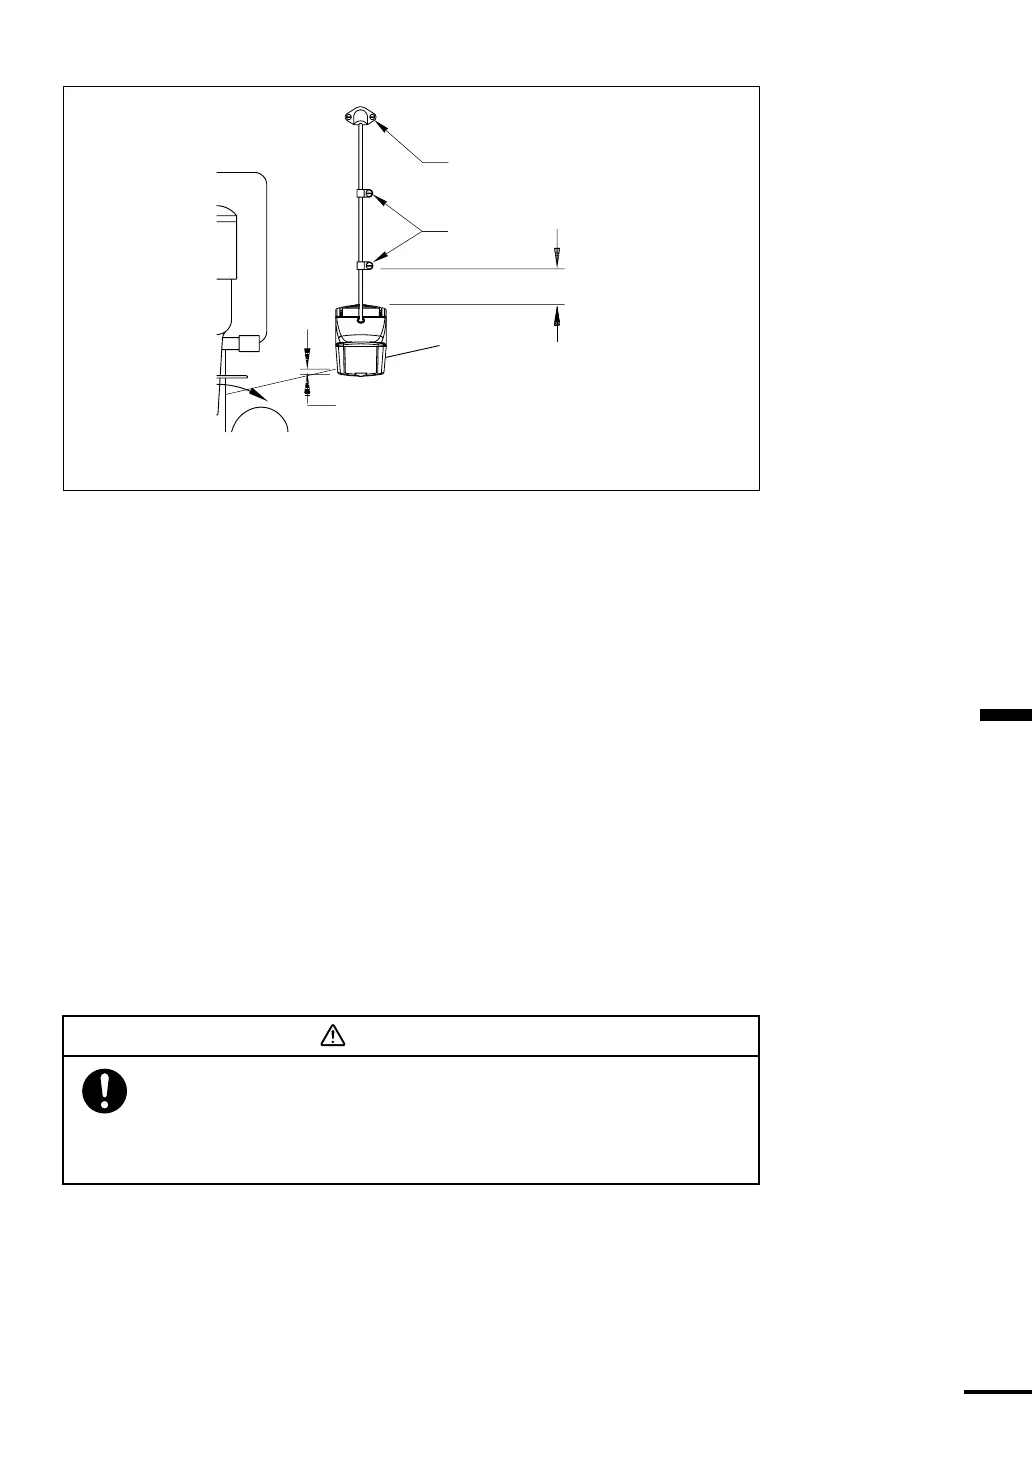
Ver tical adjustment and cable routing
2"(50mm )
cable cover
cable clamp
Hull projection
1/8" (3mm)
Figure 3-9
Testing on the Water
➀
Become familiar with your echosounder’s performance at a speed of 4kn
(5MPH).
➁
Gradually increase the boat speed and observe the gradual decline in
performance due to turbulent water flowing over the transducer’s active
surface.
➂ If the degradation is sudden (not gradual), identify the boat speed at which
the onset occurred. Return the boat to this speed, then gradually increase
speed while making moderate turns in both directions.
➃
If the performance improves while turuing, the sensor’s position probably
needs adjustment, because it is in aerated water. Move the sensor farther
down into the water in increments of 1/8" (3mm). If the performance does
not improve satisfactorily, move the sensor closer to the centerline of the
boat. Fill unused screw holes with marine sealant.
High speed operation - May require less projection in the water.
Checking for Leaks
When the boat is placed in the water, immediately
check for leaks around the screws and any holes
drilled in the hull. Never install a sensor and leave
the boat in the water unchecked for several days.
WARNING
Antifouling Paint
Marine growth can accumulate rapidly on the sensor’s surface reducing
performance in weeks. Surfaces exposed to salt water that do not interlock, must
be coated with antifouling paint. Use water-based antifouling paint only. Never
use ketone-based paint, since ketones can attack many types of plastic possibly
causing damage to the transducer. Apply paint every 6 months or at the
beginning of each boating season.